Welcome to Nuron WordPress Theme! We would like to thank you for choosing our theme - Nuron.
It’s built with Elementor page builder. It’s fully responsive and looks well. It is a modern design and high-speed performance WordPress Theme. Single & Multi Vendor Auctions WooCommerce Theme is a great design idea for auctions companies to start a new website.
The theme is SEO Optimized, easily customizable, contains easy-to-read, understand source code, and well documentation.
Requirements
There are system requirements in order to install and setup Nuron theme and its components properly. Make sure that you are running the
Latest version of WordPress
PHP version 7.4 or higher and MySQL version 5.6 or higher.
Several common problems you might encounter, like a blank screen, issues with importing demo content, empty page content, max execution time errors, memory limit errors, and upload max file size errors, are often caused by low PHP configuration limits. To resolve these issues, you need to raise the PHP limits. You can handle this yourself, or you can reach out to your web hosting provider and request that they increase these limits to at least the following minimum values:
What's Included
After purchasing Nuron theme on themeforest.net with your Envato account, go to your Download page. You can choose to download Nuron theme only (Installable WordPress Theme) or the entire Nuron theme package which contains the following files:
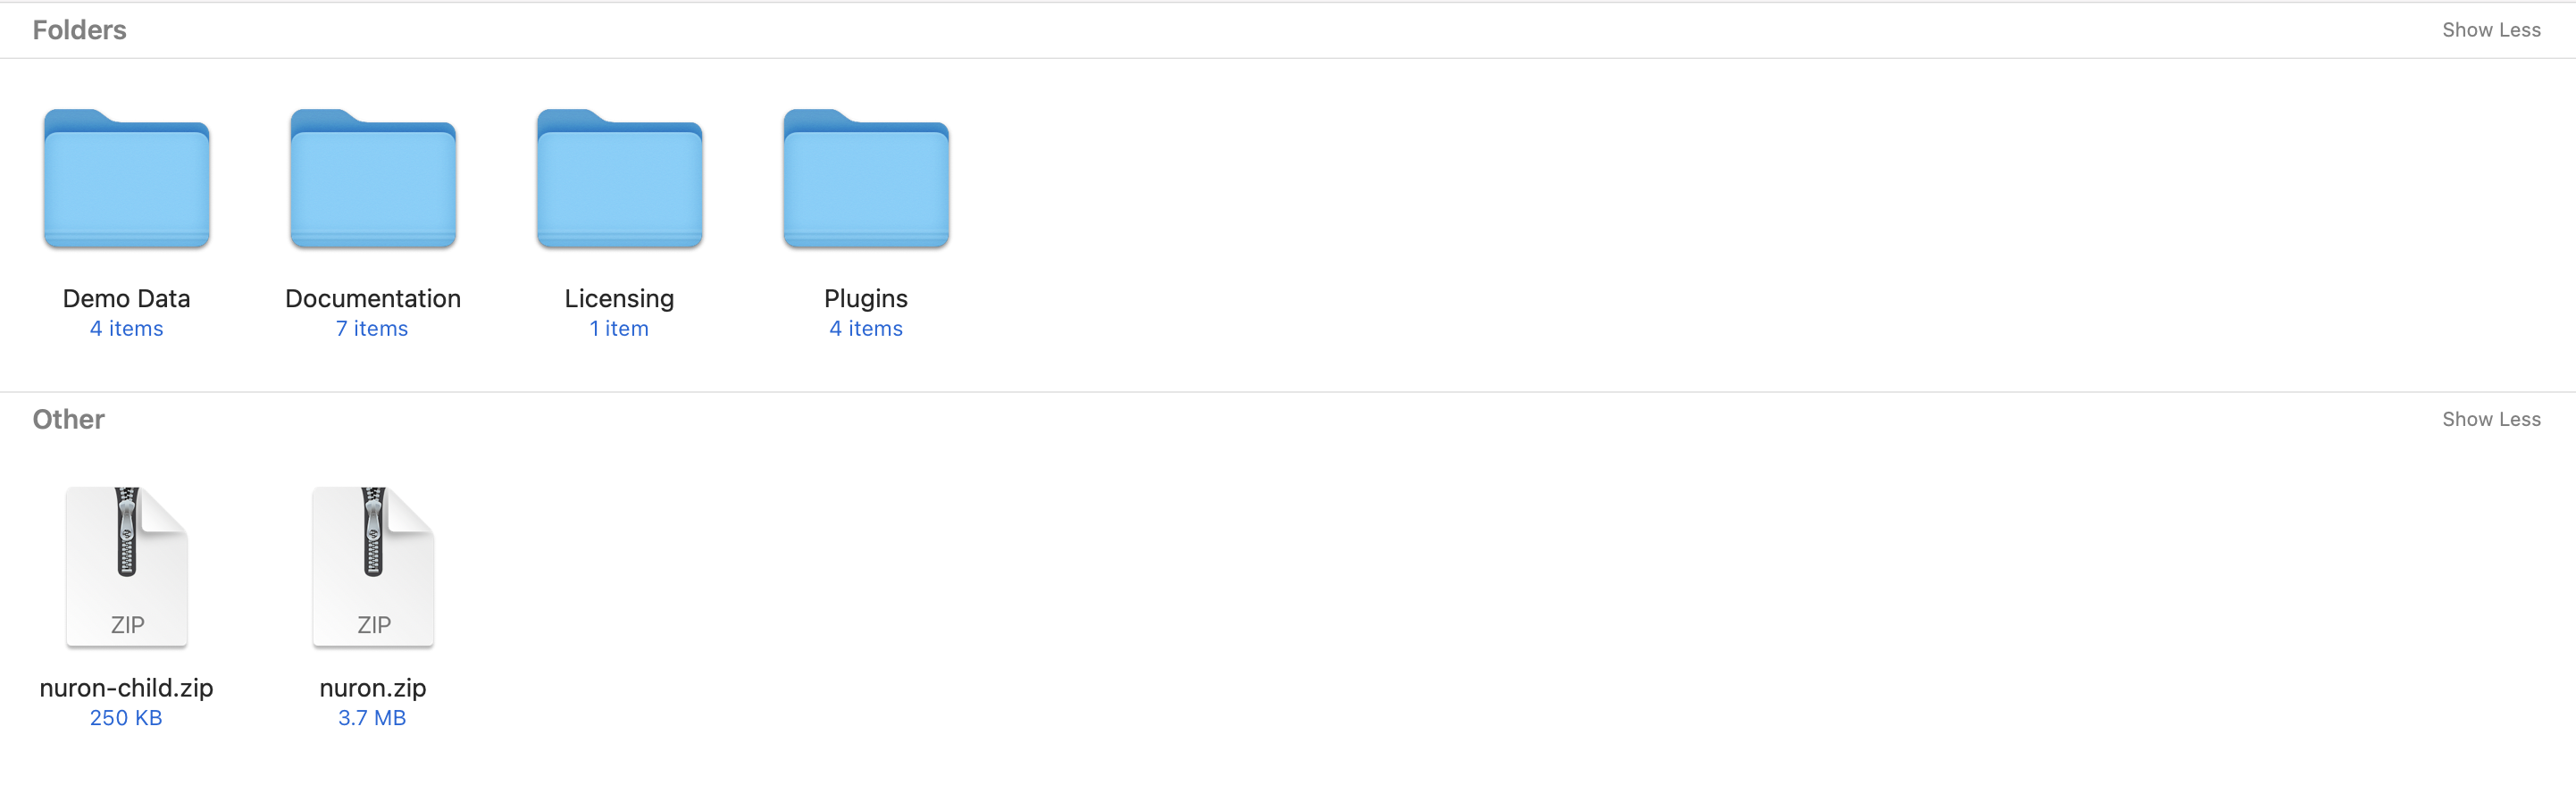
The contents of the theme package downloaded from ThemeForest:
nuron.zip - An Installable WordPress Theme zip file. this file you need to upload to WordPress.
nuron-child.zip - This file contains the basic child theme that you can use with our theme. Just installing it won’t hurt and in case you decide to make some changes/extend the source code of the theme, it will be very helpful because it helps not to lose your custom changes after updating the parent theme. More on child themes
Plugins - This folder contains plugins required to work with our theme.
Demo Data - This folder contains the demo content file which will help you to import the demo manually.
Licensing - This folder contains the terms and conditions of the license.
Documentation - This folder contains what you are reading now :)
WordPress Installation
Please follow the instructions in the video to see how you can install WordPress on your hosting:
Important! if you download the All Files archive from ThemeForest and try to upload it to your WordPress, you will receive this error: Theme is missing the style.css stylesheet. Please make sure you unzipped the main archive and are uploading the correct file to your WordPress.
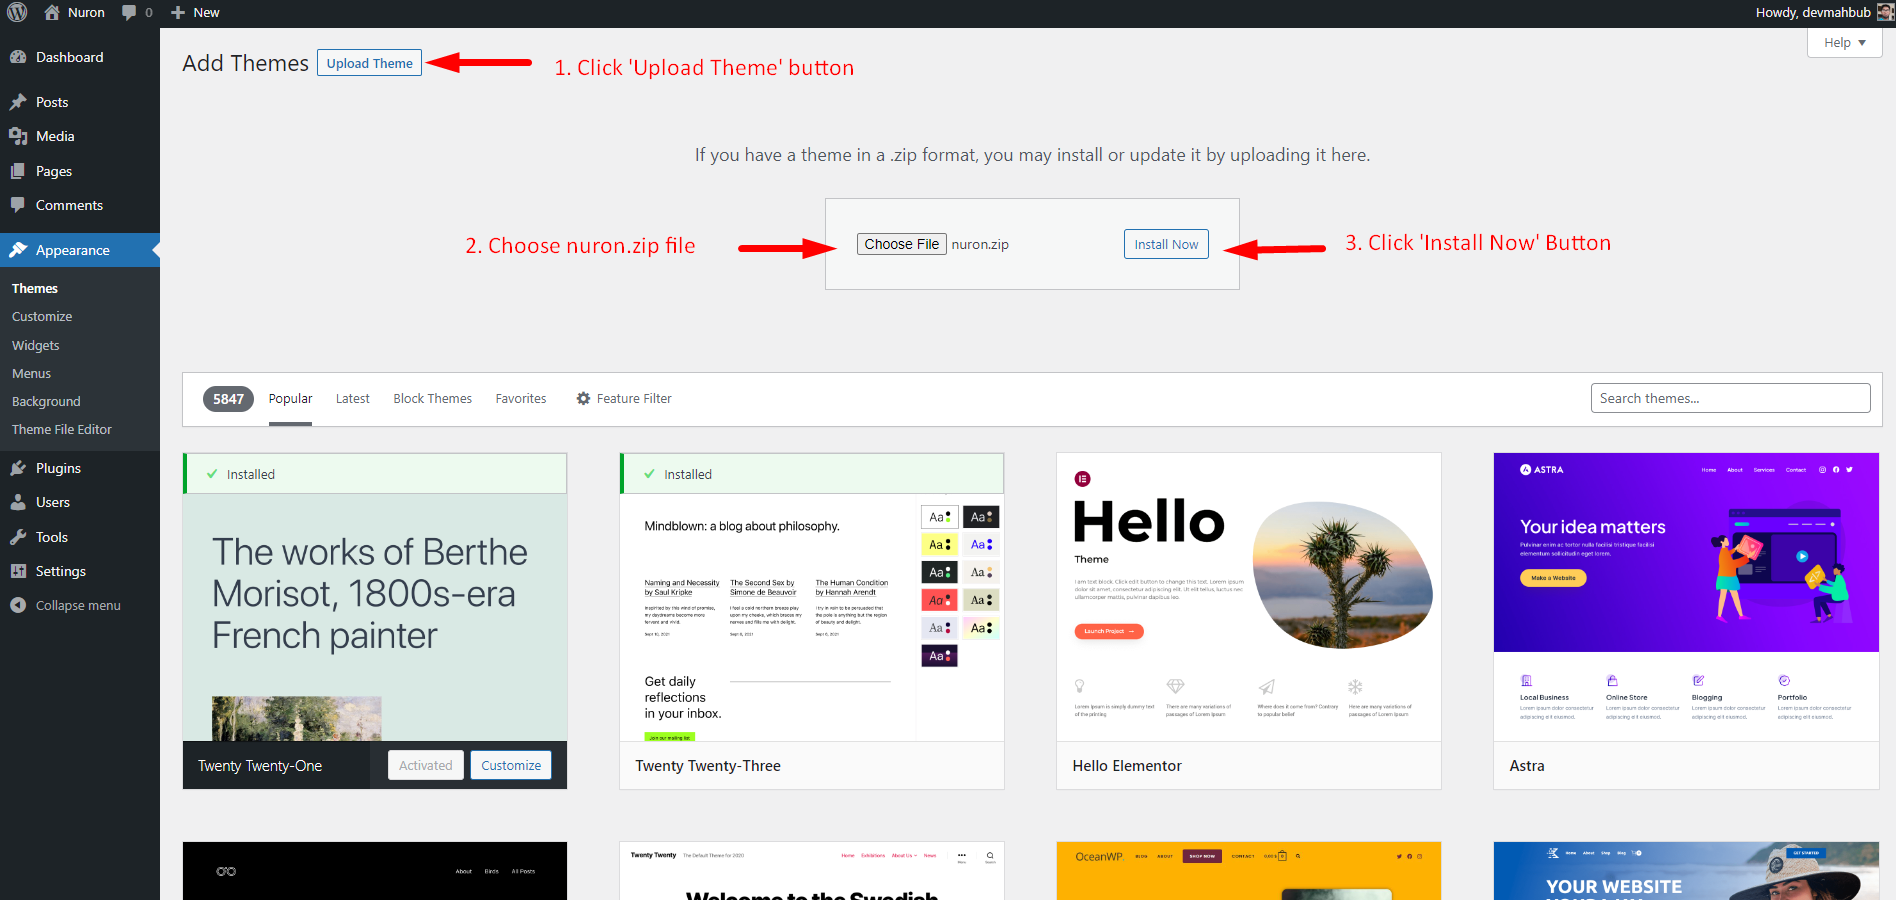
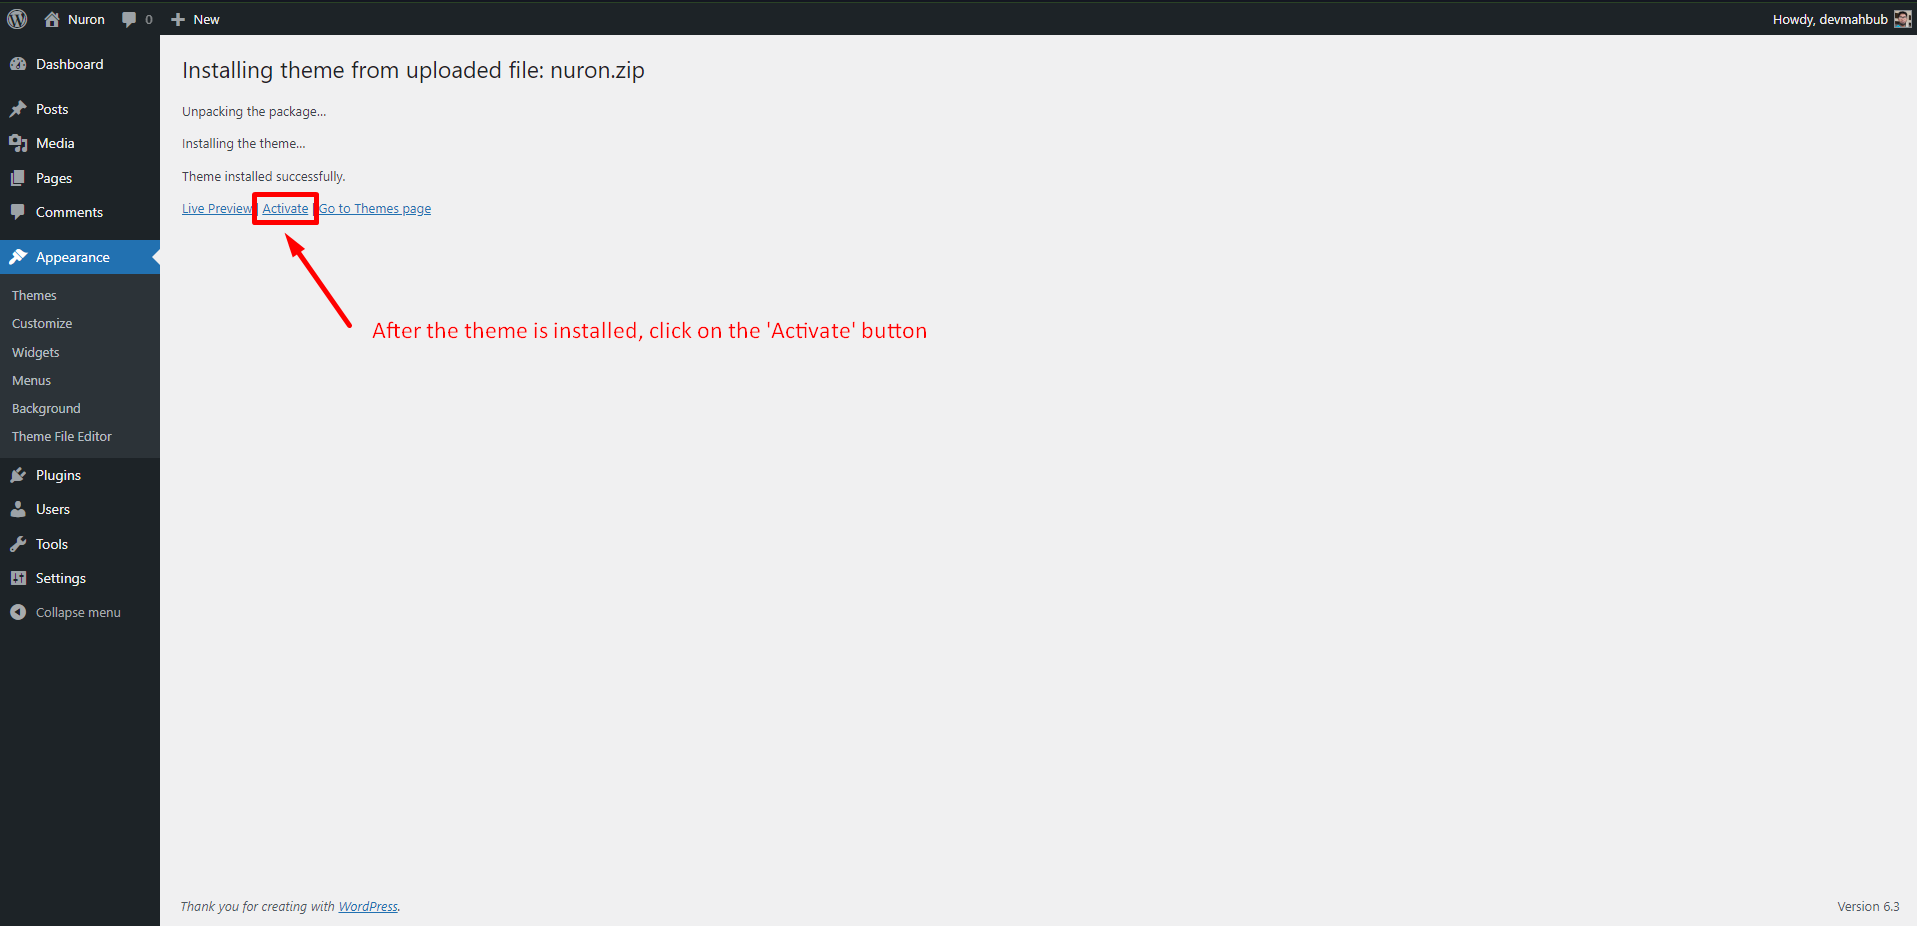
When you are ready to install a theme, you must first upload the theme files and then activate the theme itself. The theme files can be uploaded in two ways:
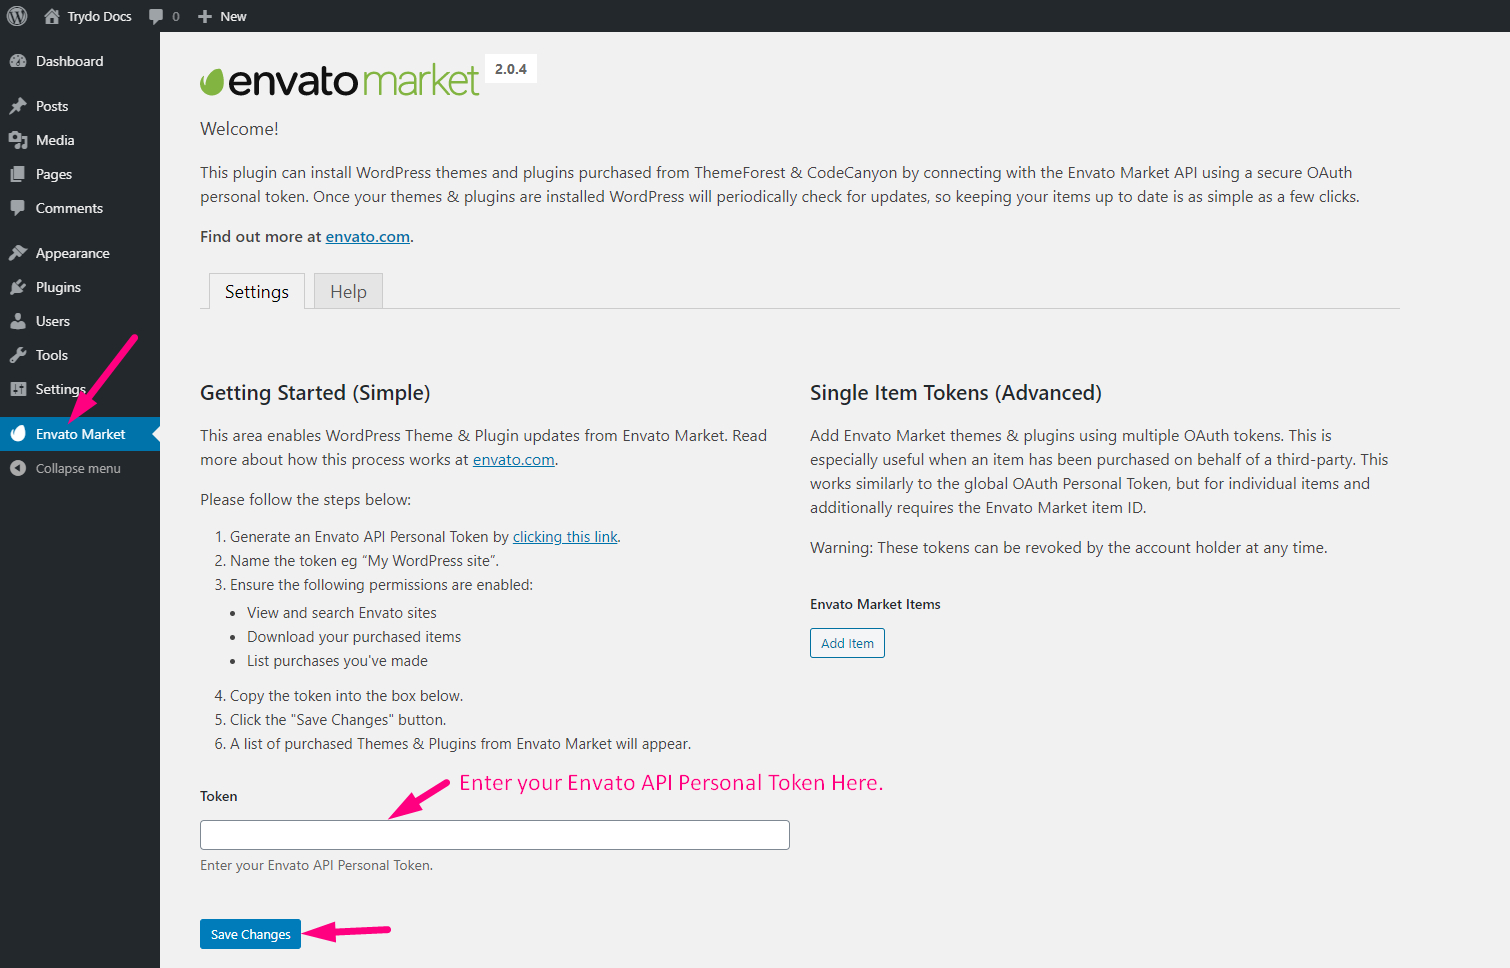
Once installed, you should see an Envato Market menu on the admin sidebar. Click on it.
Enter your Envato API Personal Token in the Token field. If you don’t have an API token you can create one here or click on the generate a personal token link on that page.
Once you have pasted your token in the Token field, click on Save Changes.
Should your token be correct, two extra tabs are now available on your Envato Market page. Click on the Plugins tab.
Enter your Envato API Personal Token.
If an update is available for the Nuron Theme, click on the Update Available link, which should start installing your update.
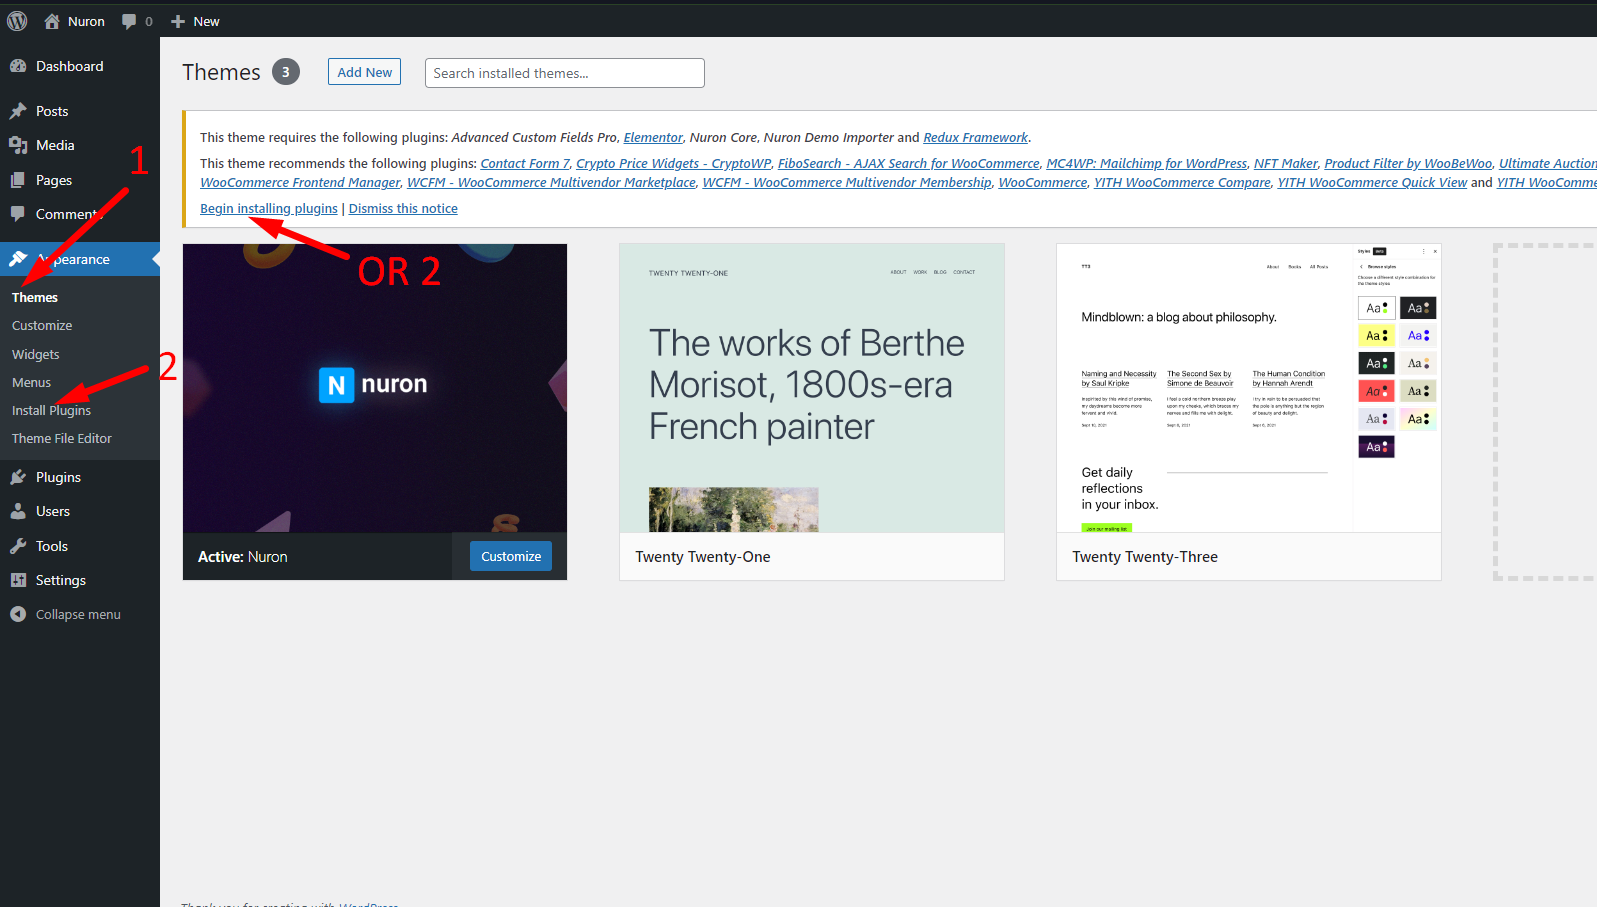
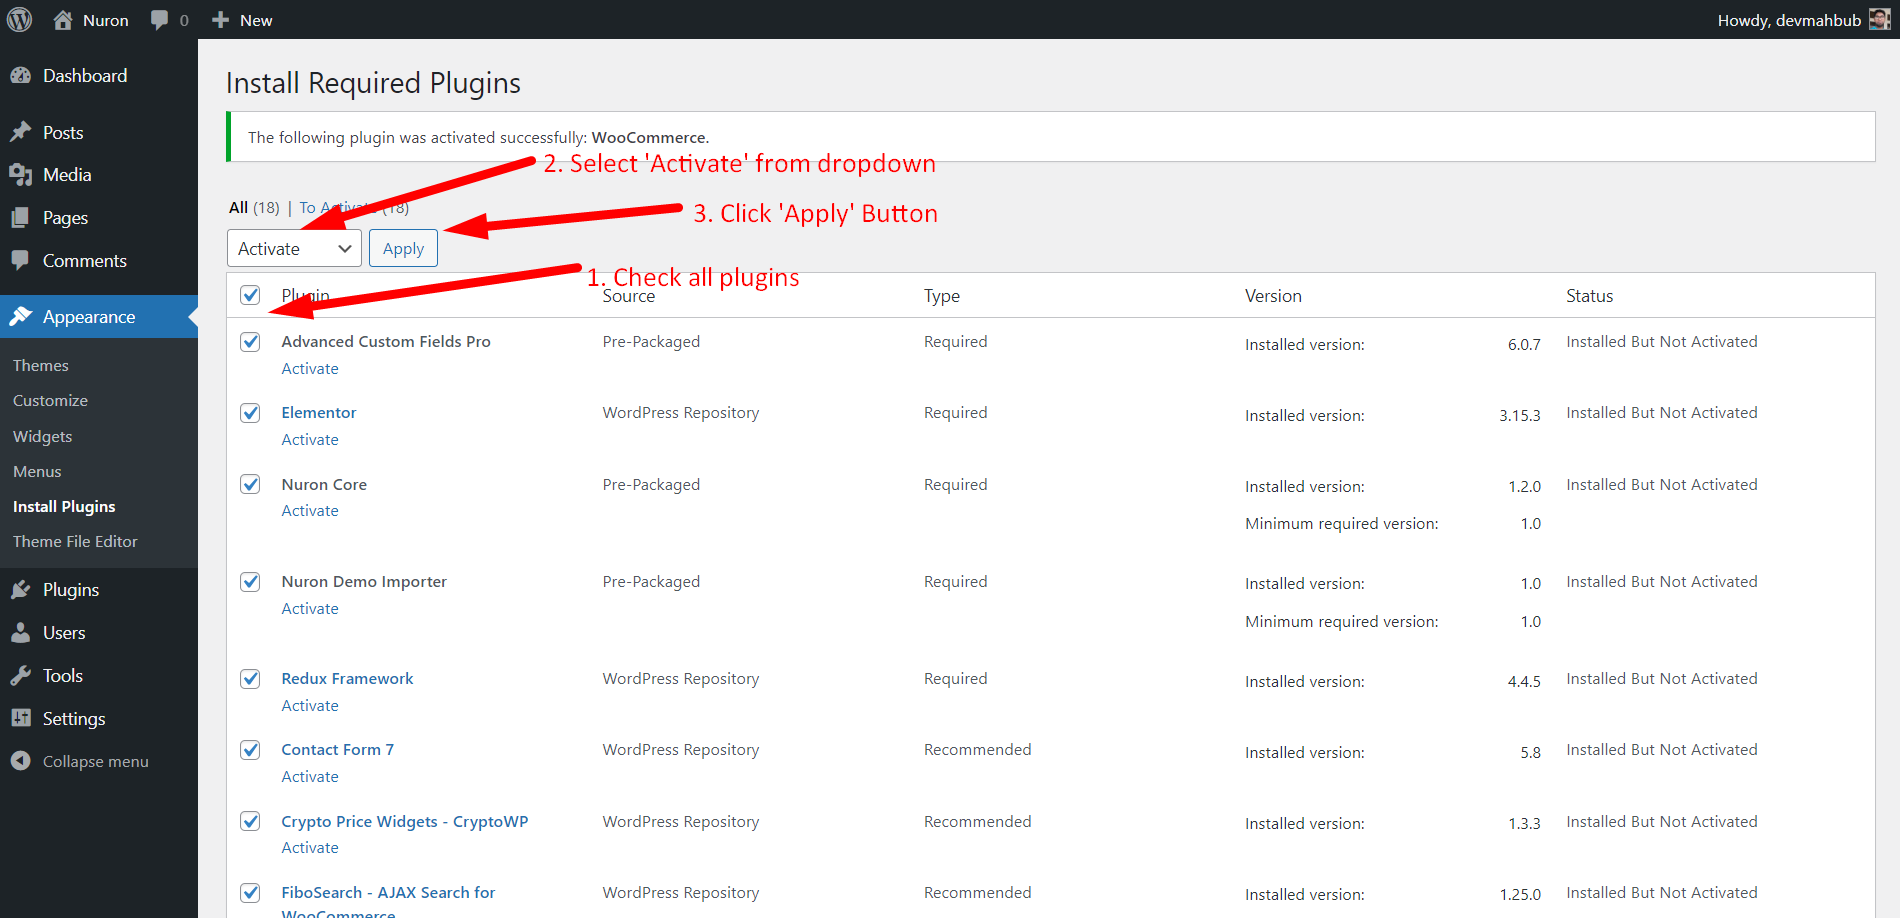
Nuron theme requires a set of core and additional plugins to function correctly. A plugin is an additional component that offers functionality and features beyond a typical WordPress installation. Without them, most of its functionality is not available. After installing the theme you will be prompted to install the required plugins at the top of your dashboard.
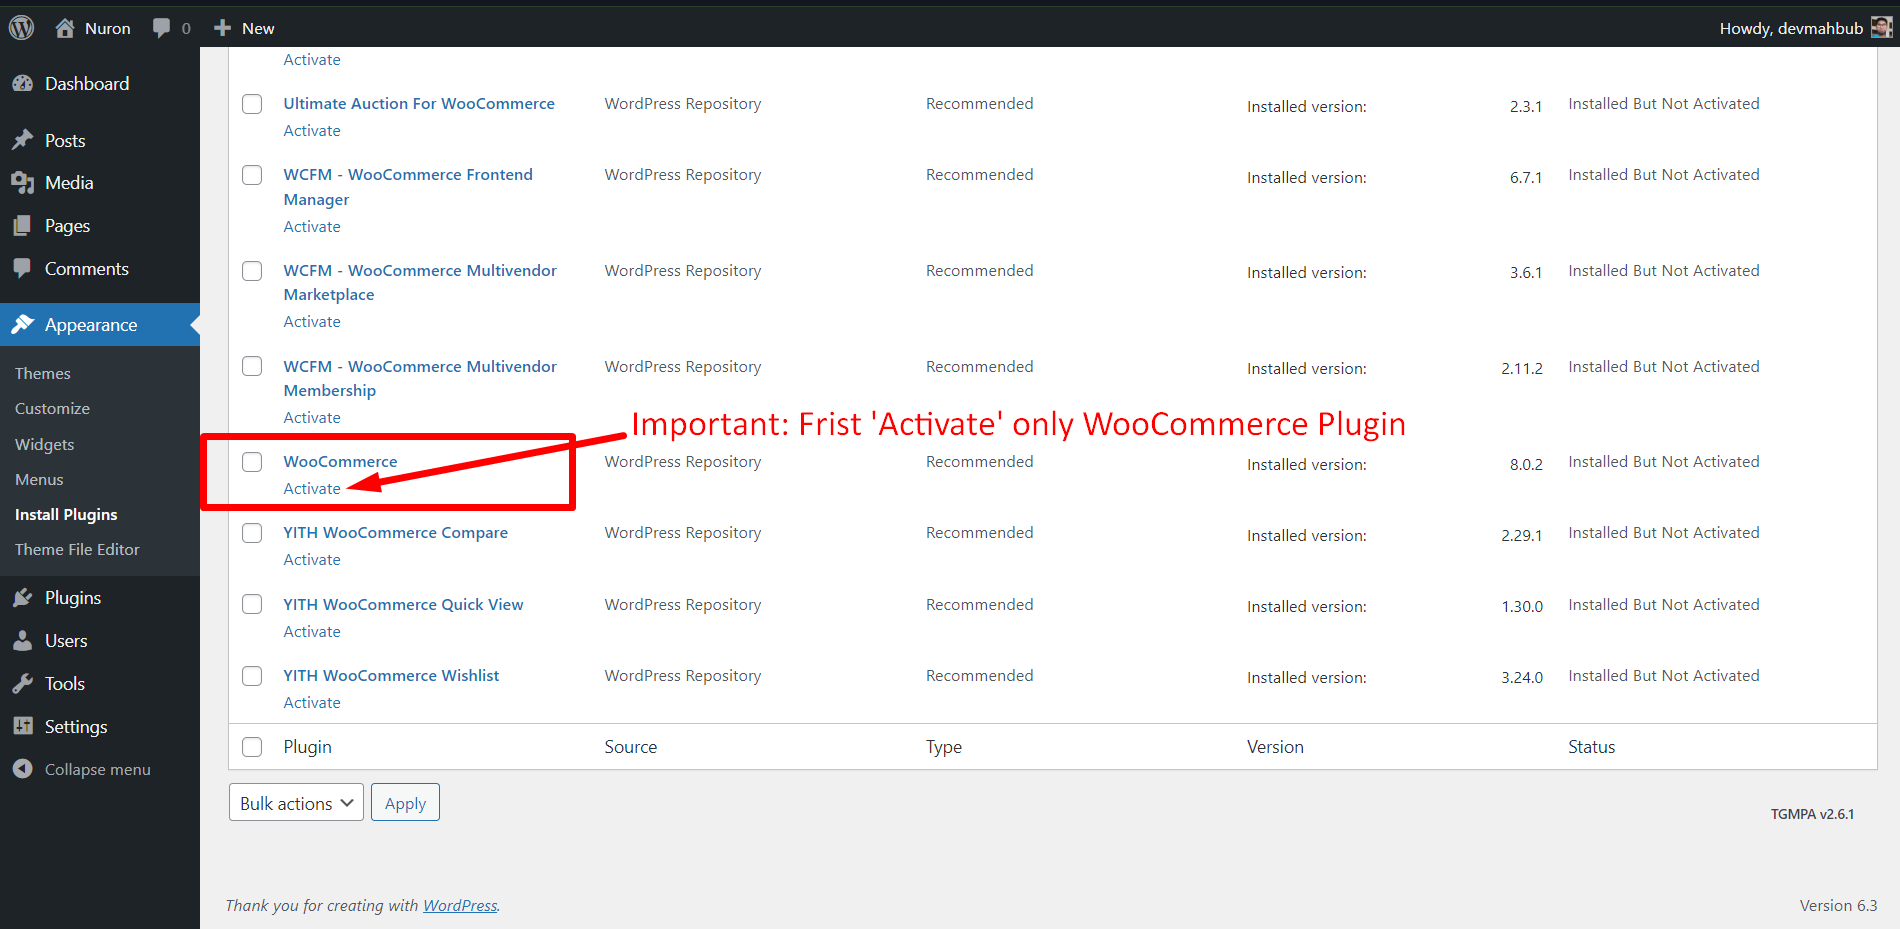
Important: First Activate only WooCommerce Plugin, Otherwise, you can get an error message. Don't worry if you face an error message, just go to your dashboard URL and activate the first WooCommerce plugin, it automatically solves your error.
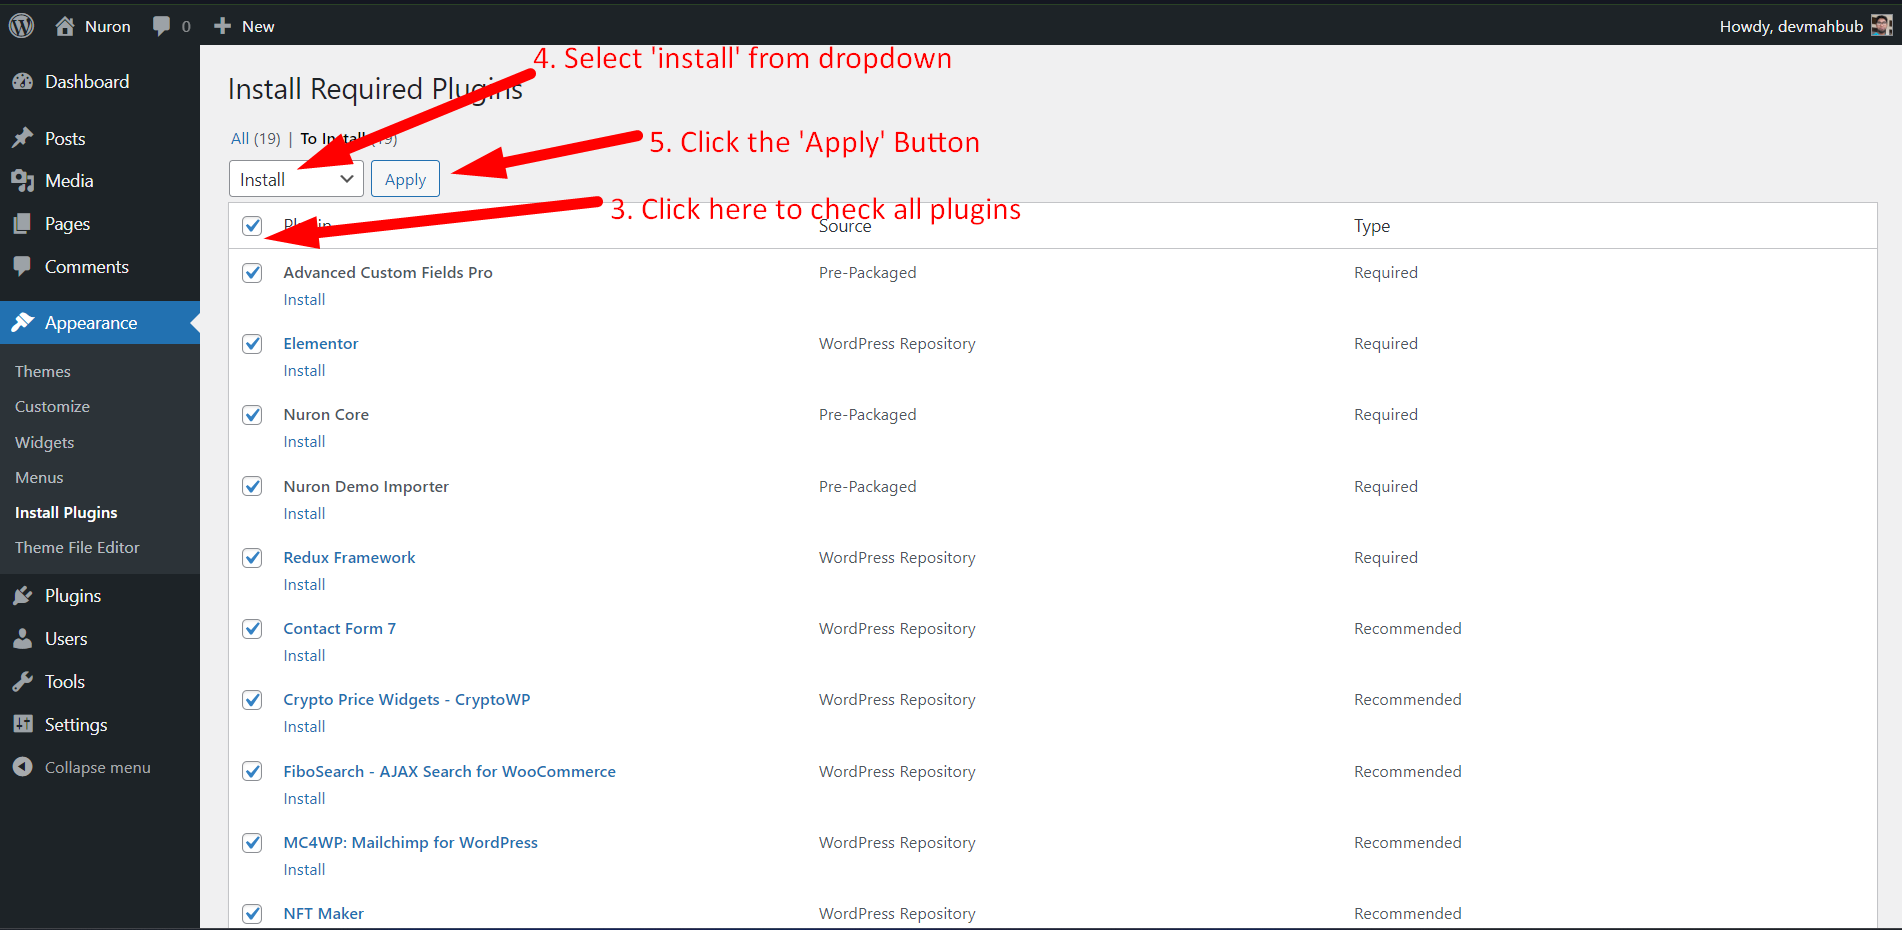
From the dashboard go to Appearance Install Plugins
Toggle all the required plugins and hint “Install”;
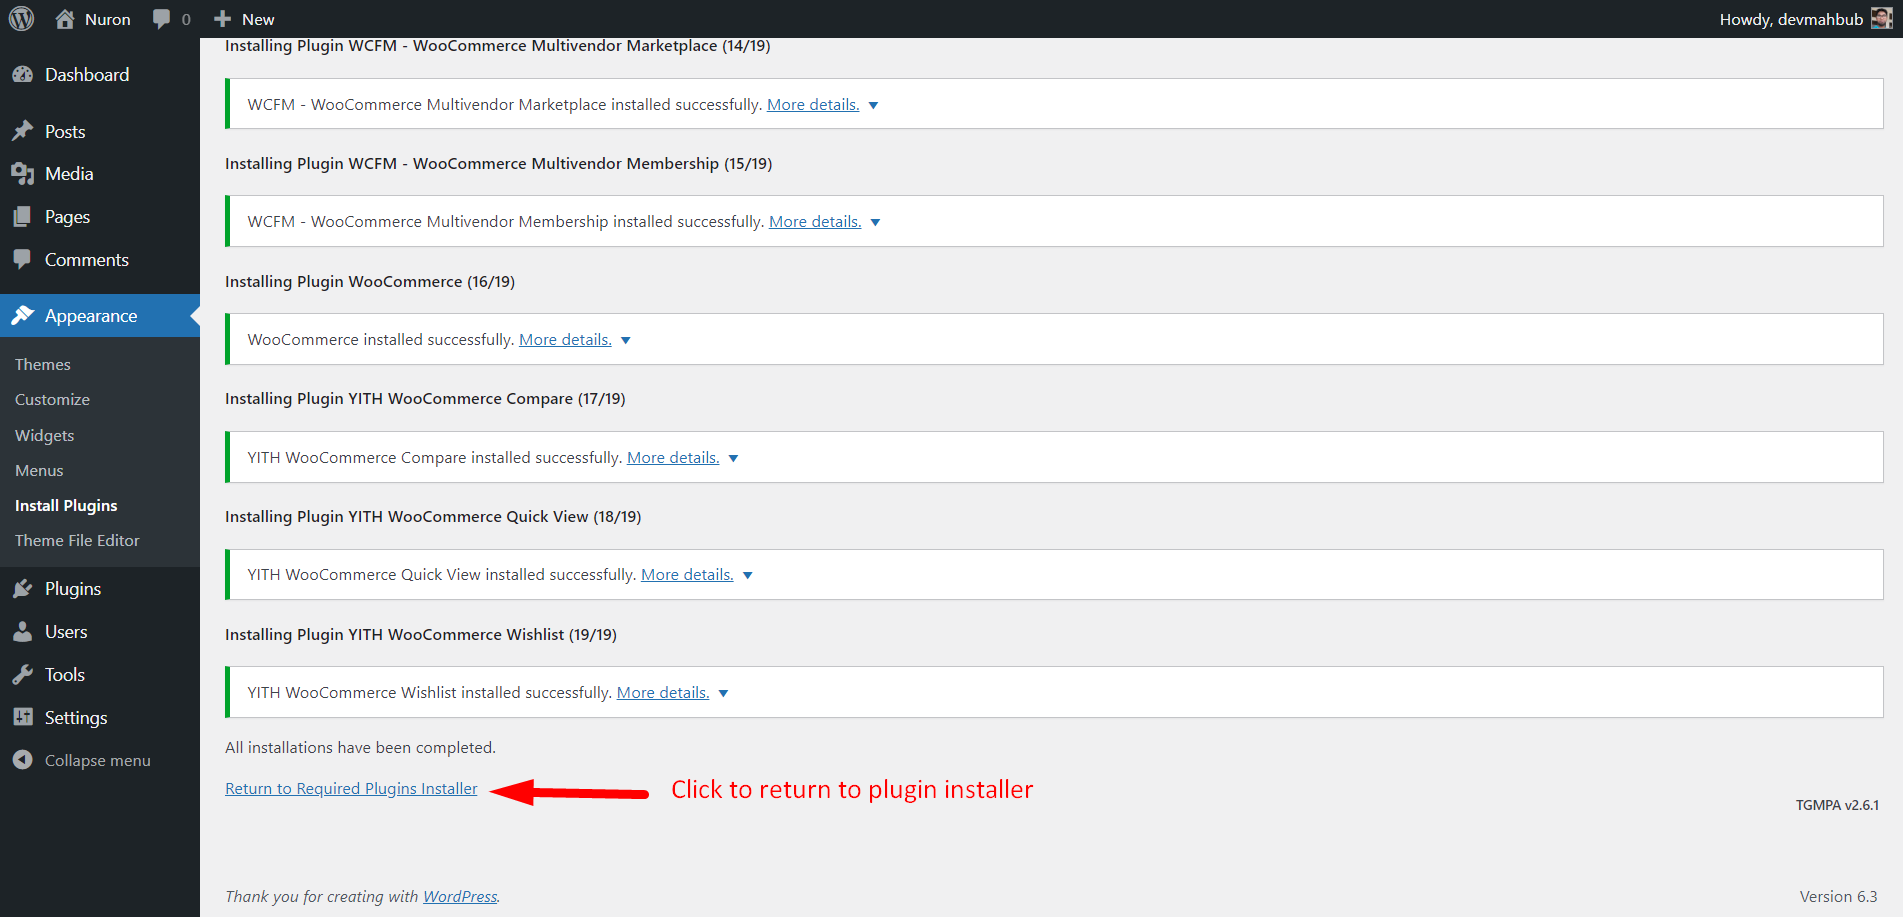
The last step will be activating the plugins.
Click on the begin installing plugins link to install all the required plugins.Select all and installReturn to Plugin InstallerActivate only WooCommerce PluginSelect all and Activate
What is Included with the theme (and what is not incldued)?
Notice: Some of the plugins used in this theme are free version not pro version included in the package and has to be purchased separately for pro version for pro features.
Important
In most cases, we do not recommend that you not purchase the Pro version because you will create a website like our demo without the Pro version or any tools.
The YITH WooCommerce Compare plugin allow you to compare in a simple and efficient way products on sale in your shop and analyze their main features in a single table.
YITH WooCommerce Wishlist gives your users the possibility to create, fill, manage and share their wishlists allowing you to analyze their interests and needs to improve your marketing strategies.
Select a page for your wishlist
Show the ‘Add to wishlist’ button also on the Shop page
Product variation support
Importing Demo Contents
Please ensure the php server configration are currect:
Want to build your site like the demo? You can do it by only one click! Nuron an easy solution for the demo content you saw on our preview website. Please follow the instructions below:
Note: Please remember that when you are done with the demo import, your some existing settings will be replaced by the demo contents Like: Your menu, Customizer. So it is recommended that you should only do this in fresh site.
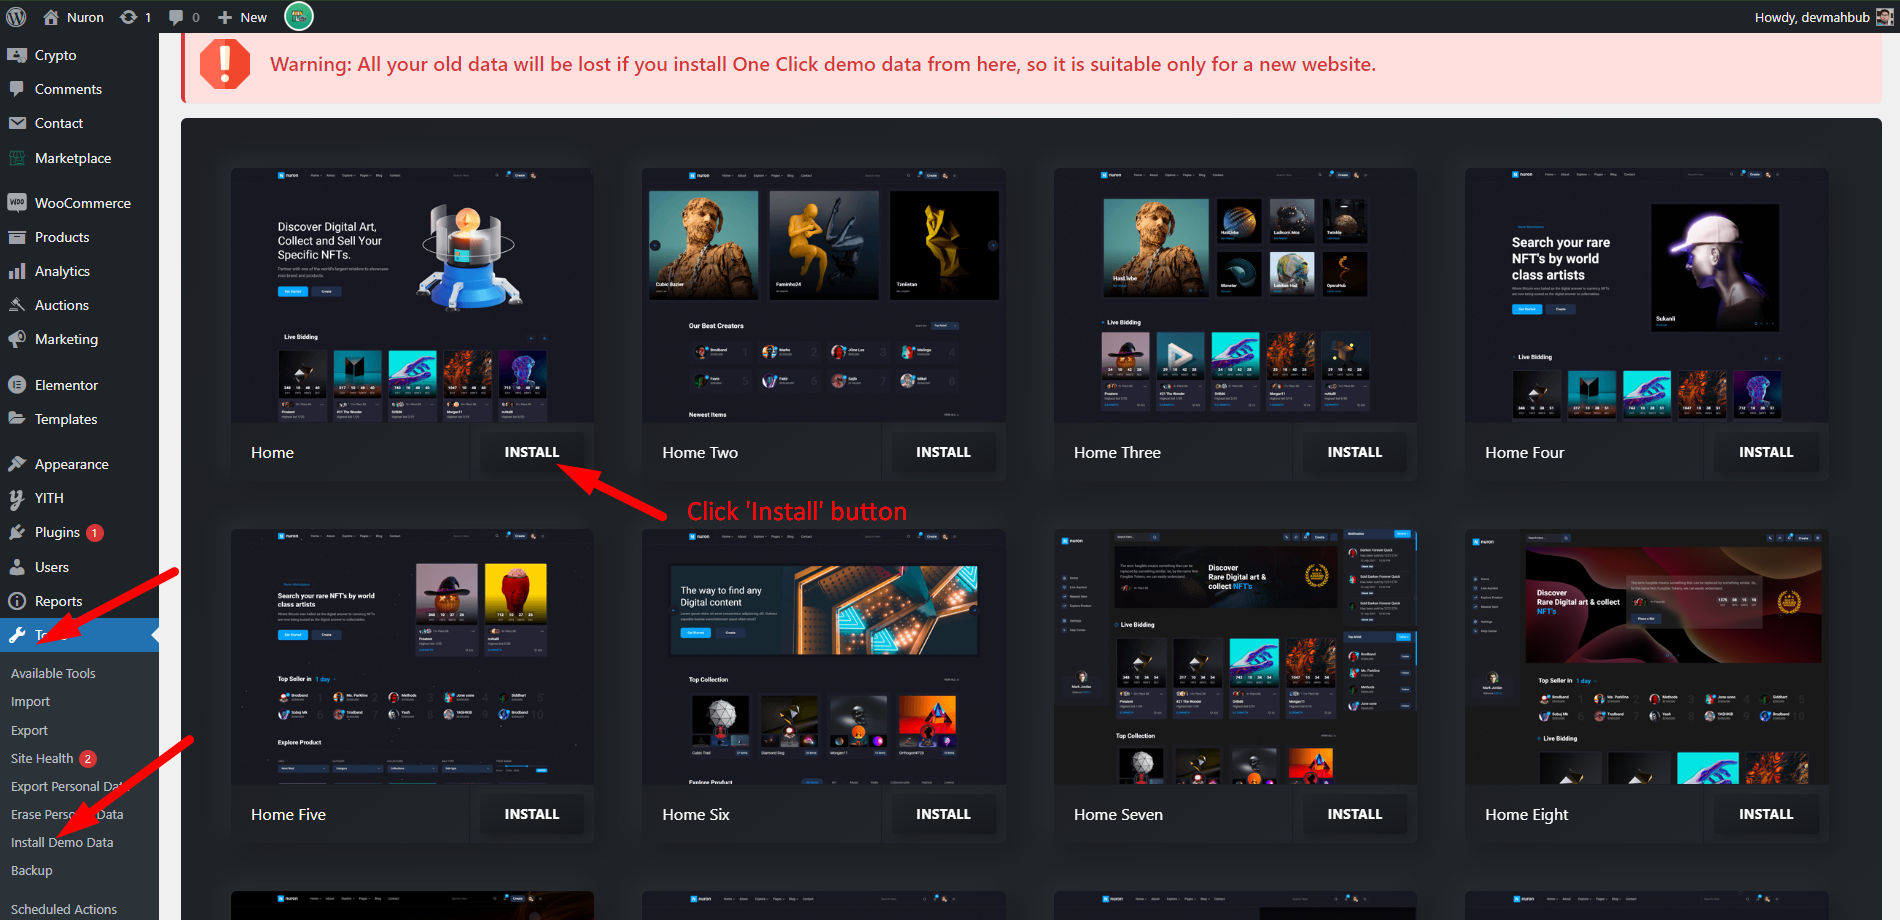
Warning: All your old data will be lost if you install One Click demo data from here, so it is suitable only for a new website.
Ensure, that the Nuron Demo Importer plugin is installed and activated;
From the dashboard go to Tools Install Demo Data
Choose the demo you want to install and click on the Install button below;
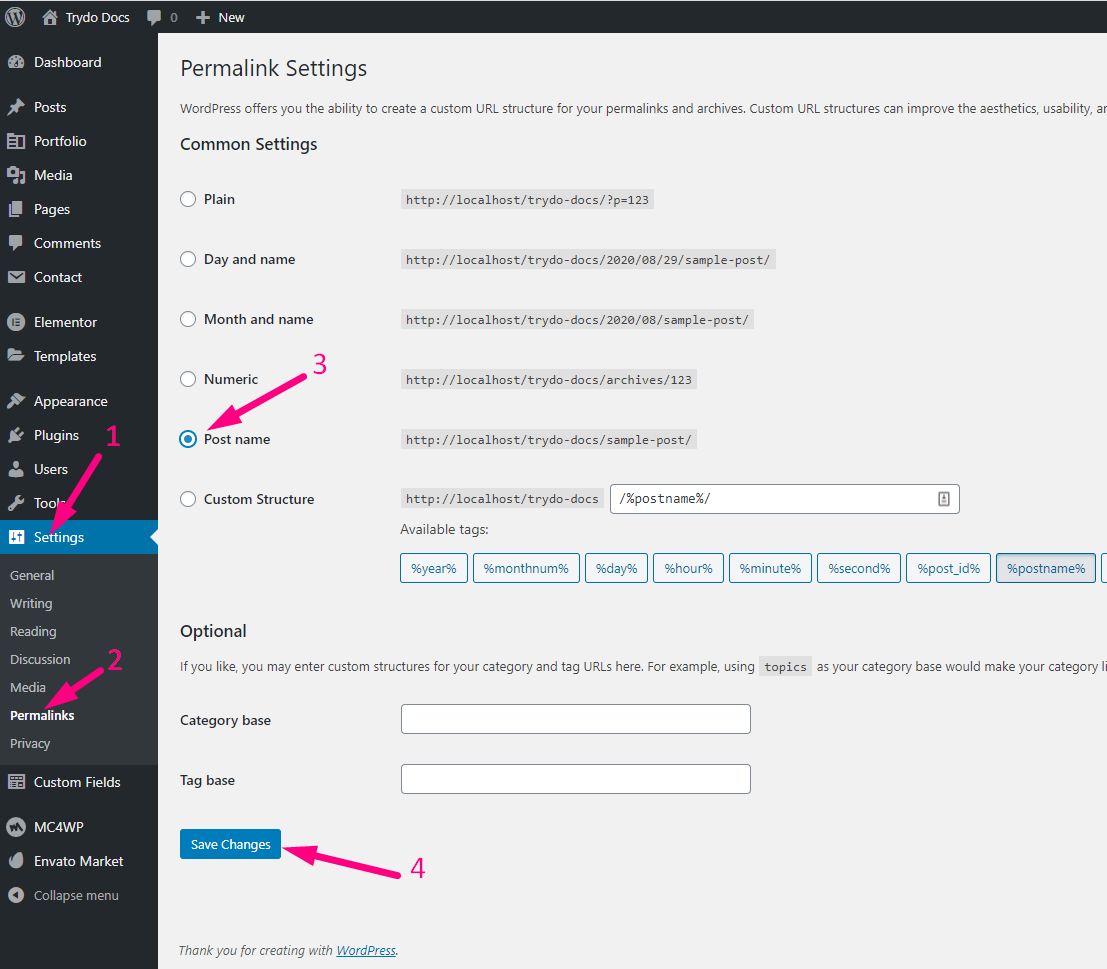
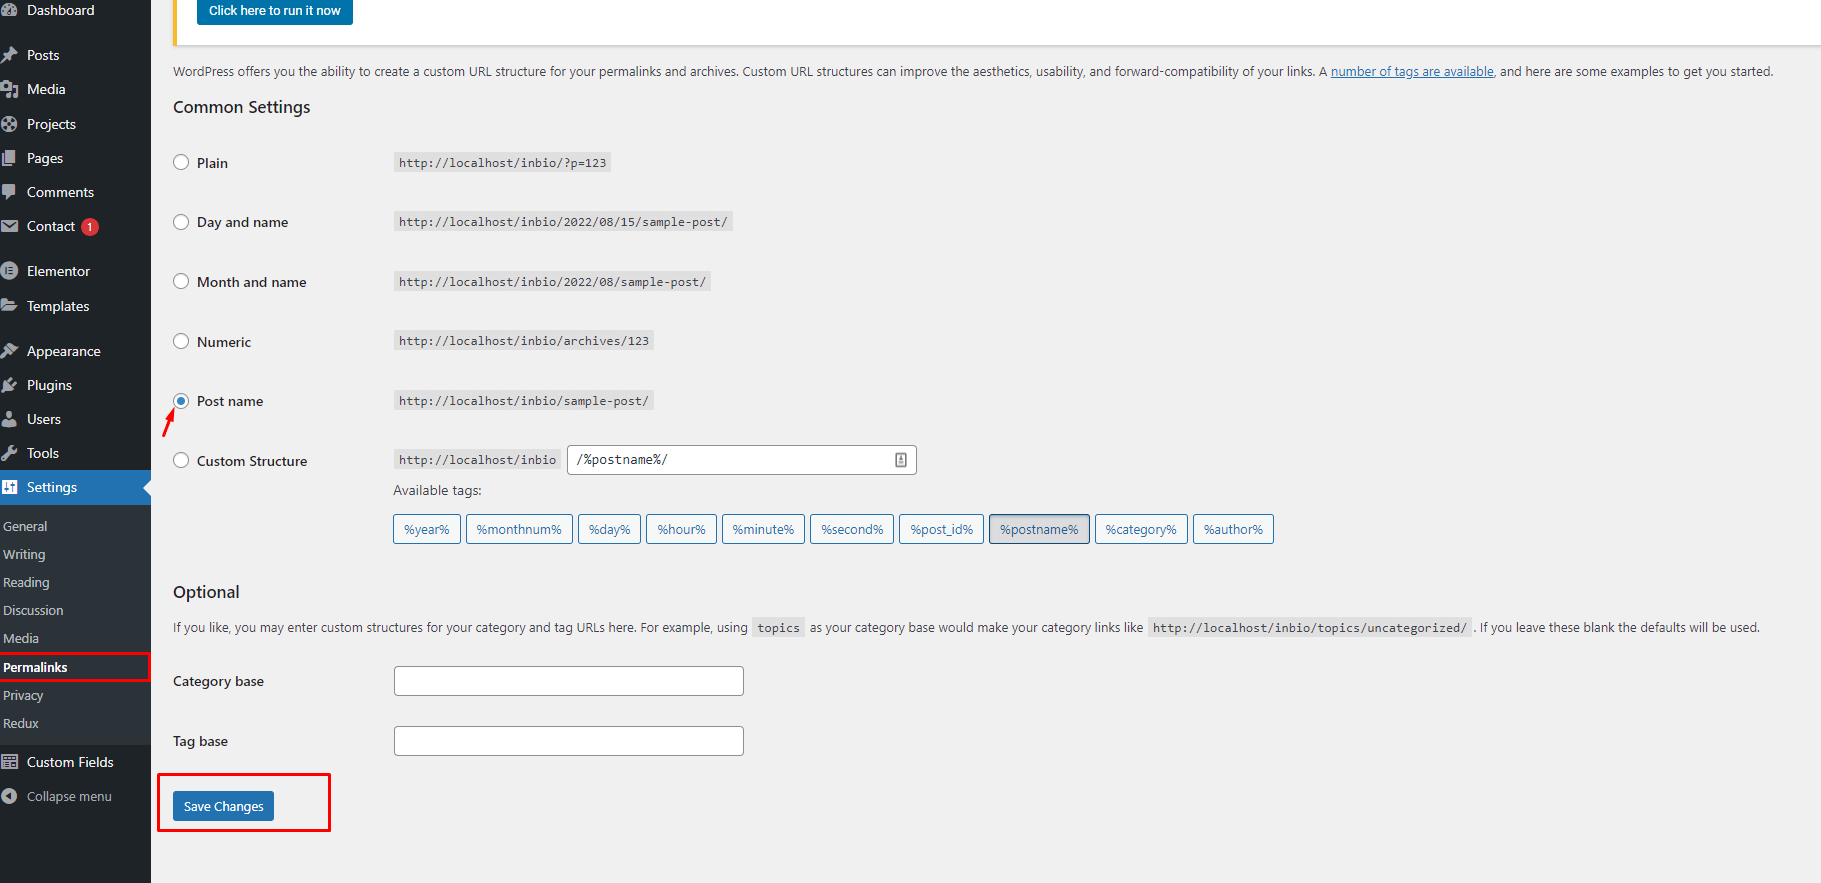
And change the permalink: From the dashboard go to Settings Permalink
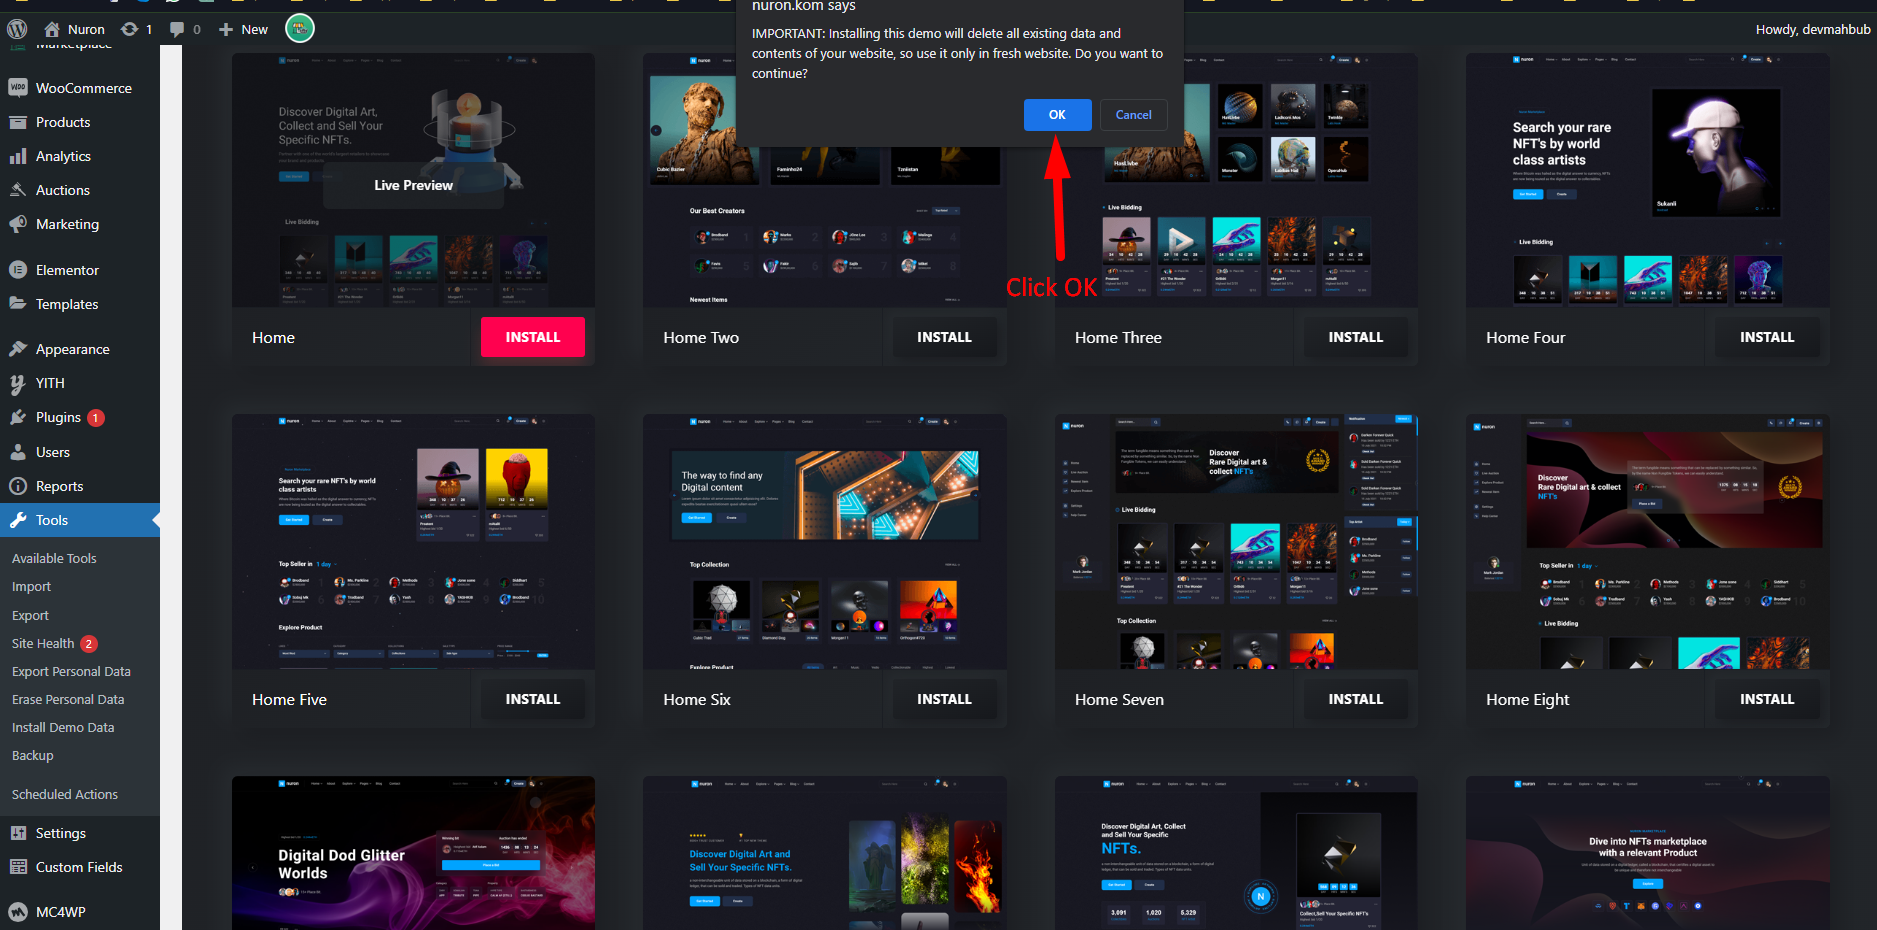
go to Tools -> Install Demo Data And Click on the "Install" buttonClick "OK" ButtonChange permalink
Manually Import
Please follow the instructions below:
Note: If you are unsure of how to configure these settings, please contact your hosting provider or create a support ticket our support center.
Import Content:
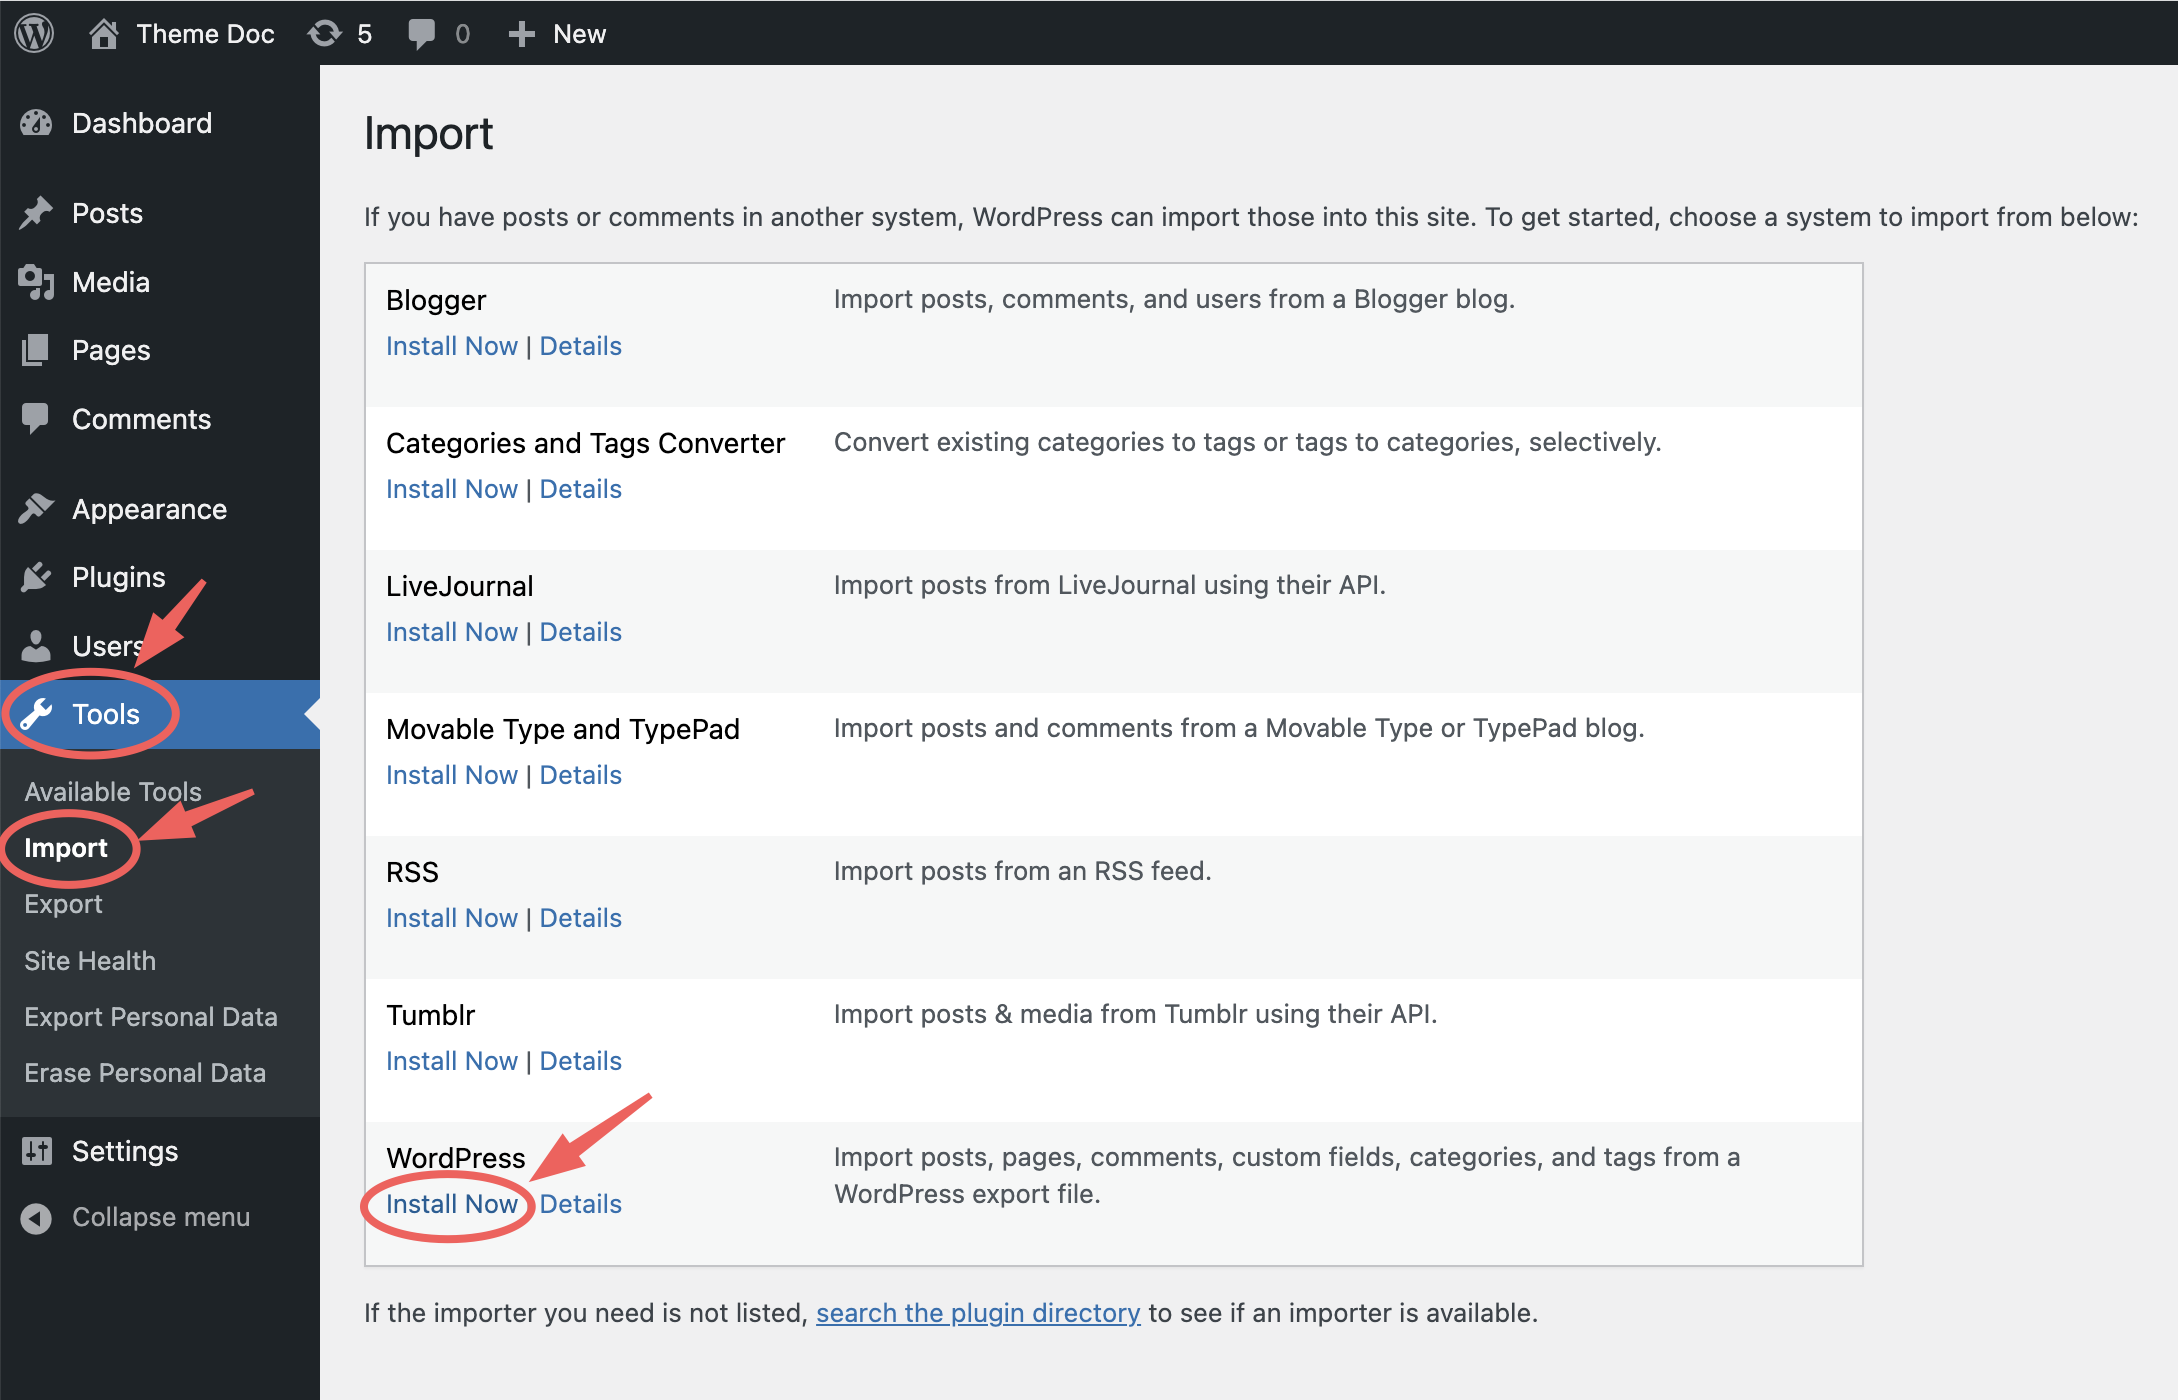
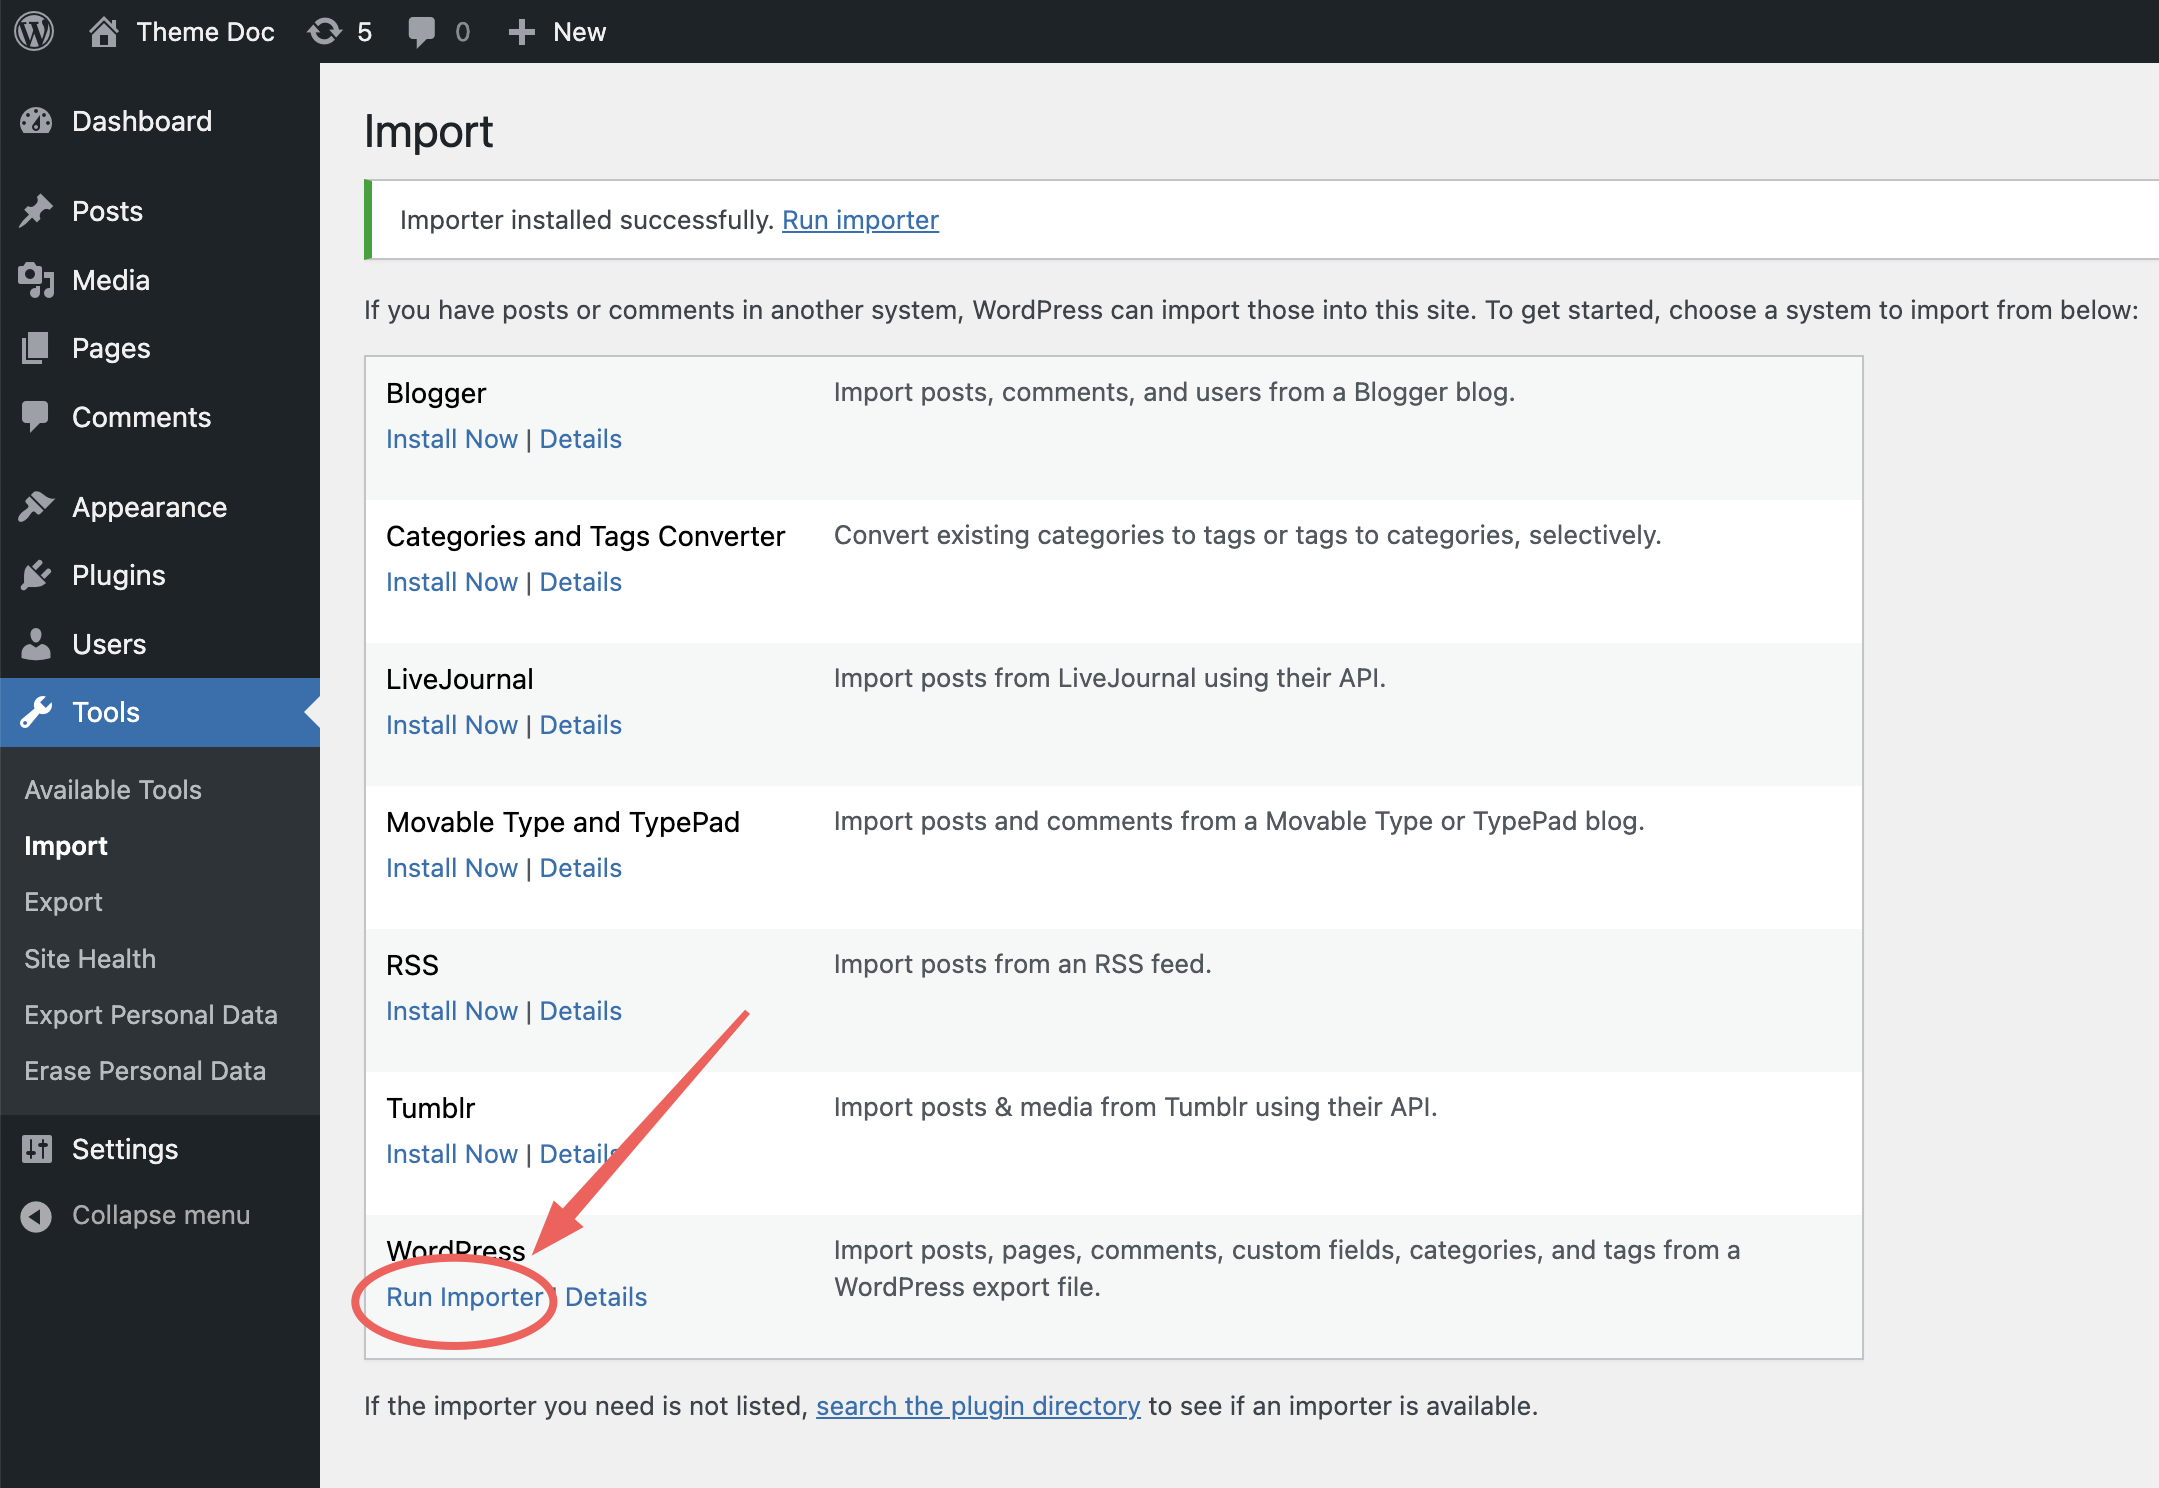
Go to Tools > Import and click Run Import. Install it first if it’s not installed.
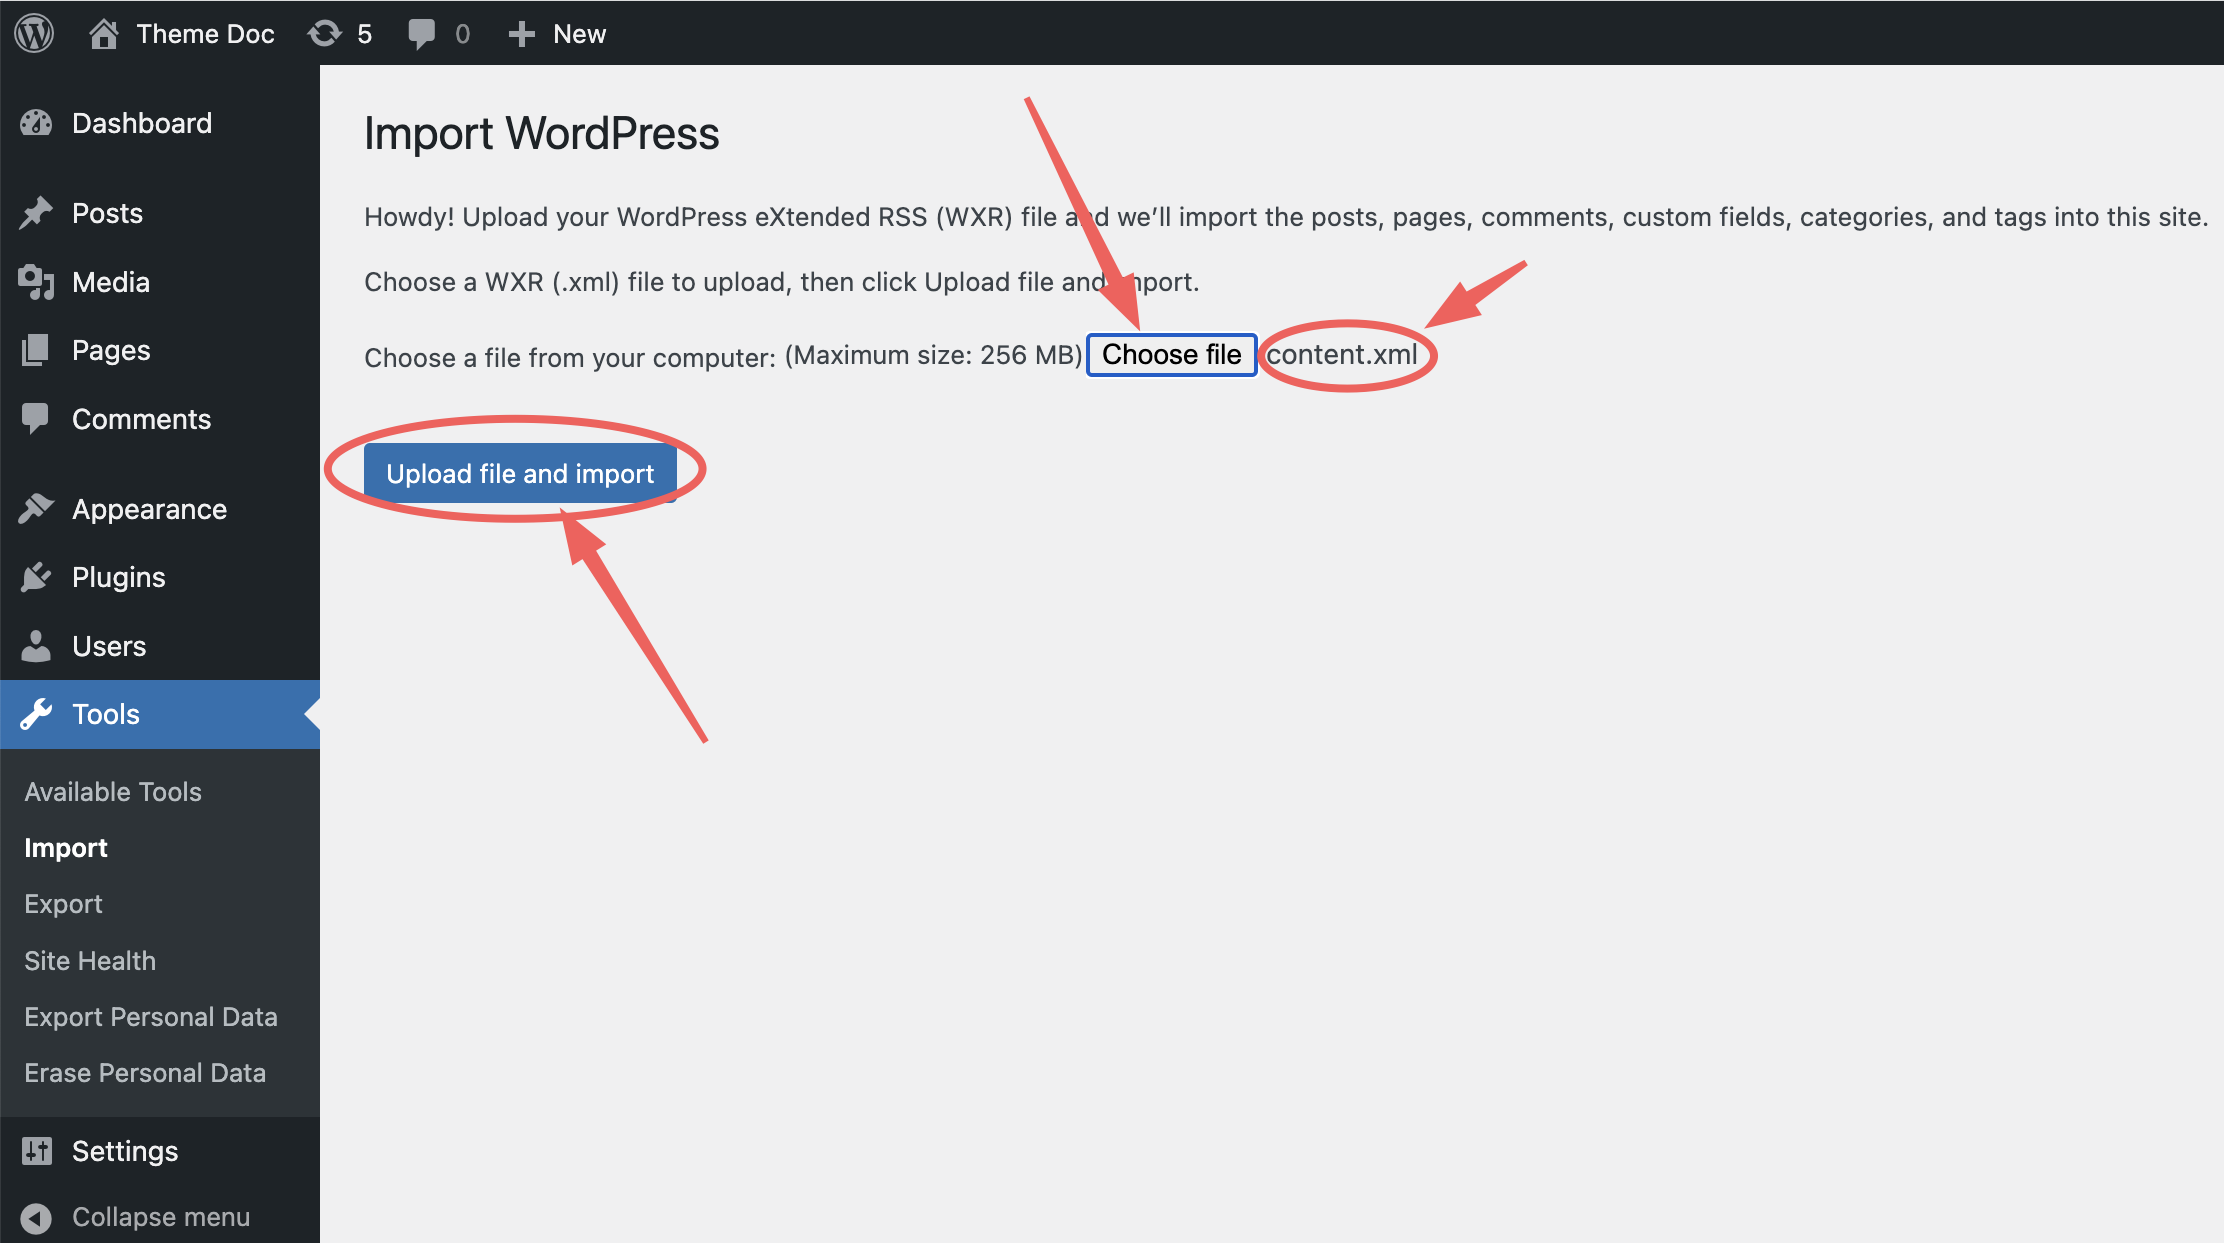
Choose the content.xml file from your downloaded package and click Upload file and import.
In the next step check or uncheck Download and import file attachments accordingly.
Click Submit and wait for the content to be imported.
Import Redux Options:
Go to Appearance > Theme Options.
Navigate to Import / Export and click Import from file.
Open options.json file included with the theme in a text editor and copy all content into the text field.
Click the Import button below to import all the settings and options.
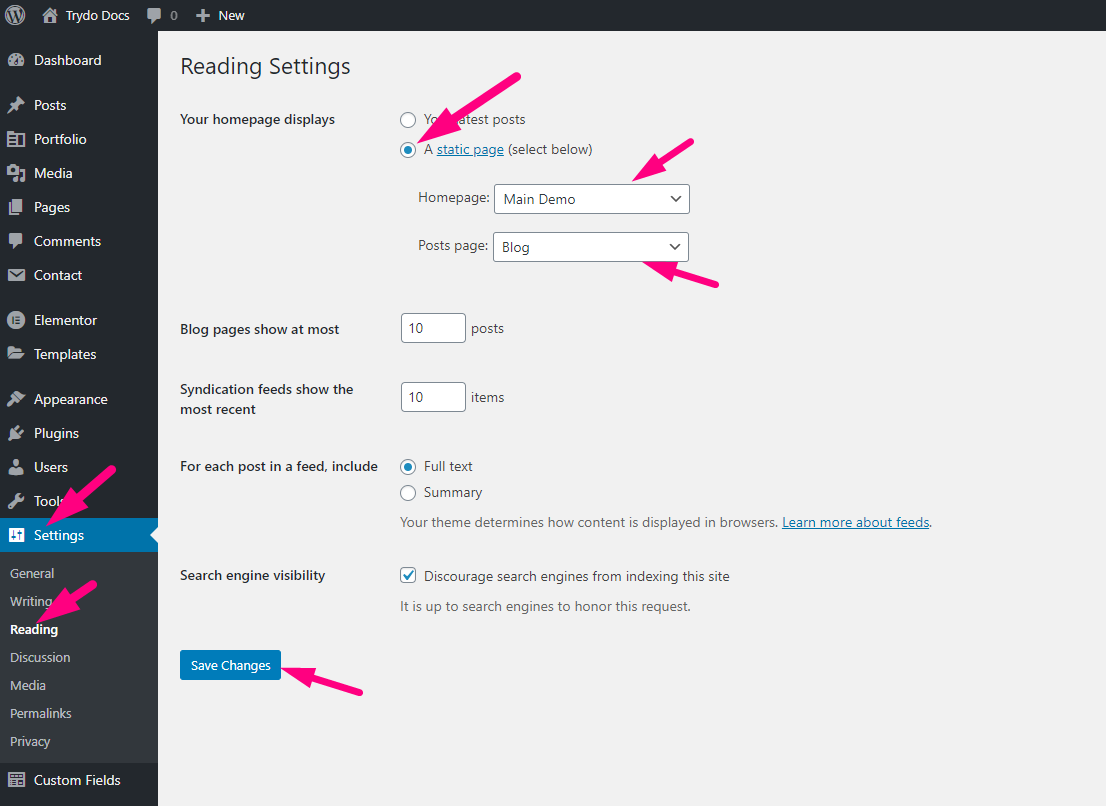
Set the Home Page:
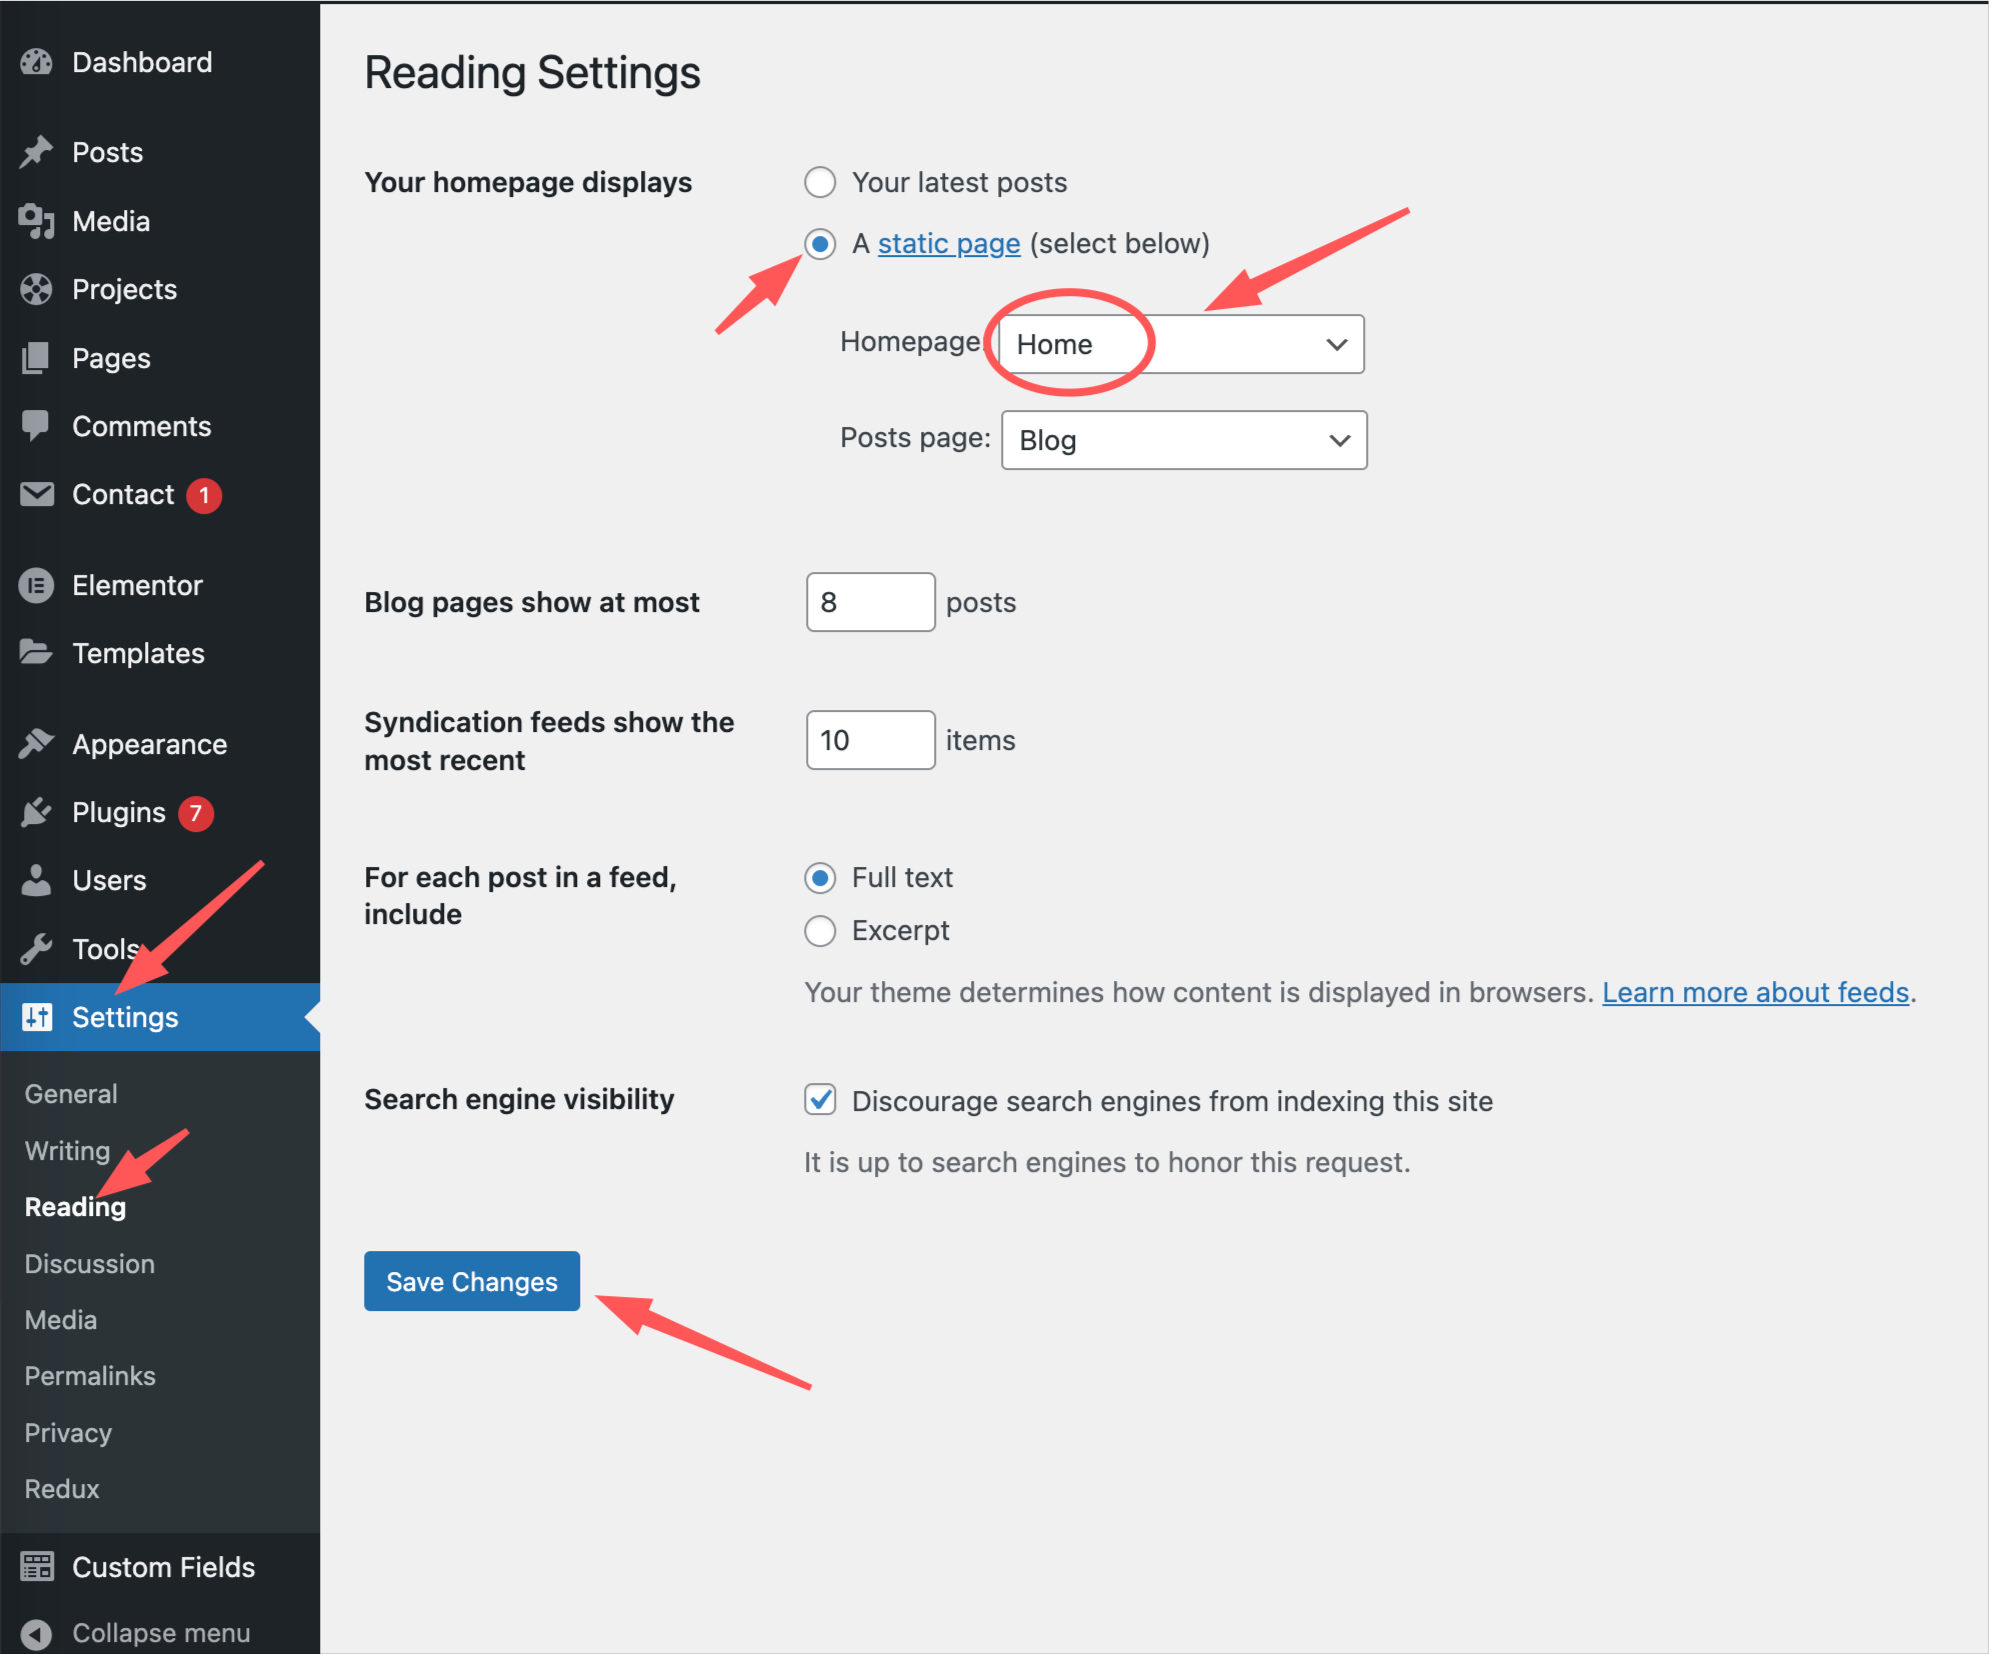
Please select the homepage from Reading Settings. To do that go to Settings -> Reading -> Homepage
For example, Select Home if you want to setup our main demo.
See the screenshot for better understanding in no 3.
Update permalink:
After importing demo data, please update your permalink. To update the permalink, navigate to Settings -> Permalink and then click on the Save Settings button. See the screenshot for better understanding in no 4.
1.1 Import Content1.2 Import Content1.3 Import Content2.Import Redux Options3.Set the Home Page4.Update permalink
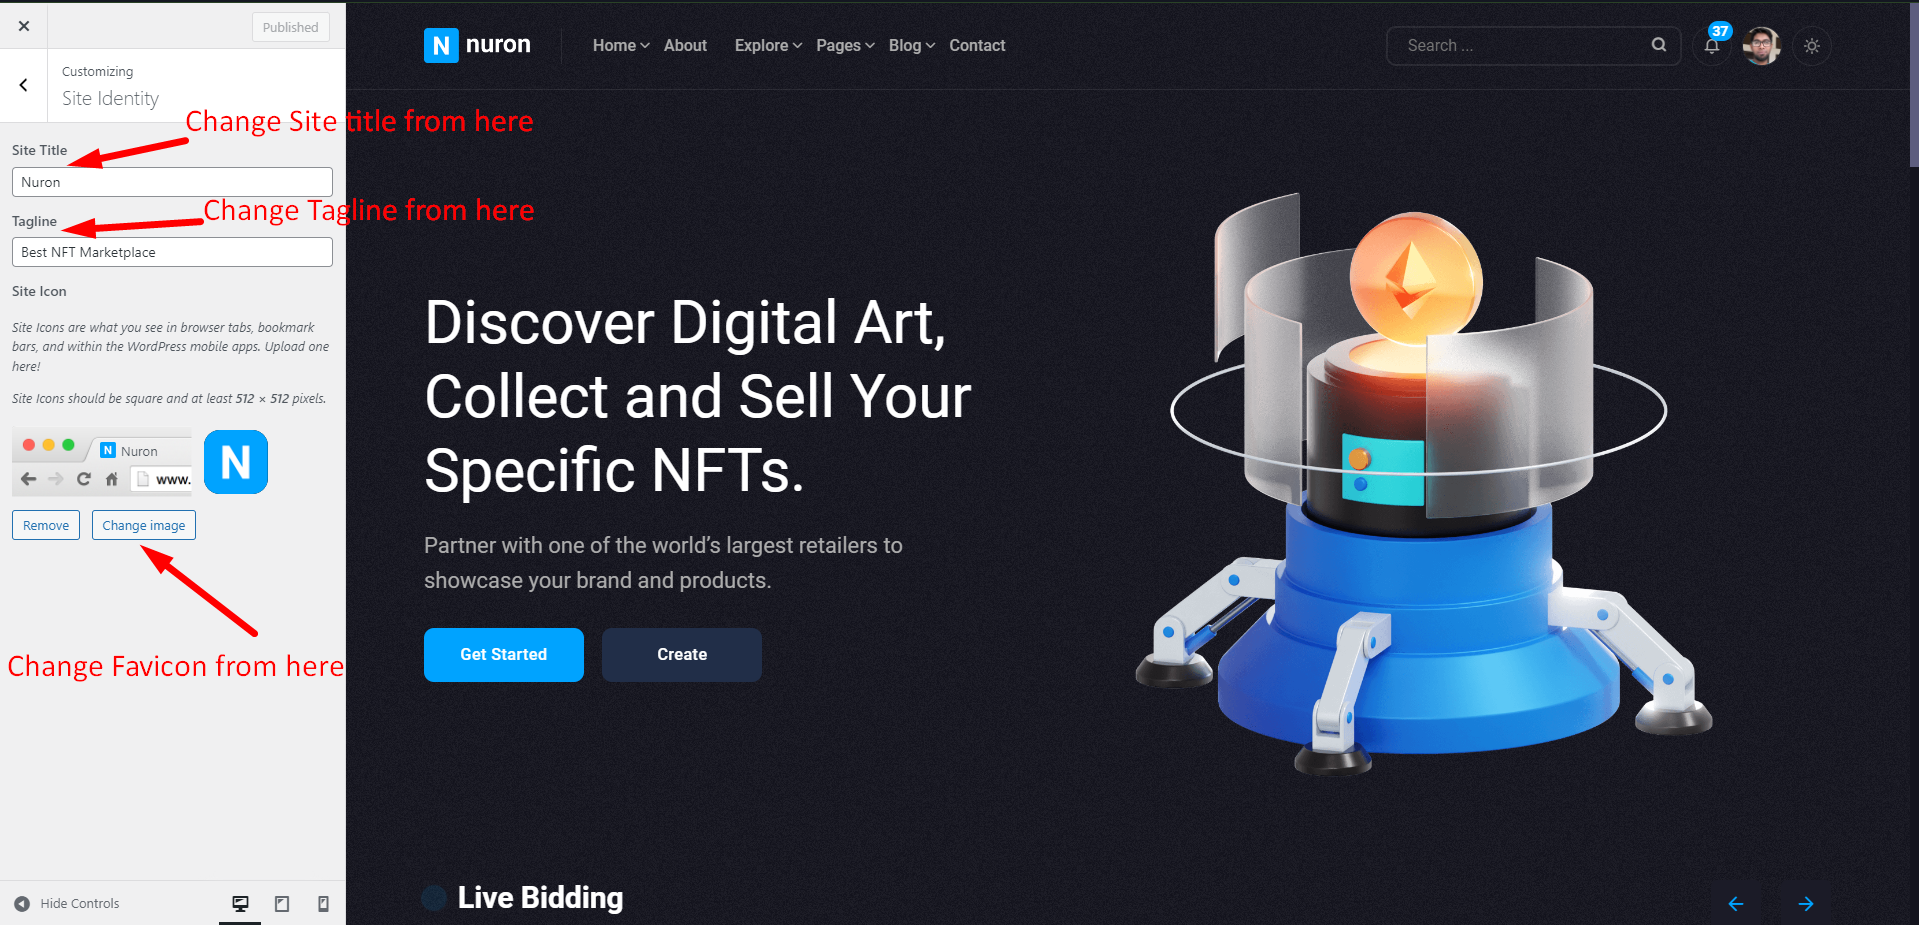
Change Site Title and Favicon
To change your Site title and Favicon login to wp-admin and navigate to Dashboard AppearanceCustomizeSite Identity and follow the following steps:
go to Dashboard > Appearance > Customize > Site Identity and change it.
Change Logo
To change your Site logo, login to wp-admin and go to Dashboard Nuron Theme OptionsGeneral and follow the following steps:
Go to Dashboard > Nuron Theme Options > General > upload your logo from here.
Setting a Home Page and Blog Page
To set the home and blog page, login to wp-admin and go to Dashboard Settings Reading and follow the following steps:
Select your Home and Blog Page.
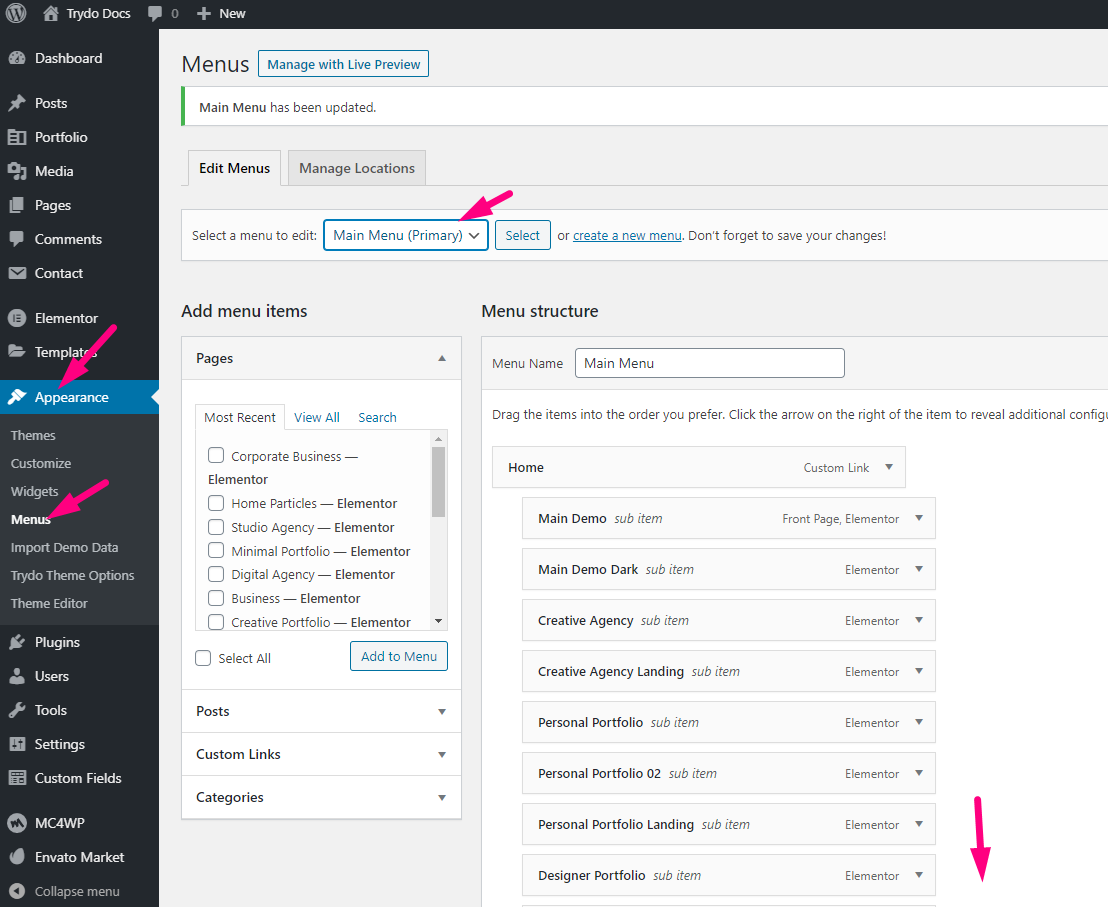
Customize Menu
To set the menus, login to wp-admin and go to Dashboard Appearance Menus and follow the following steps:
Customize the menu 1Customize the menu 2
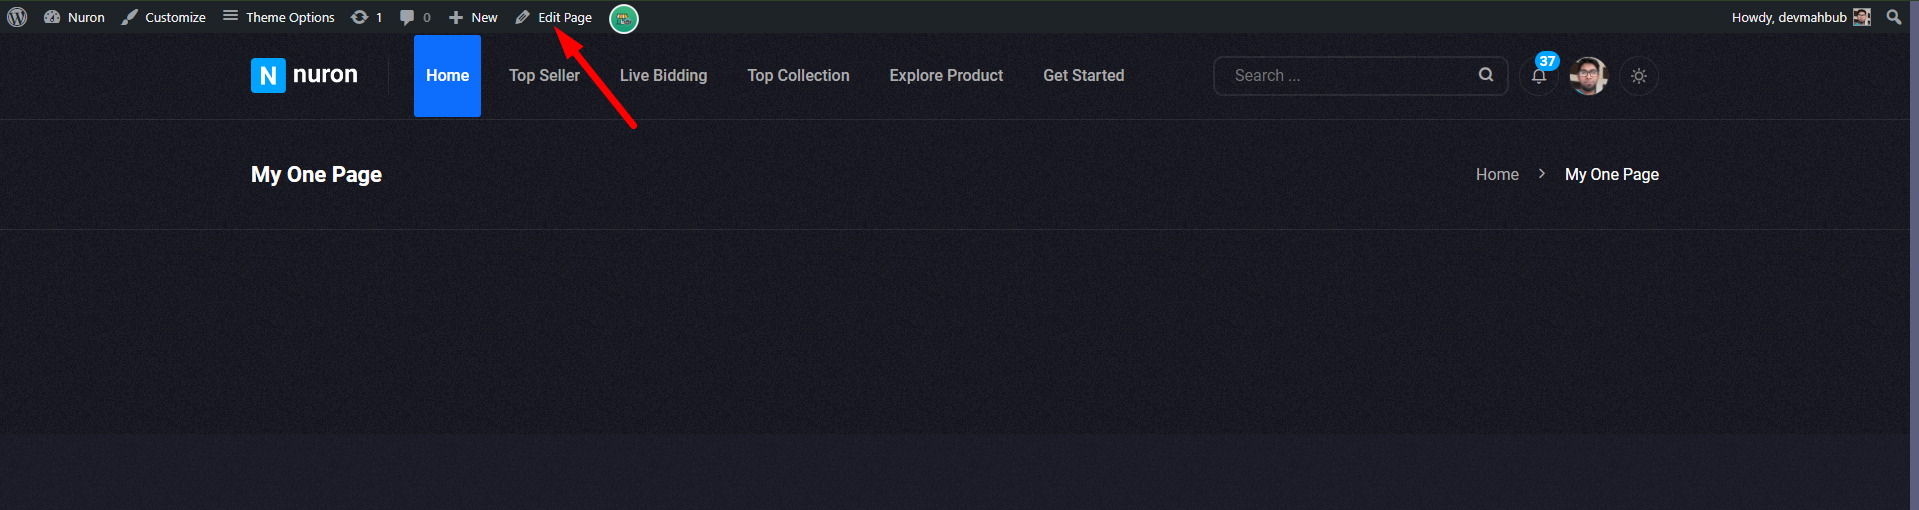
One page Navigation
Prepare the page
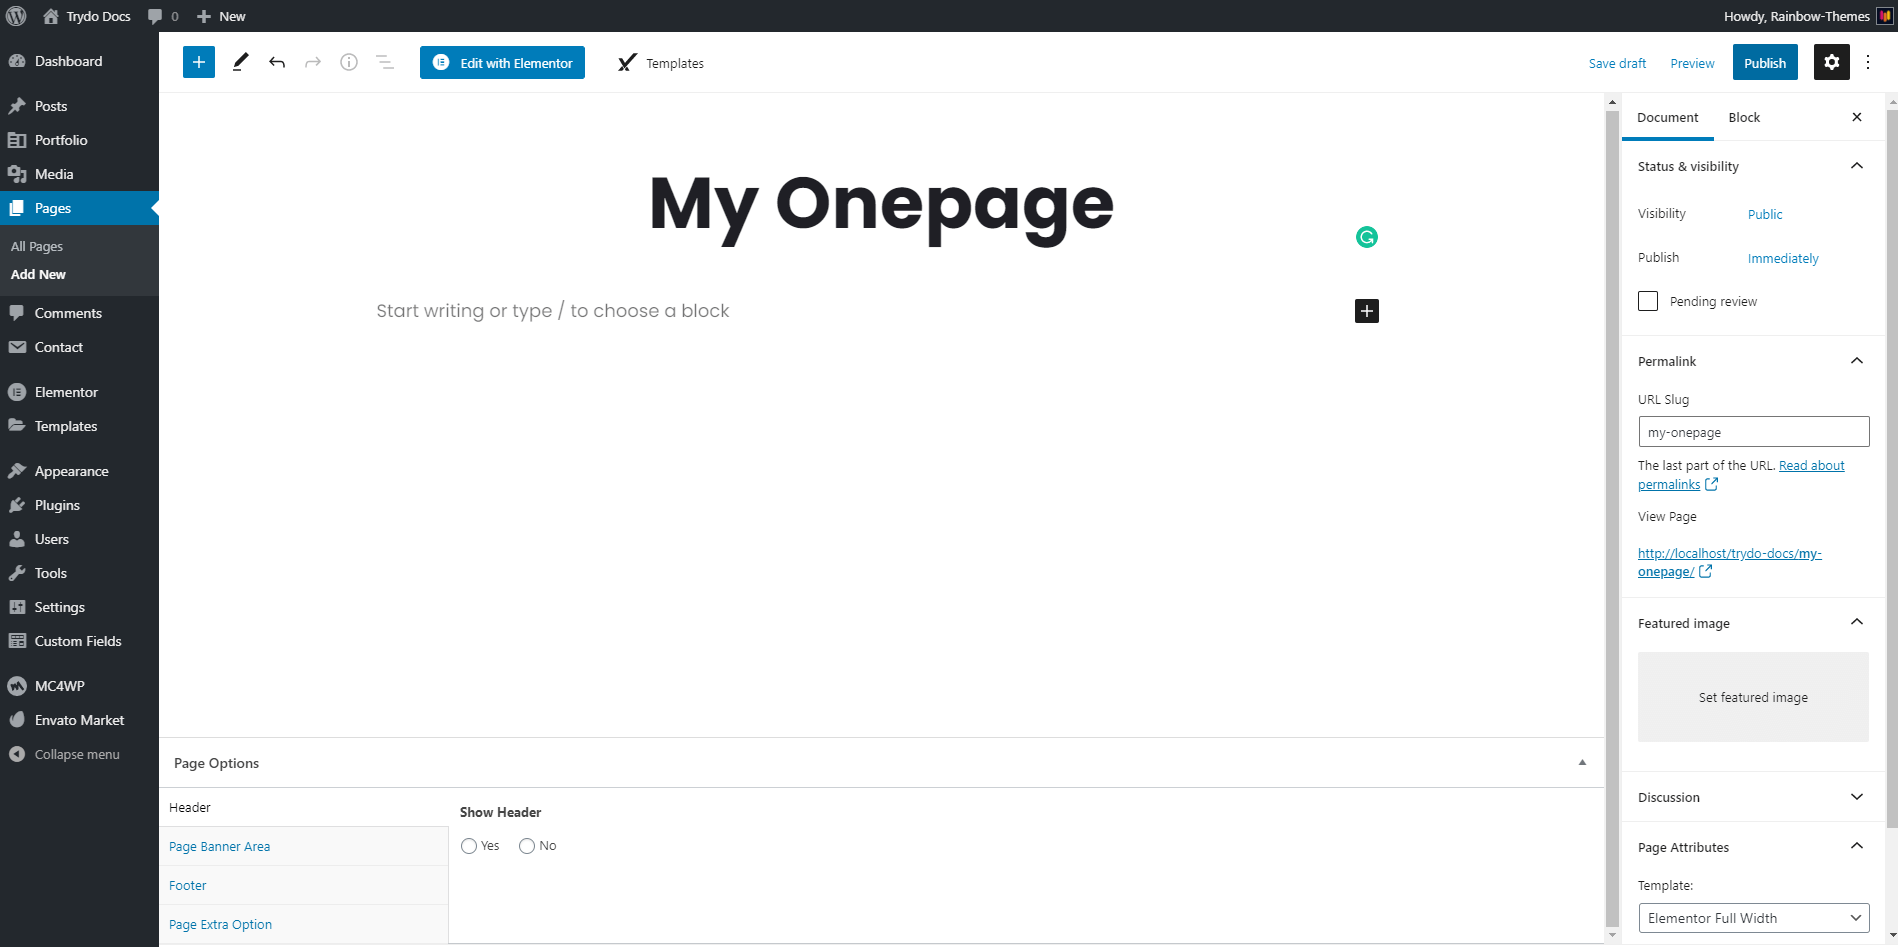
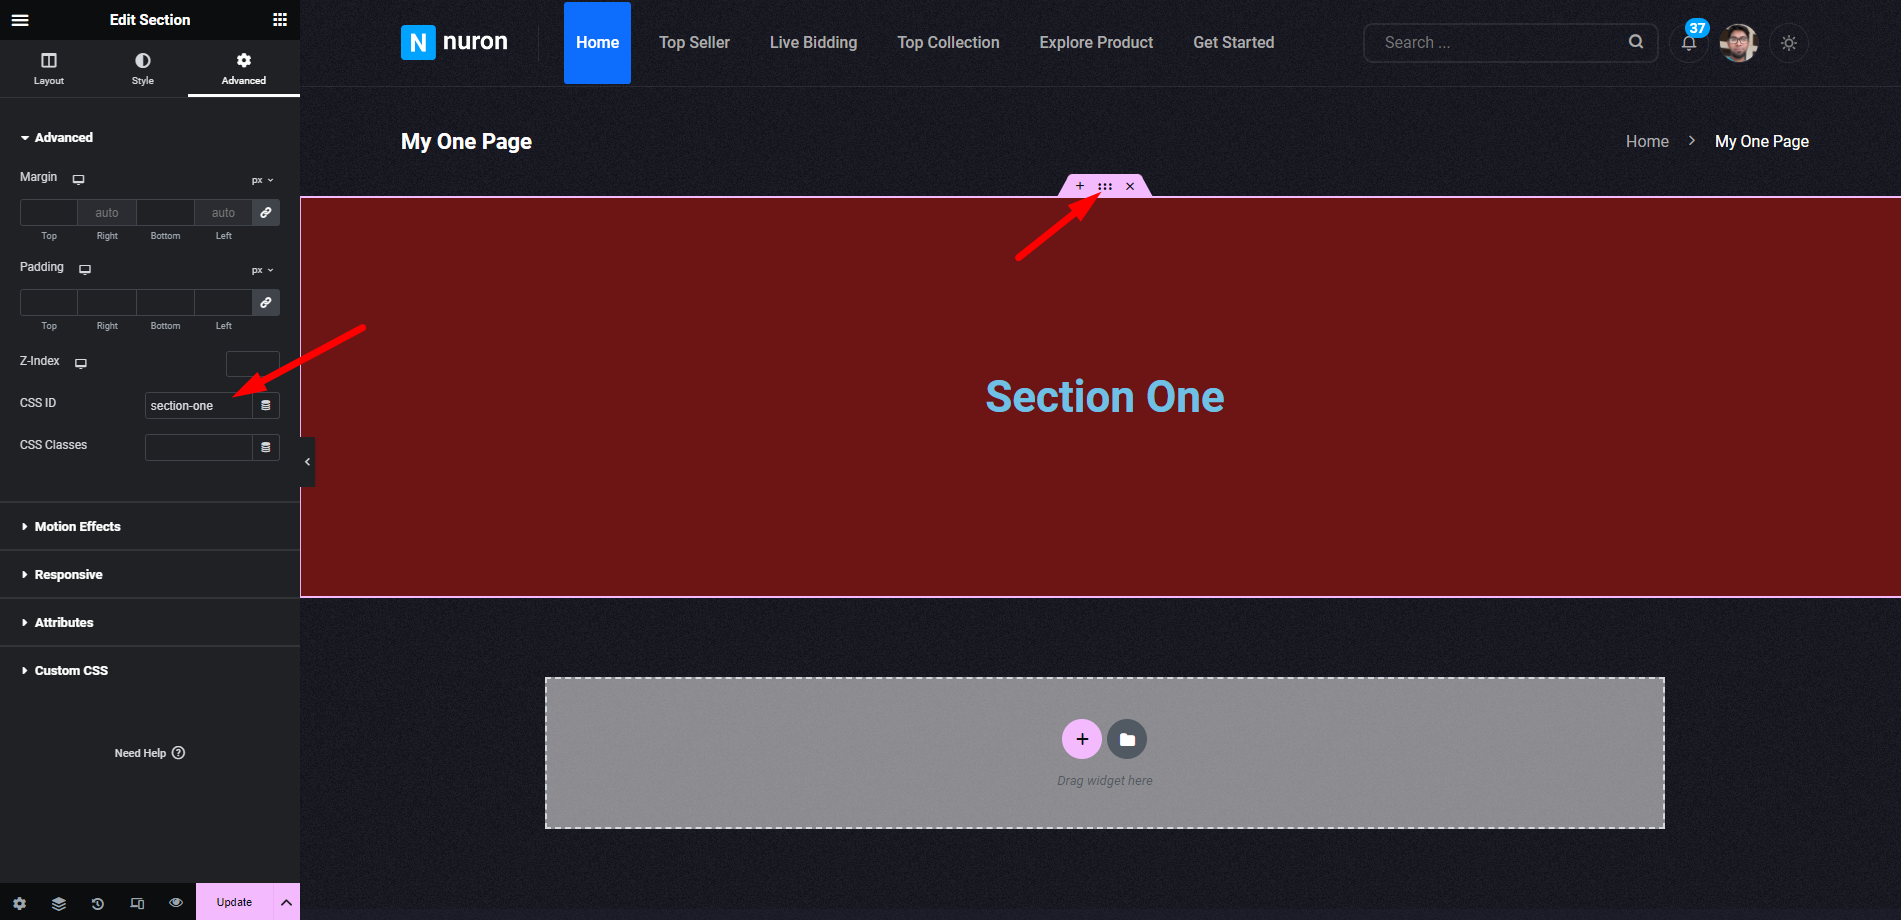
Create a new page. To do that go to Pages Add New and give the page a title and then add a Block element to the content. Add section unique "ID" into Per Block.
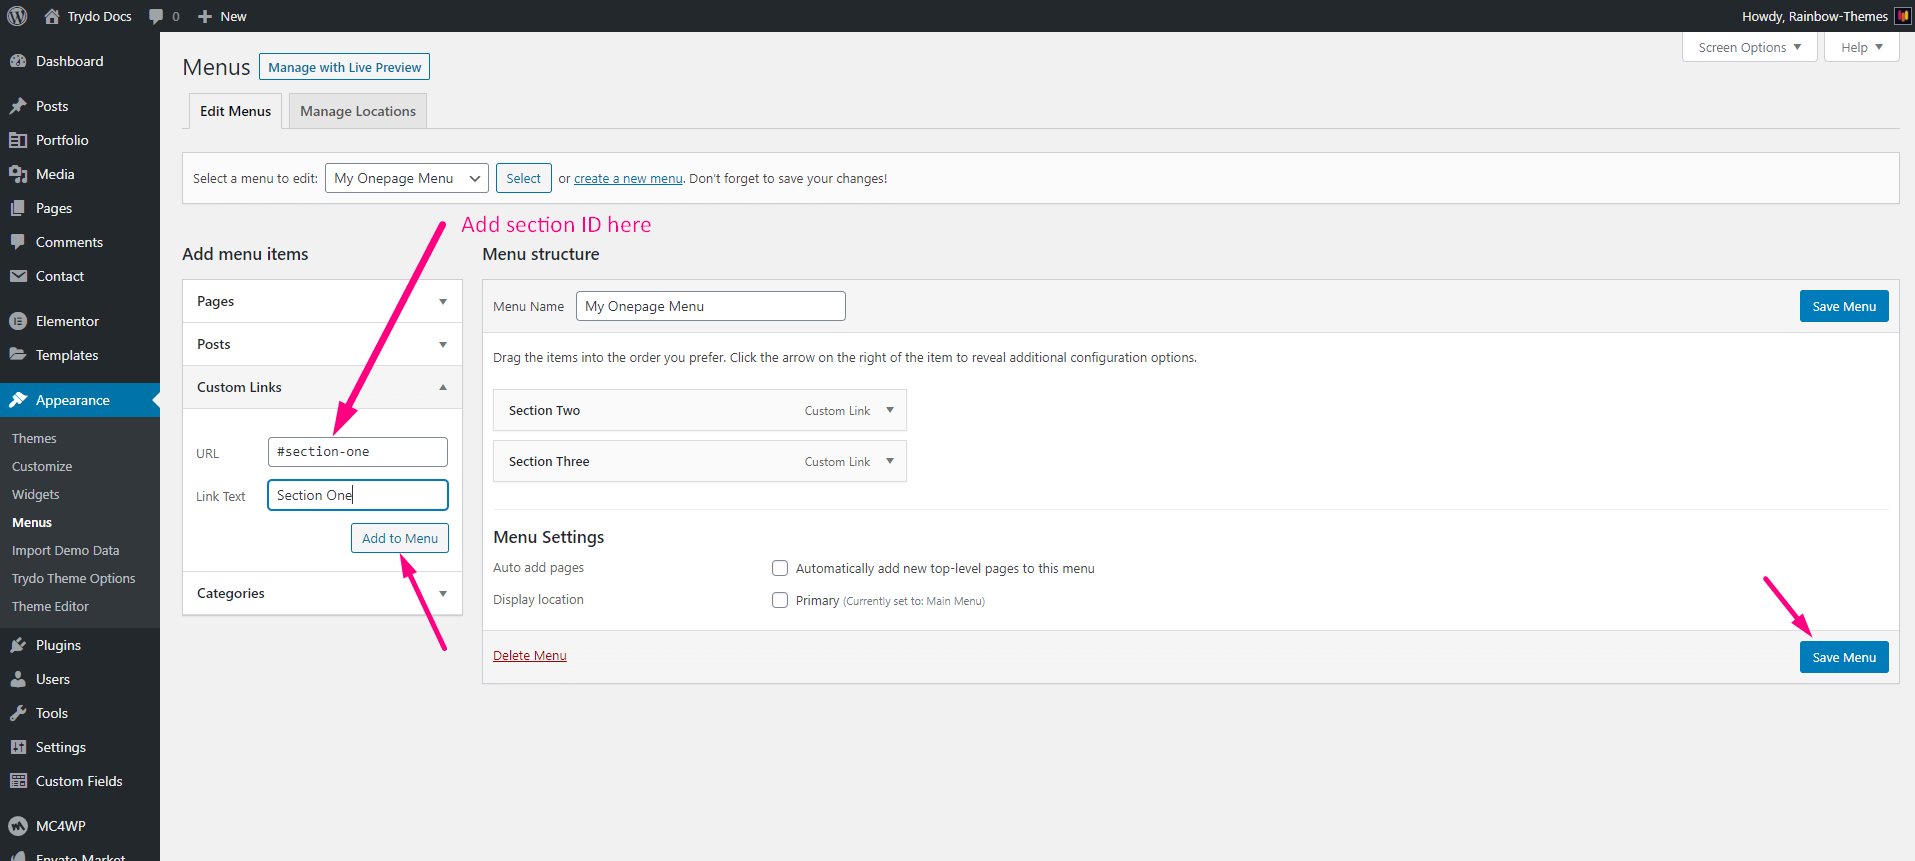
Prepare the menu
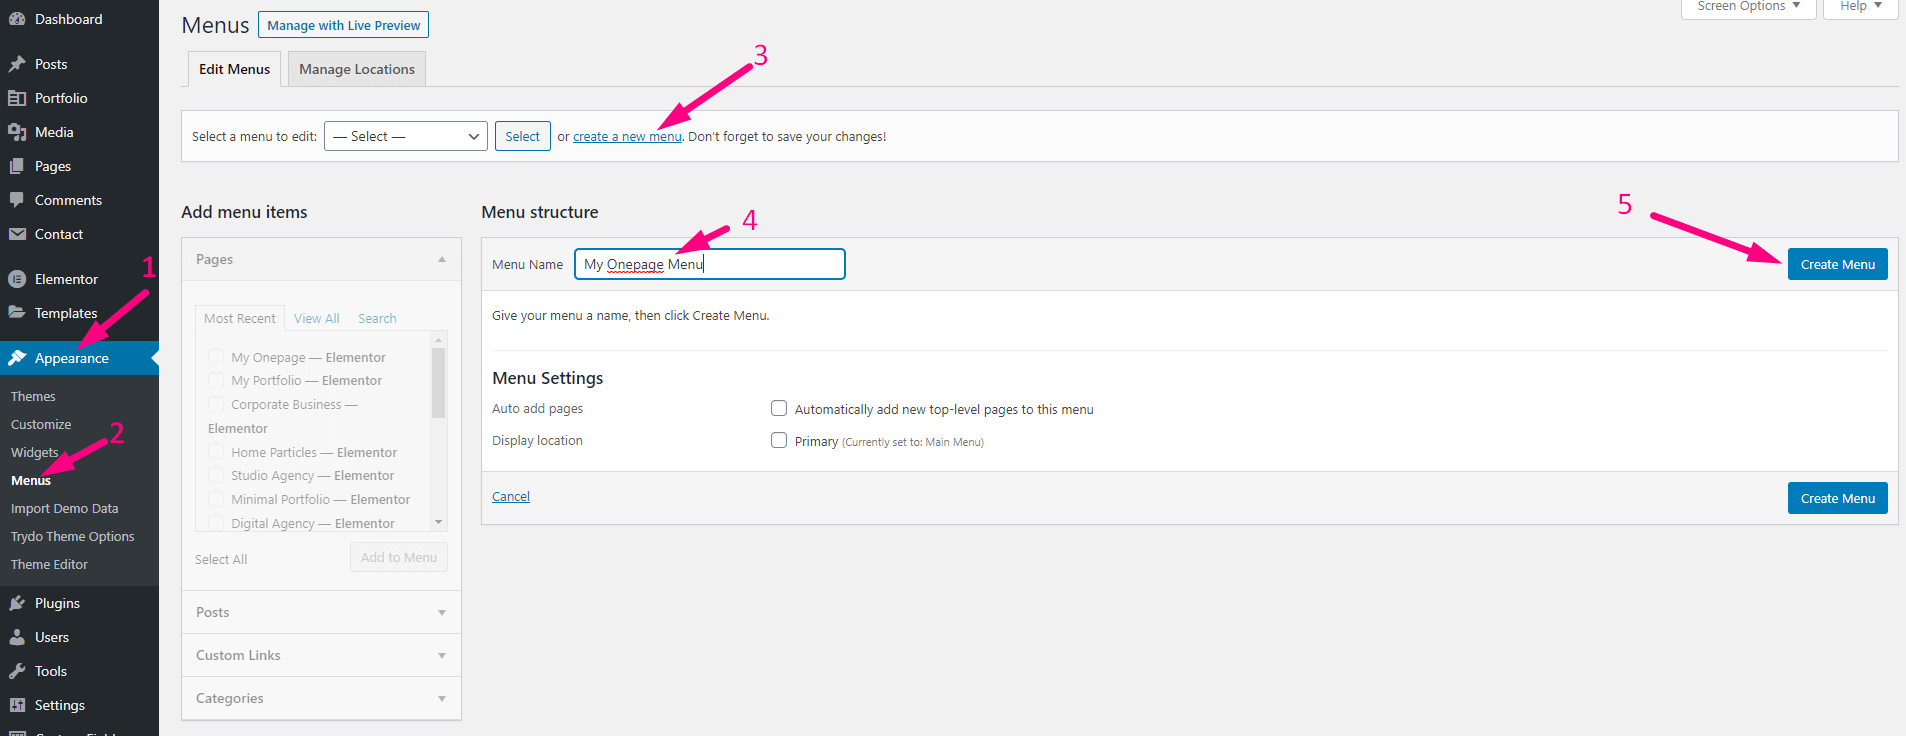
Go to Appearance Menu click the create a new menu link Give the new menu a unique name and then click the Create Menu button.
Add menu item with section ID
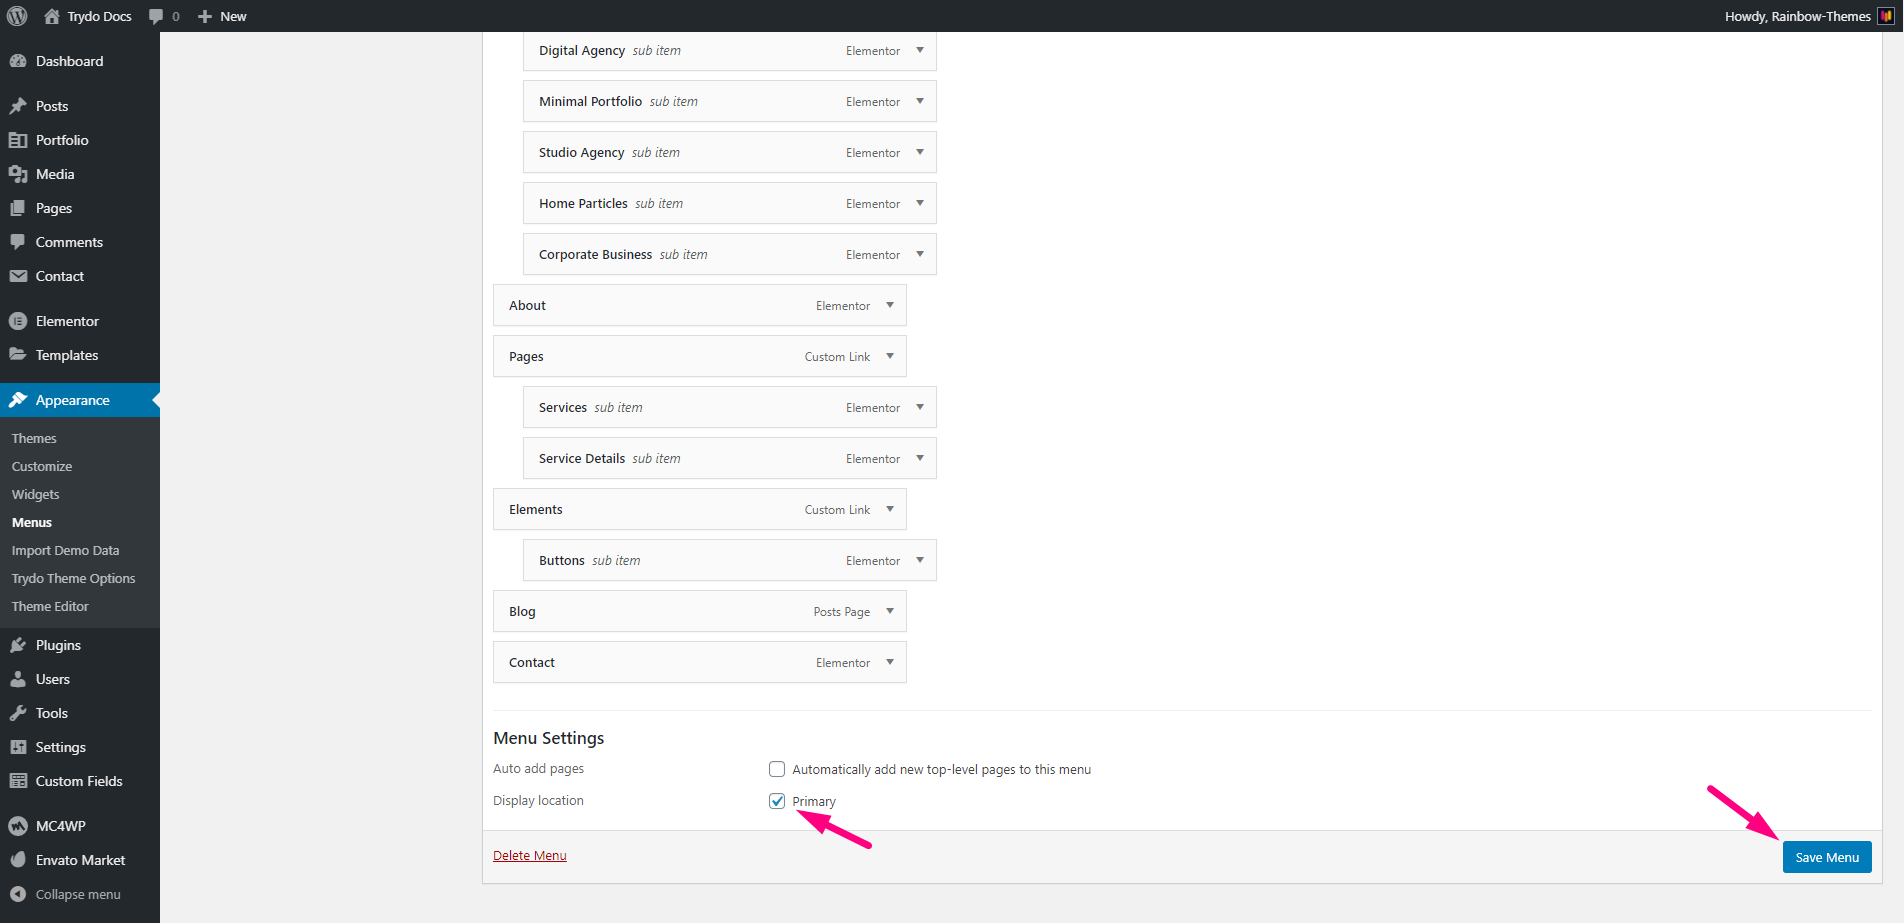
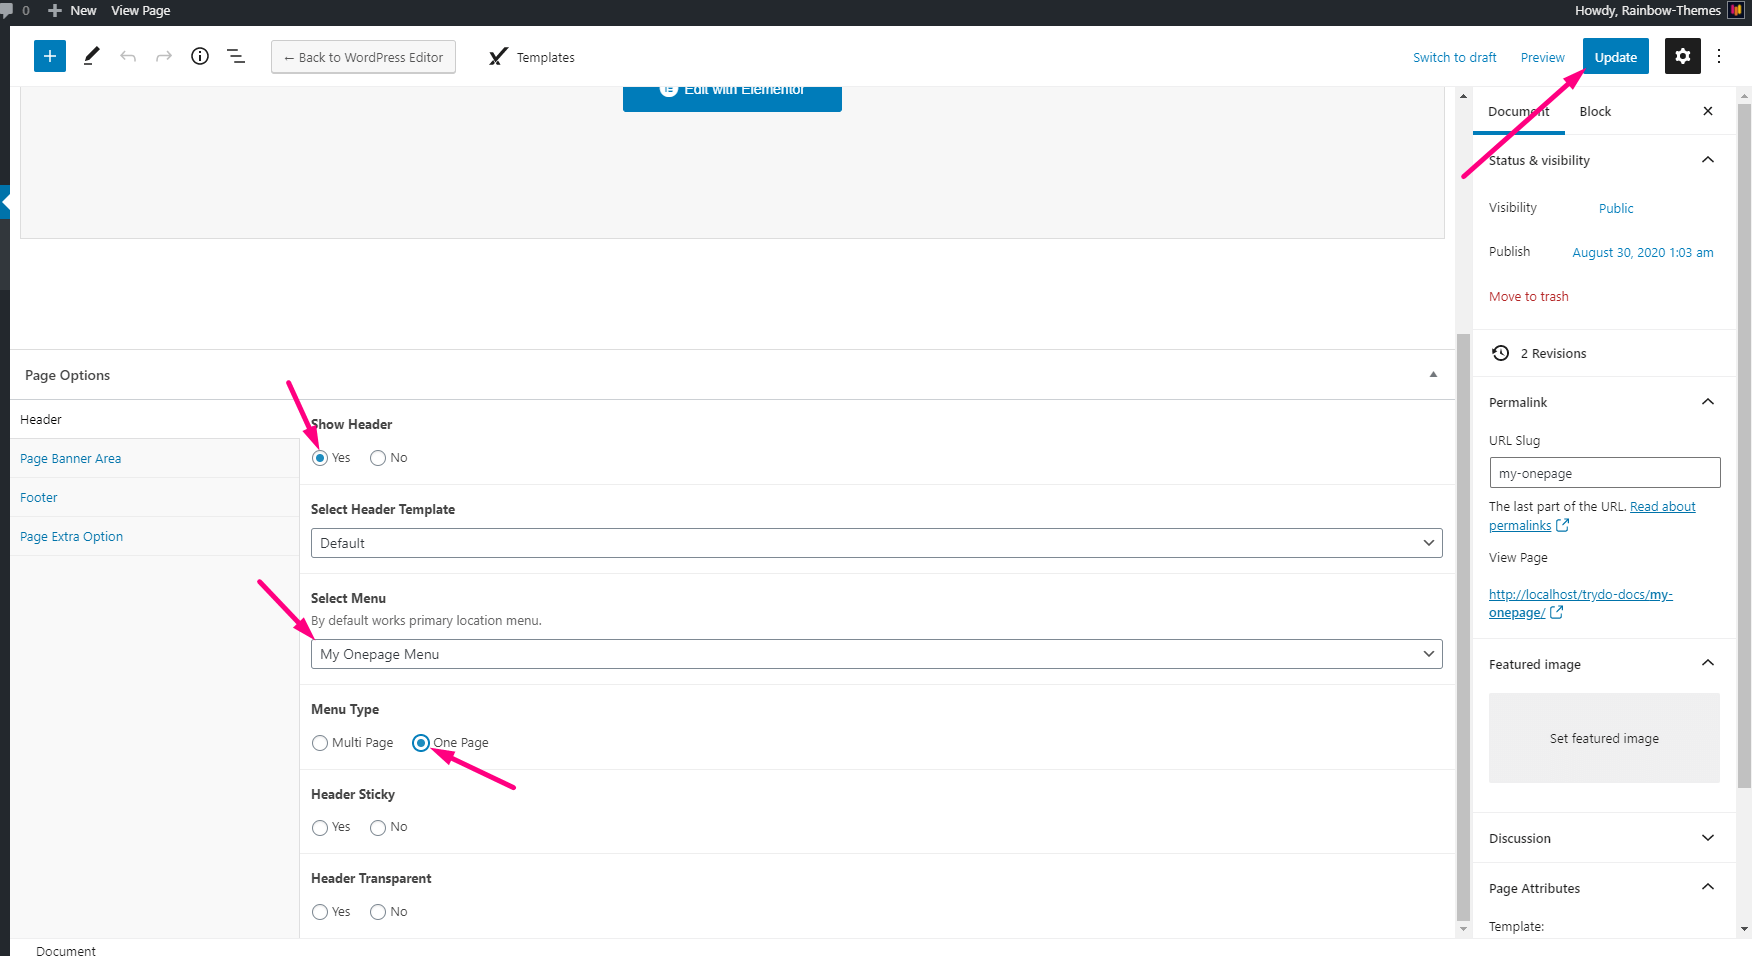
Select Onepage menu for this page from page attributes options
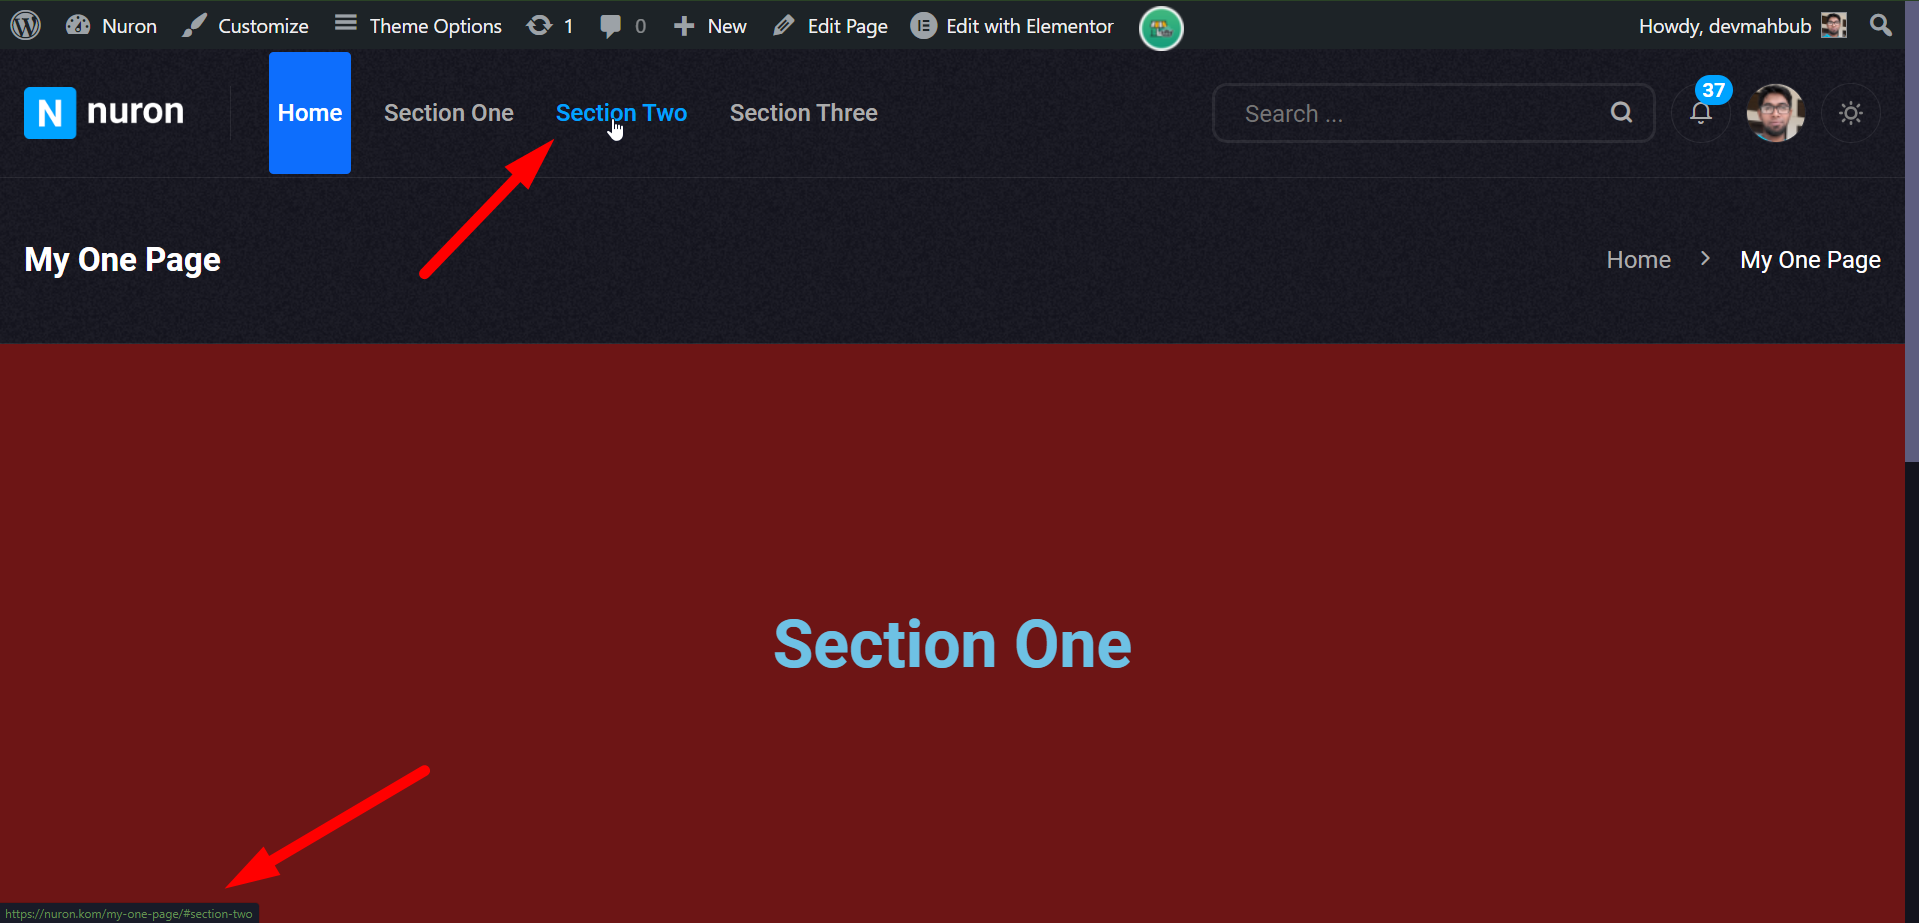
Create a pageAdd content block with "unique ID"Create a new menu for one pageAdd custom link item with section idSet One page menuFrom page attributes sectionOne Page Preview
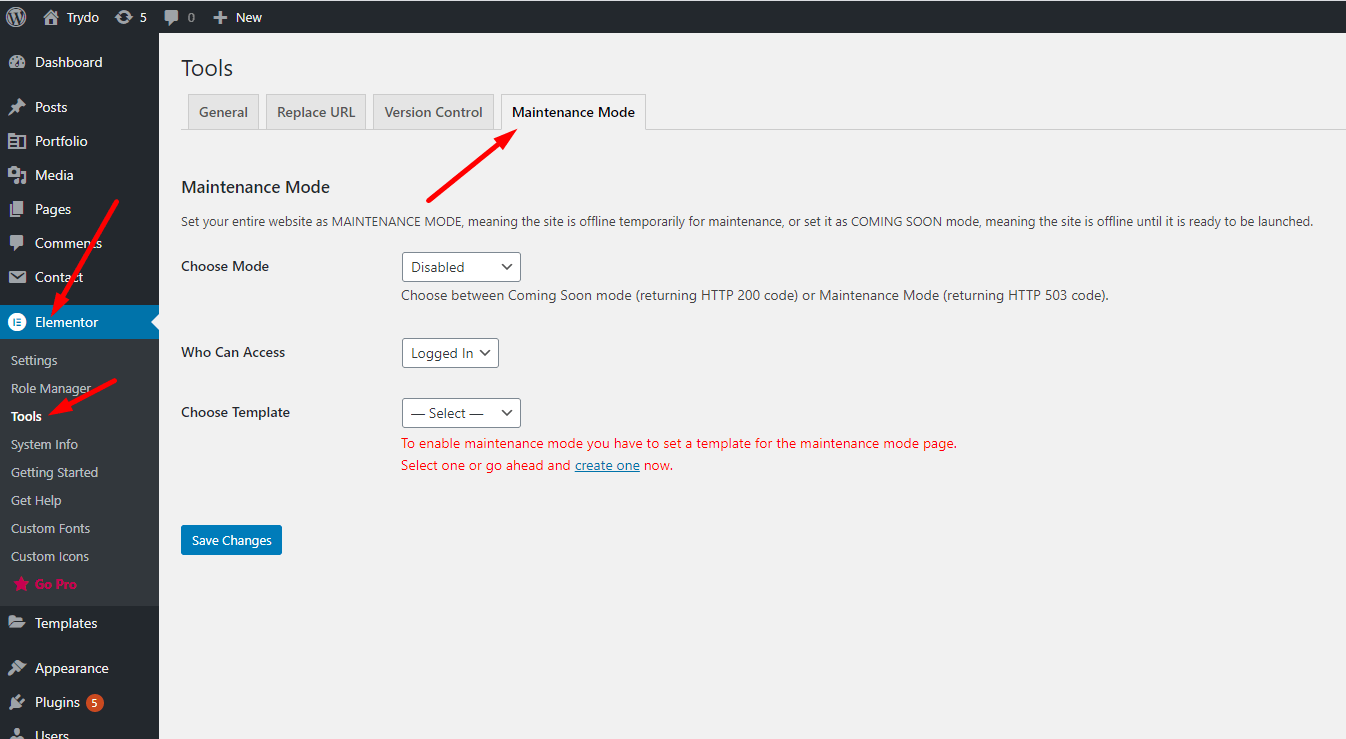
Get back to the WordPress Dashboard and navigate to Elementor Tools Maintenance Mode
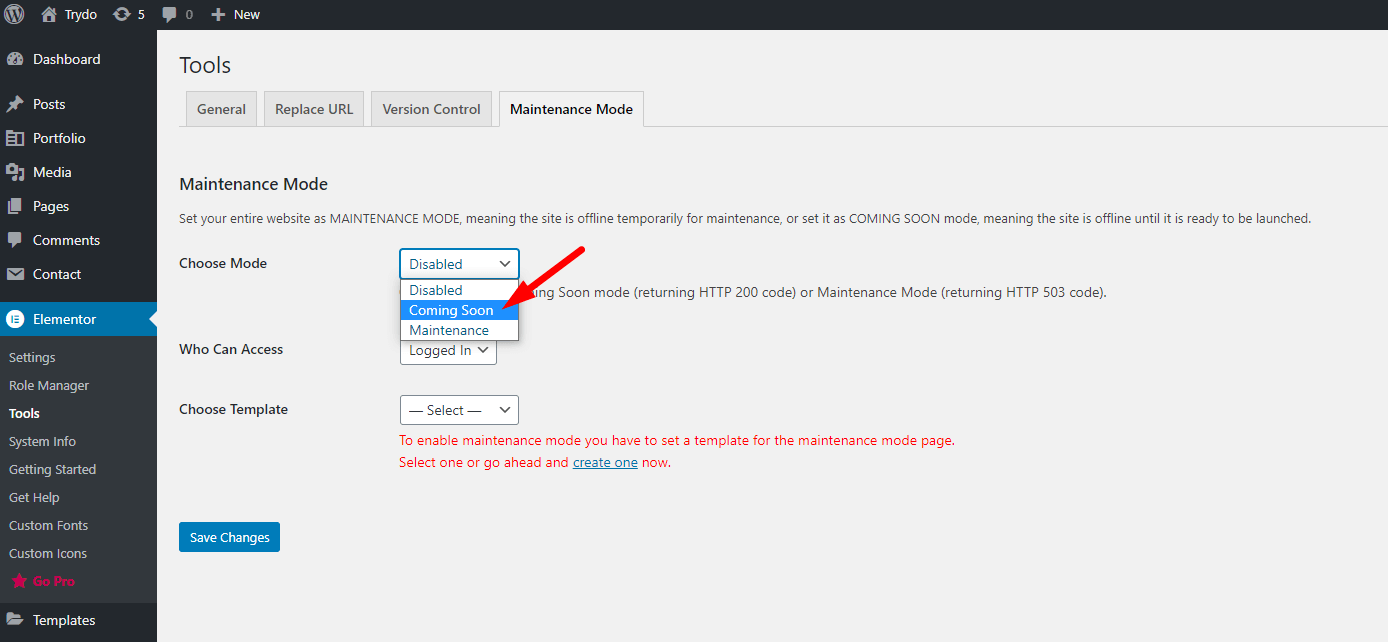
Choose between Coming Soon and Maintenance Mode
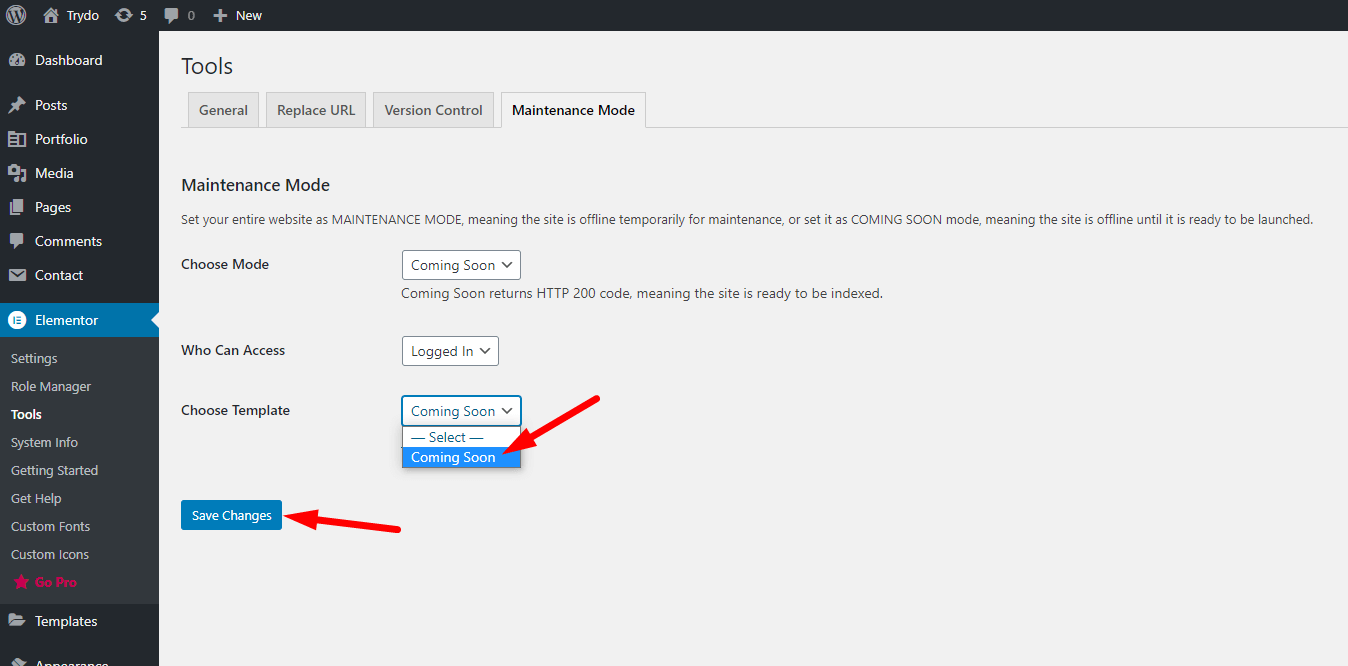
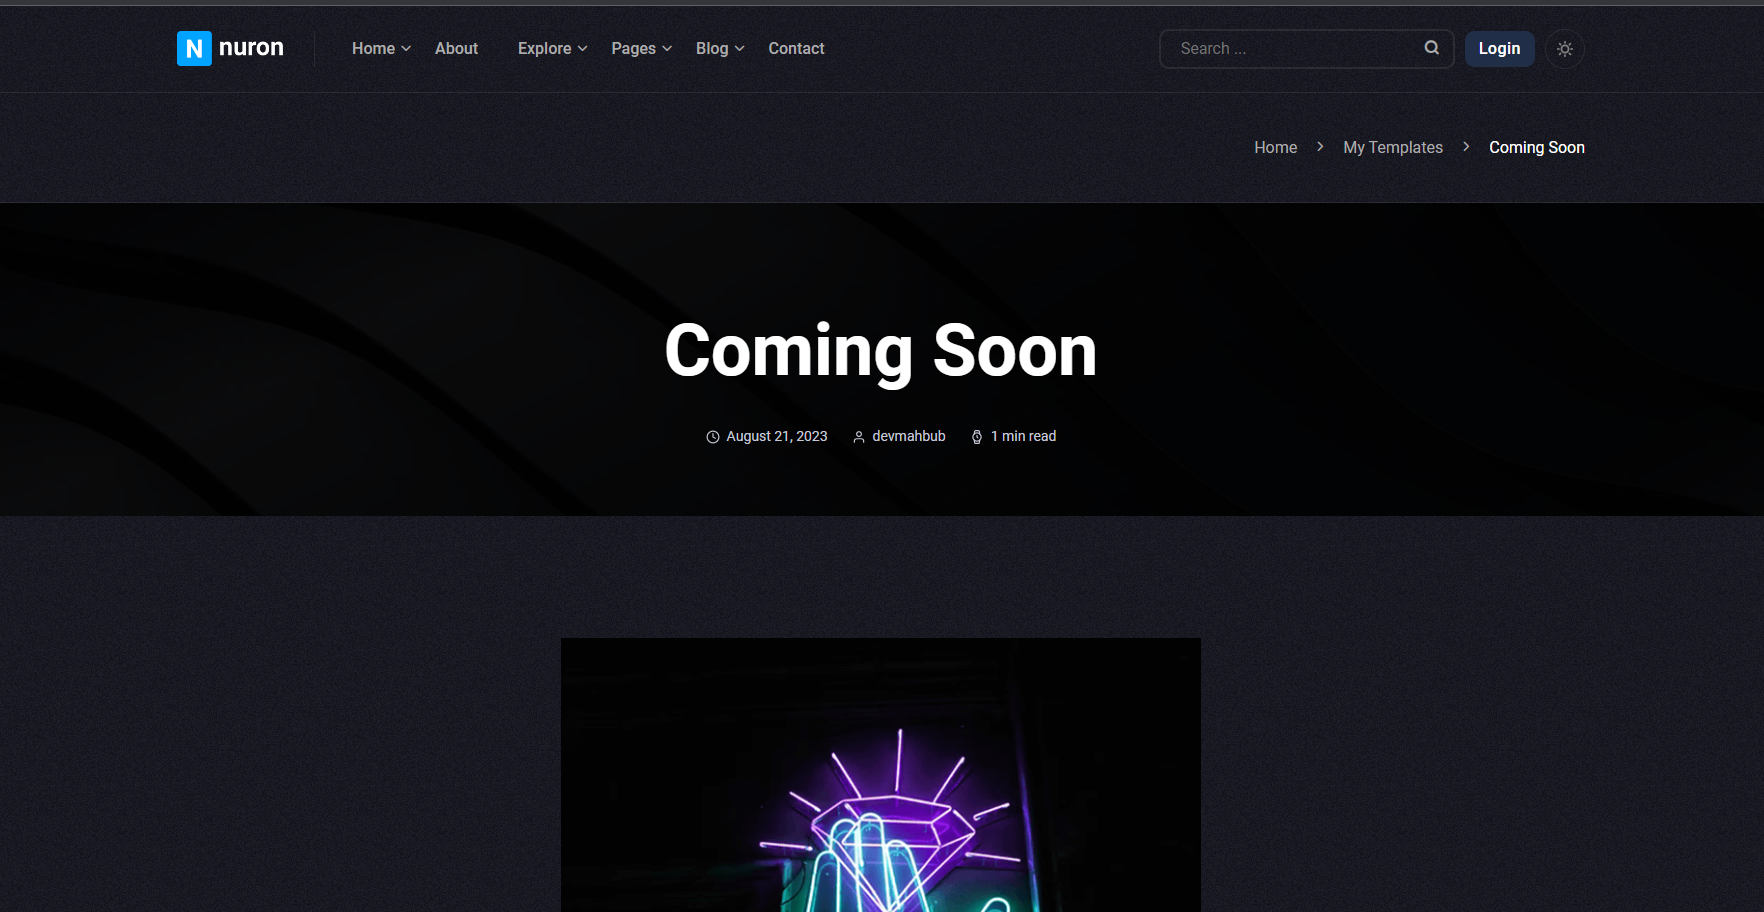
Pick the template for the Coming Soon Mode. Template name "Coming Soon"
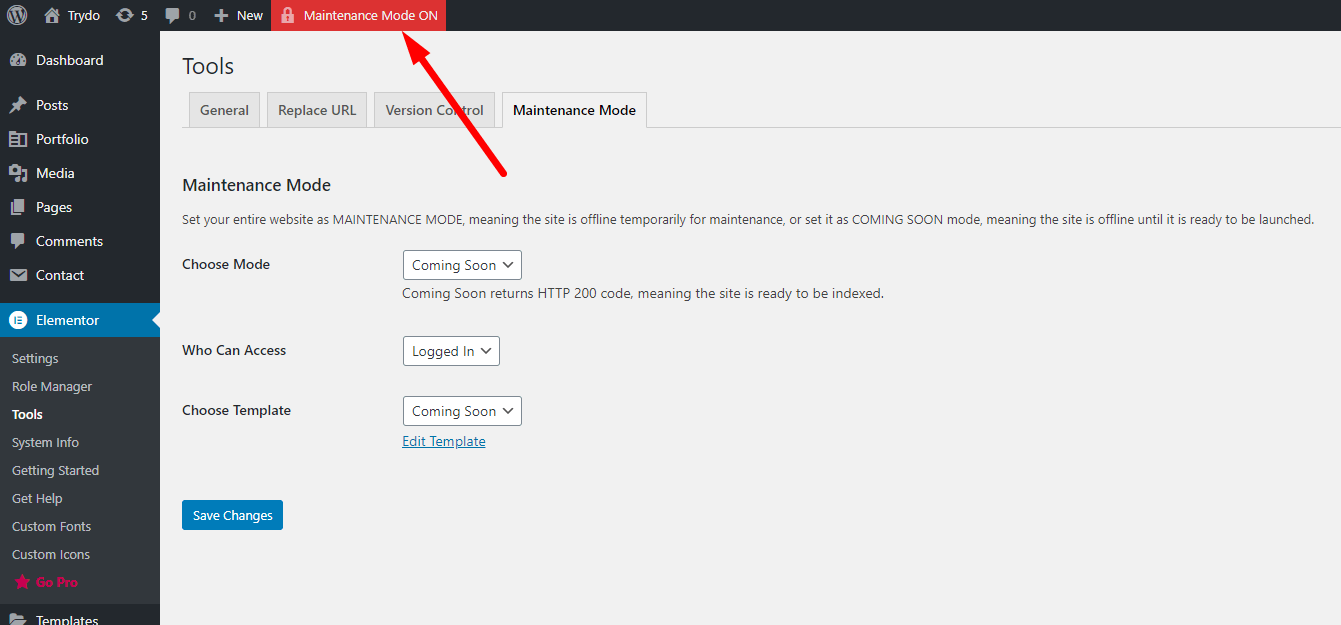
Note: You will see a red button on your top WordPress bar with the text: " Maintenance Mode ON".
Tip: You can use the same process described here for "Maintenance Mode"
Elementor > Tools > Maintenance ModeChoose between Coming Soon and Maintenance Mode Pick the template for the Coming Soon Mode. Template name "Coming Soon" and click the save change buttonMaintenance Mode ONActive Coming Soon Mode
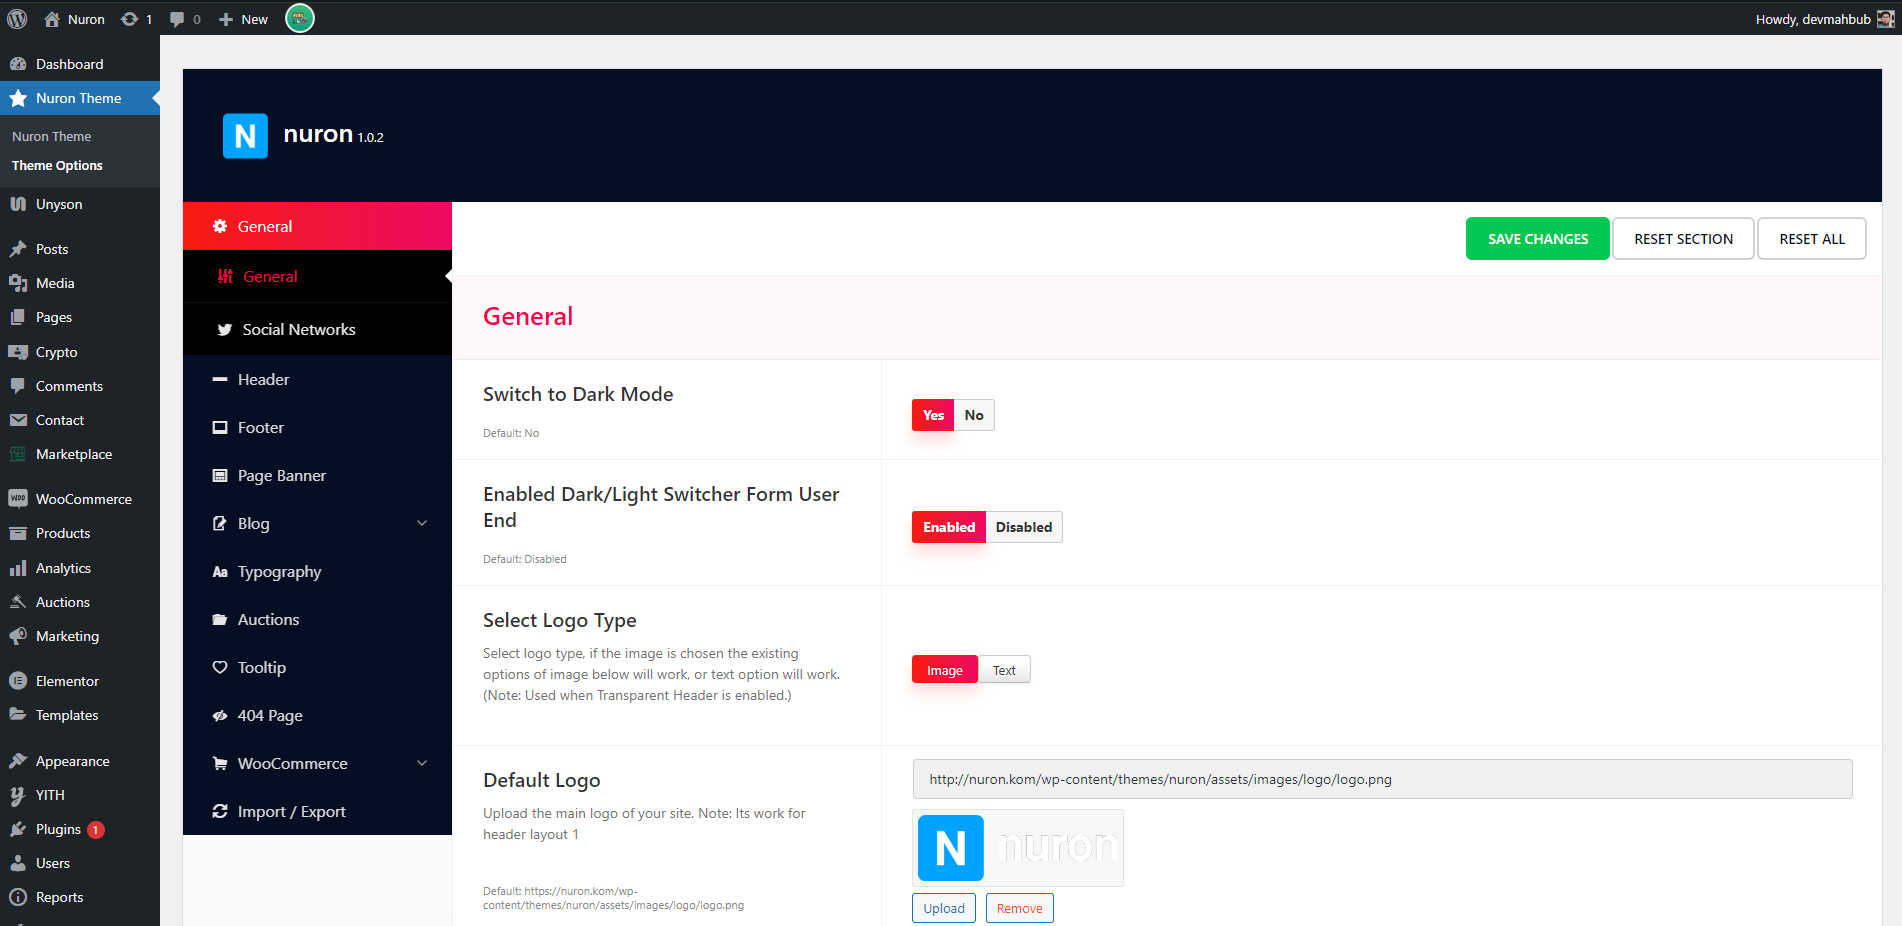
General
To change Nuron General Options navigate to Nuron Theme Theme Options General
General menu contains such tabs as website logo settings.
The logo can be uploaded in 4 variants. This is very helpful in case you have pages with different backgrounds and are using a transparent header. It makes you available to choose the logo which looks the best for each of your pages individually.
General
Social Networks
To change Social Networks Options navigate to Nuron Theme Theme Options Social Networks
Pul your social profile link here.
Add your link here
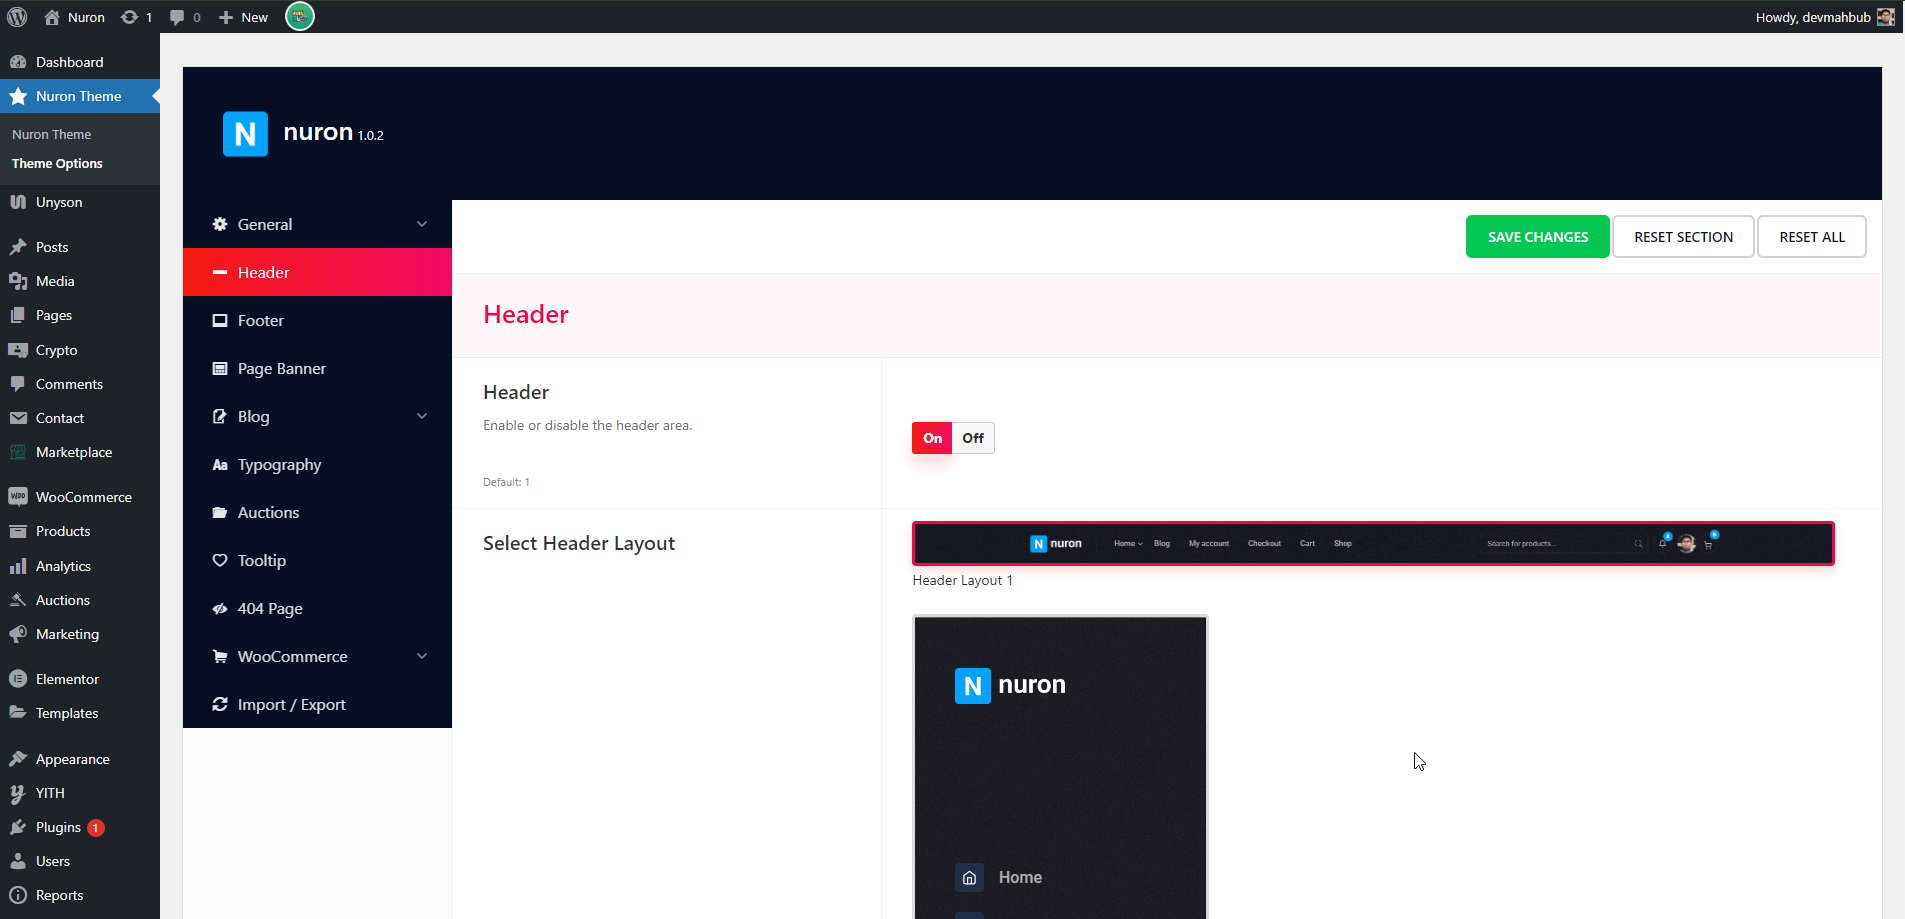
Header
To change Header Layout and setting, navigate to Nuron Theme Theme Options Header
Change Header Setting
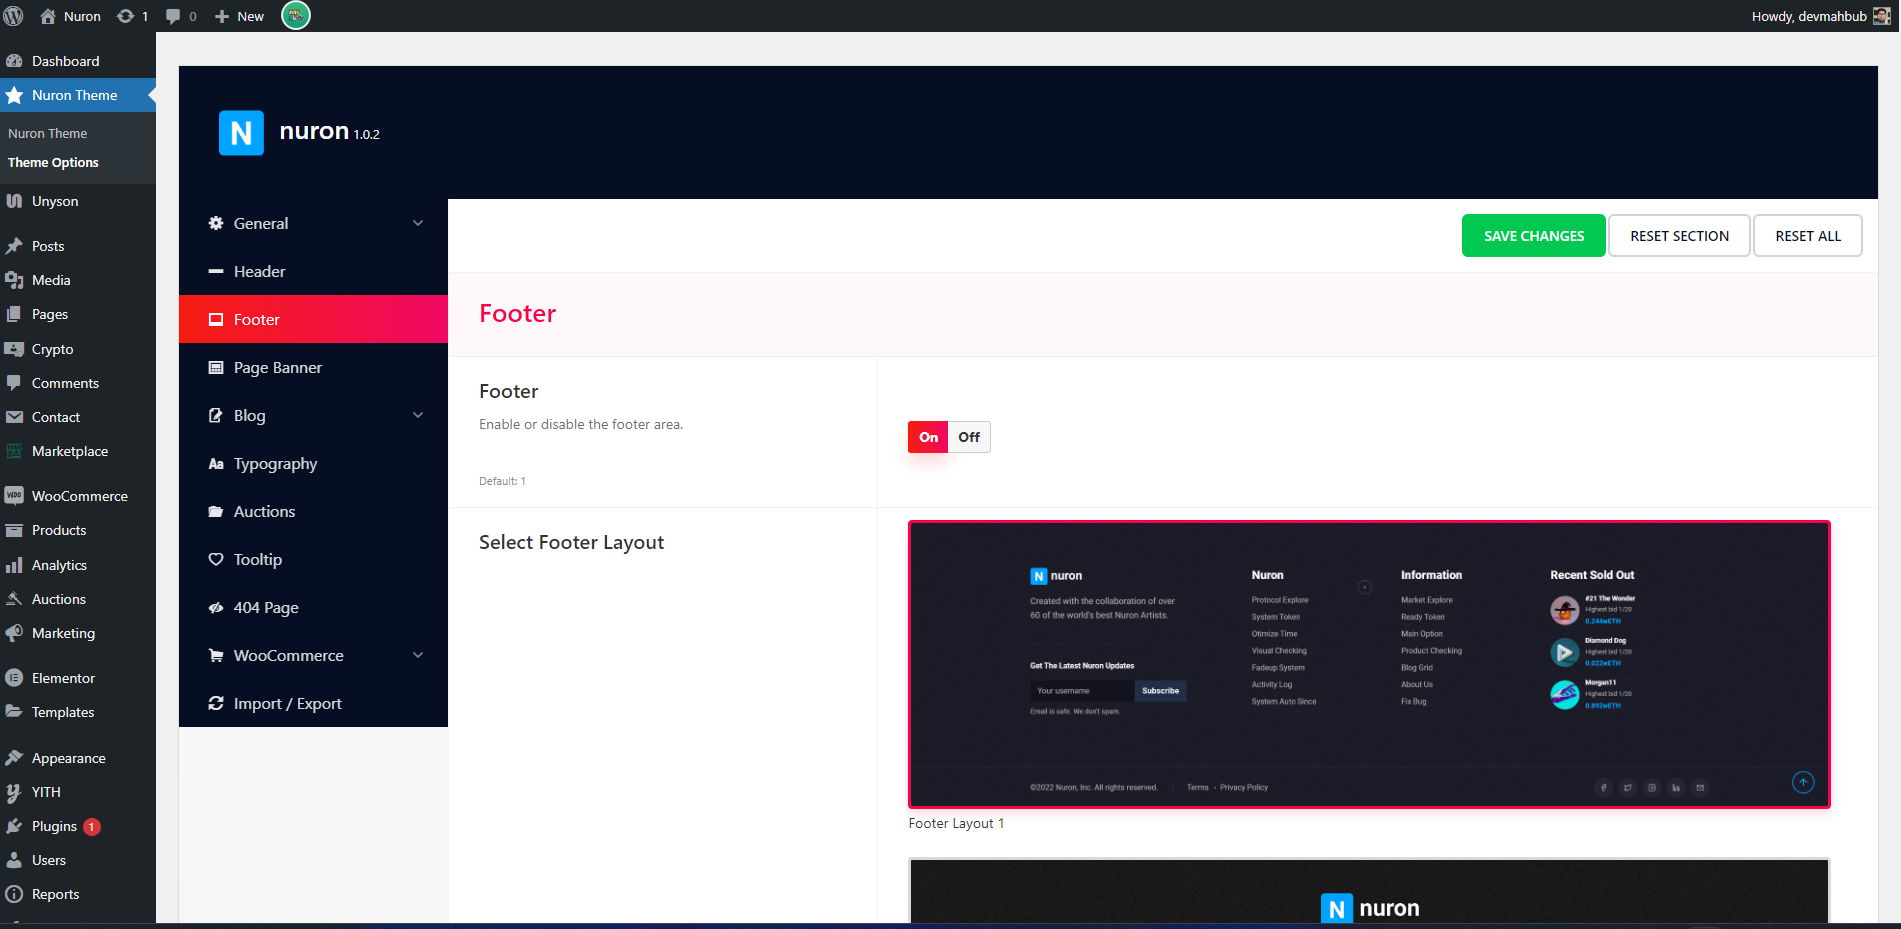
Footer
To change Footer Layout and setting, navigate to Nuron Theme Theme Options Footer
Change Footer Setting
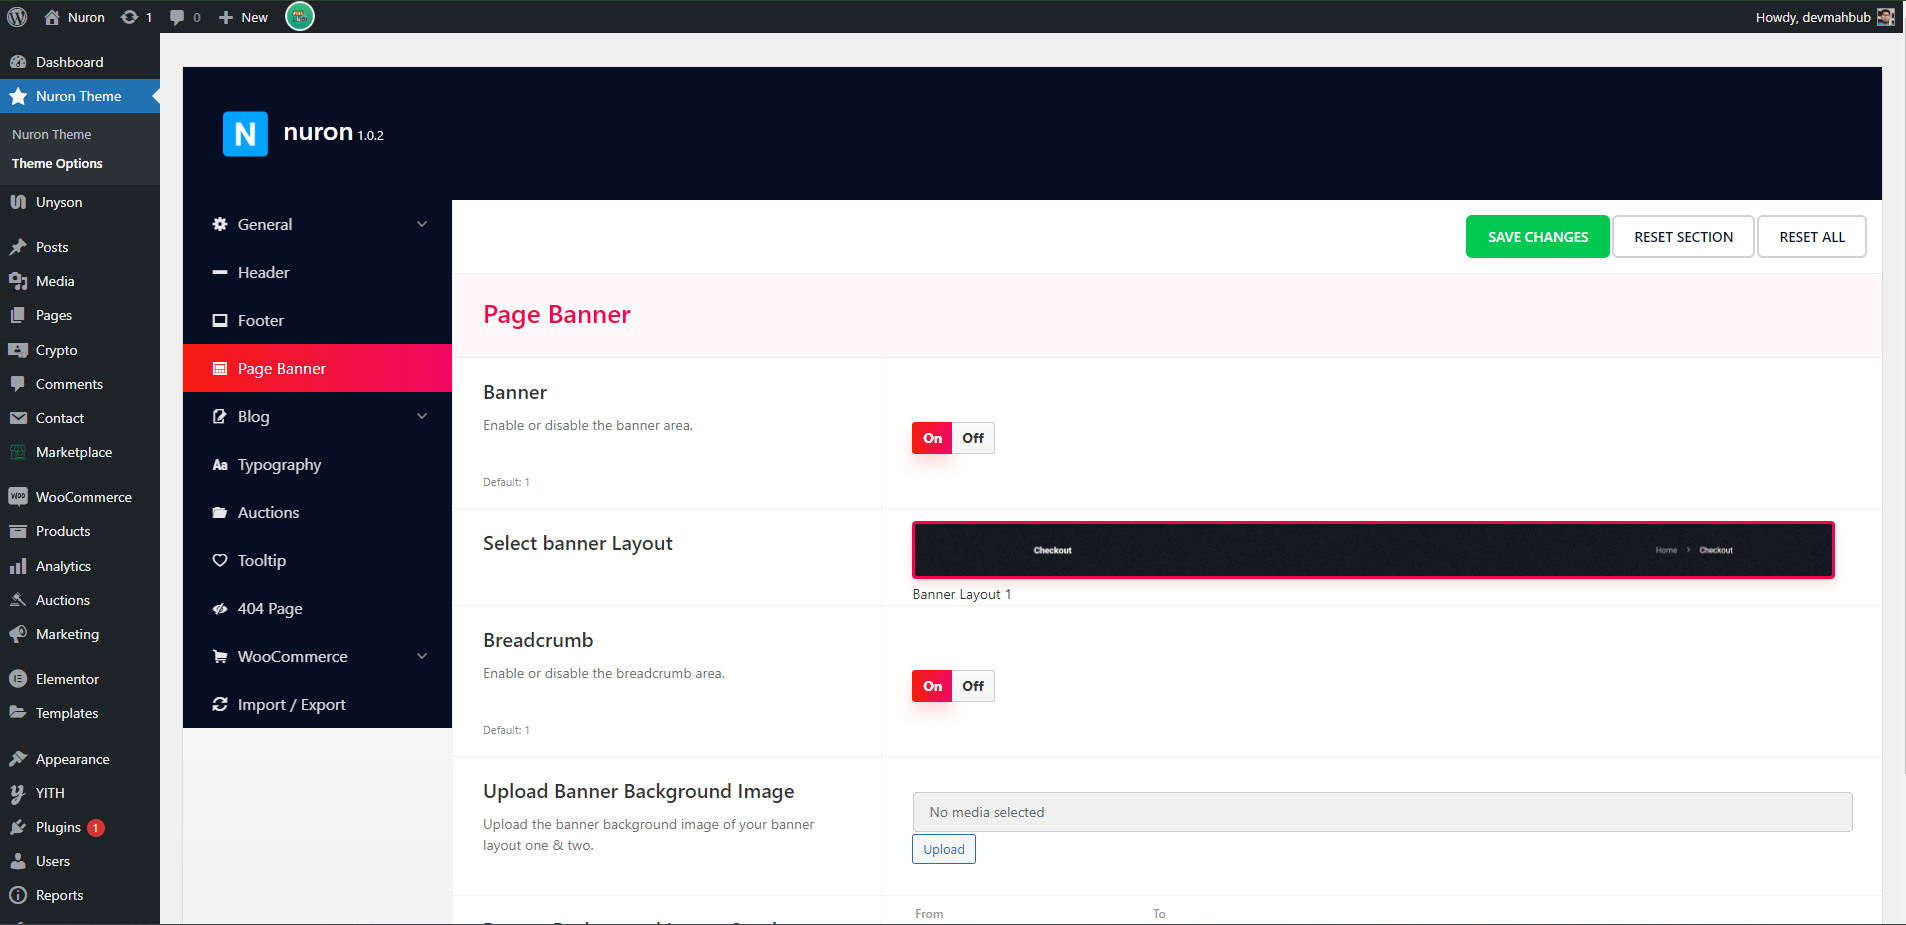
Page Banner
To change Page Banner Layout and setting, navigate to Nuron Theme Theme Options Page Banner
Change Page Banner Setting
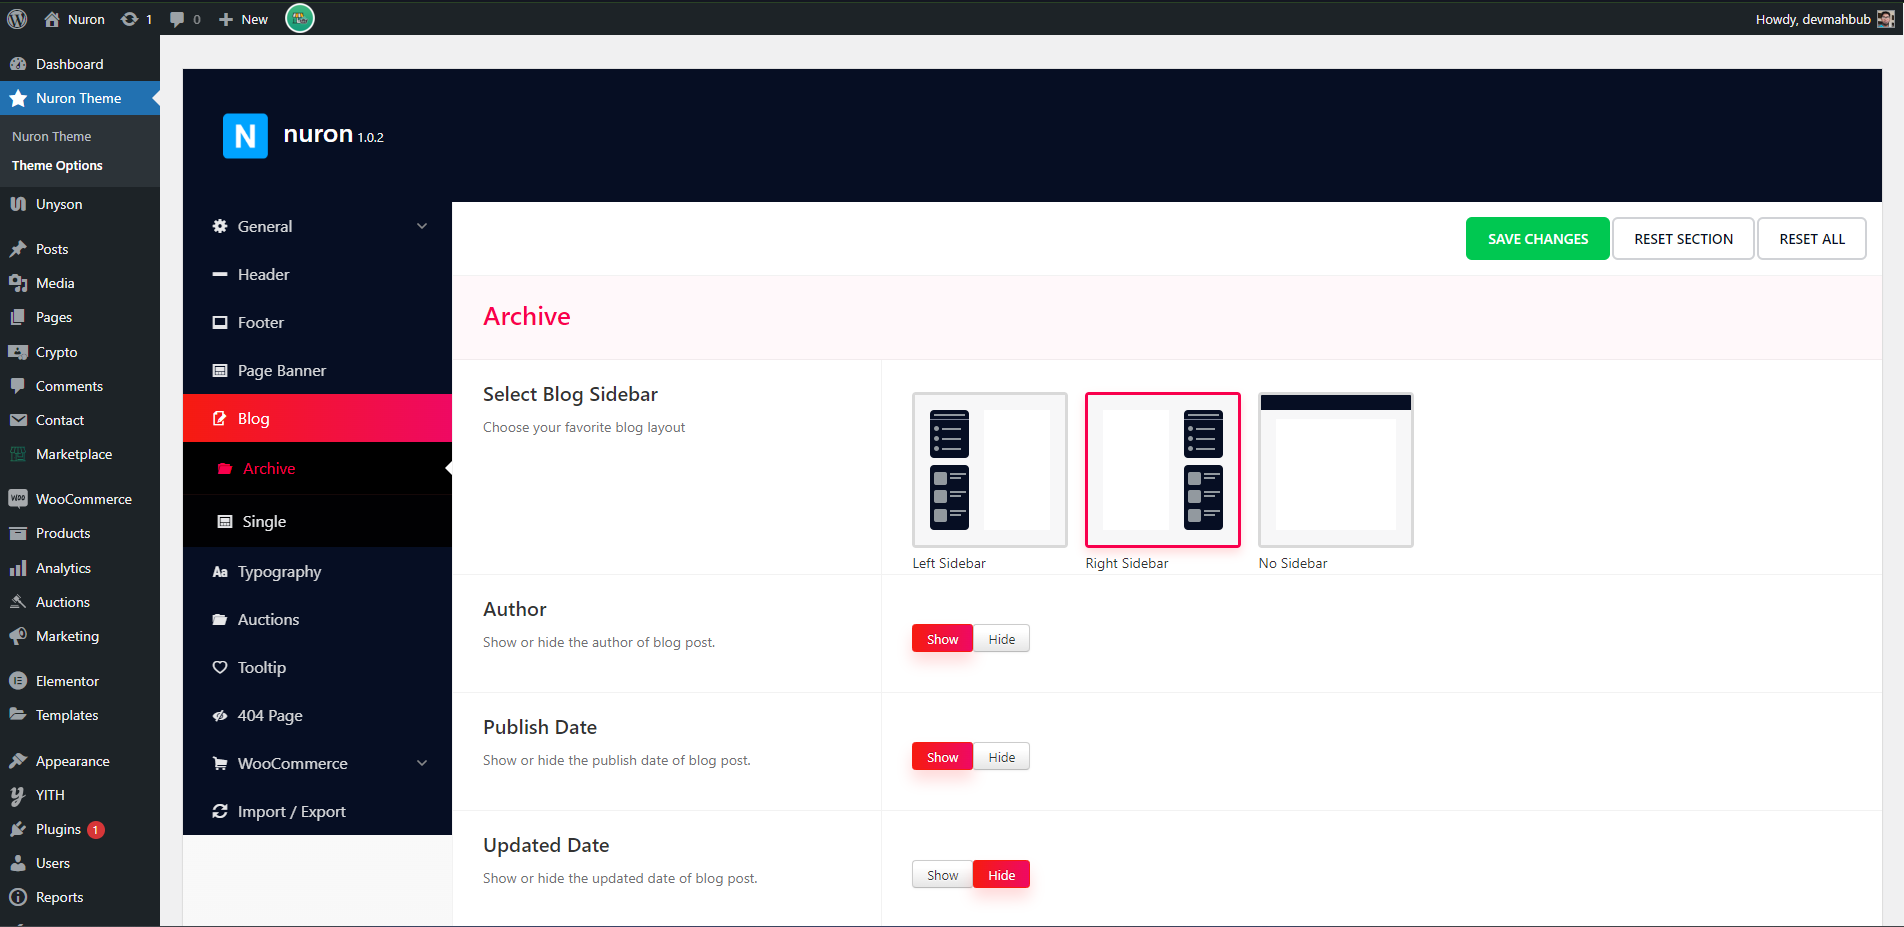
Blog Archive
To change Blog Archive setting, navigate to Nuron Theme Theme Options Blog Archive
Change Blog Archive Setting
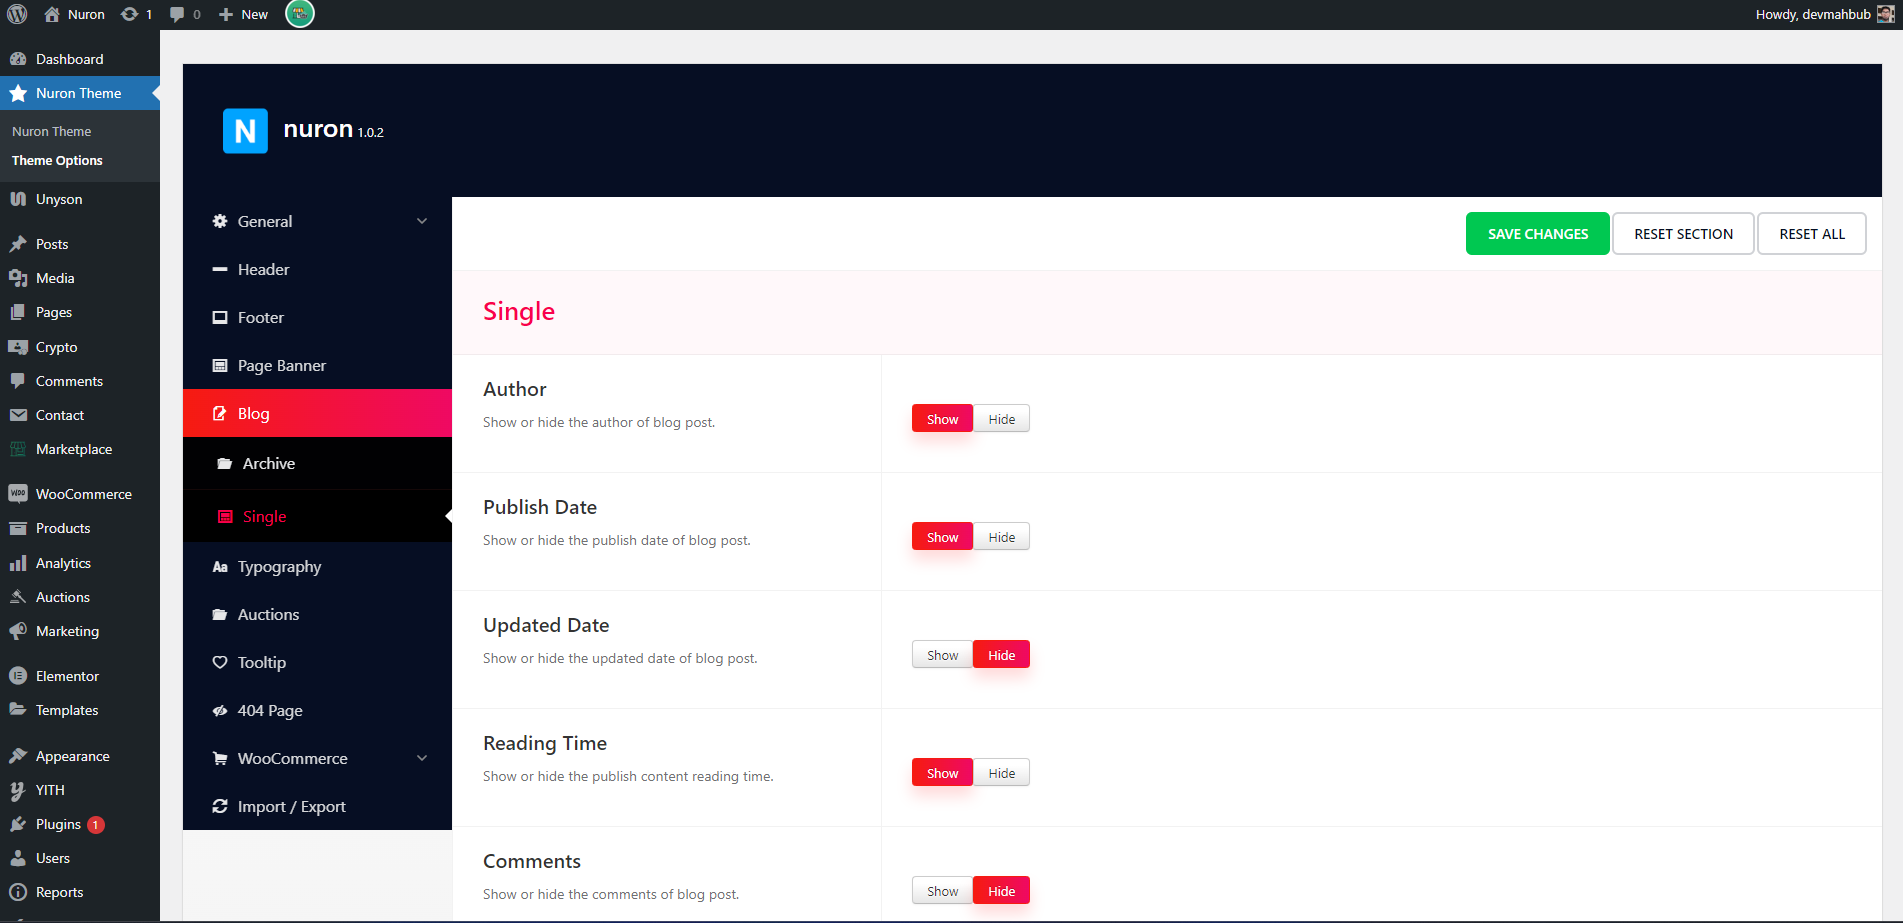
Blog Single
To change Blog Single setting, navigate to Nuron Theme Theme Options Blog Single
Change Blog Single Setting
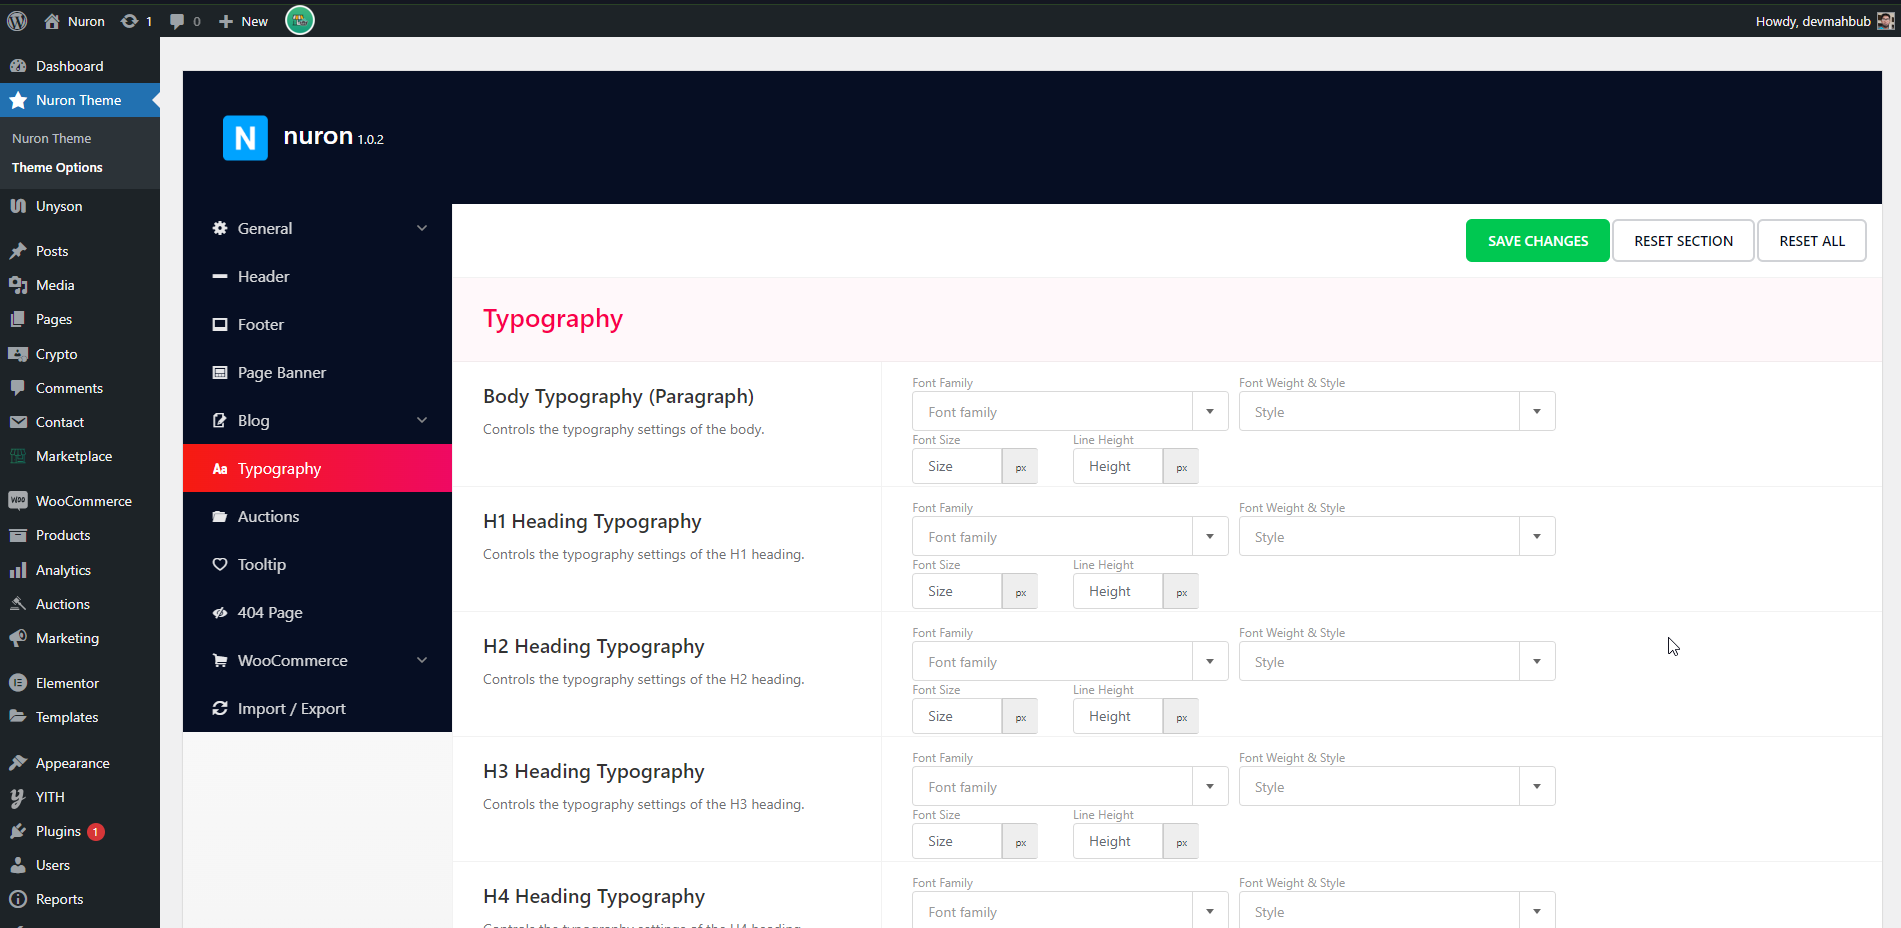
Typography
To change Typography setting, navigate to Nuron Theme Theme Options Typography
Change Typography Setting
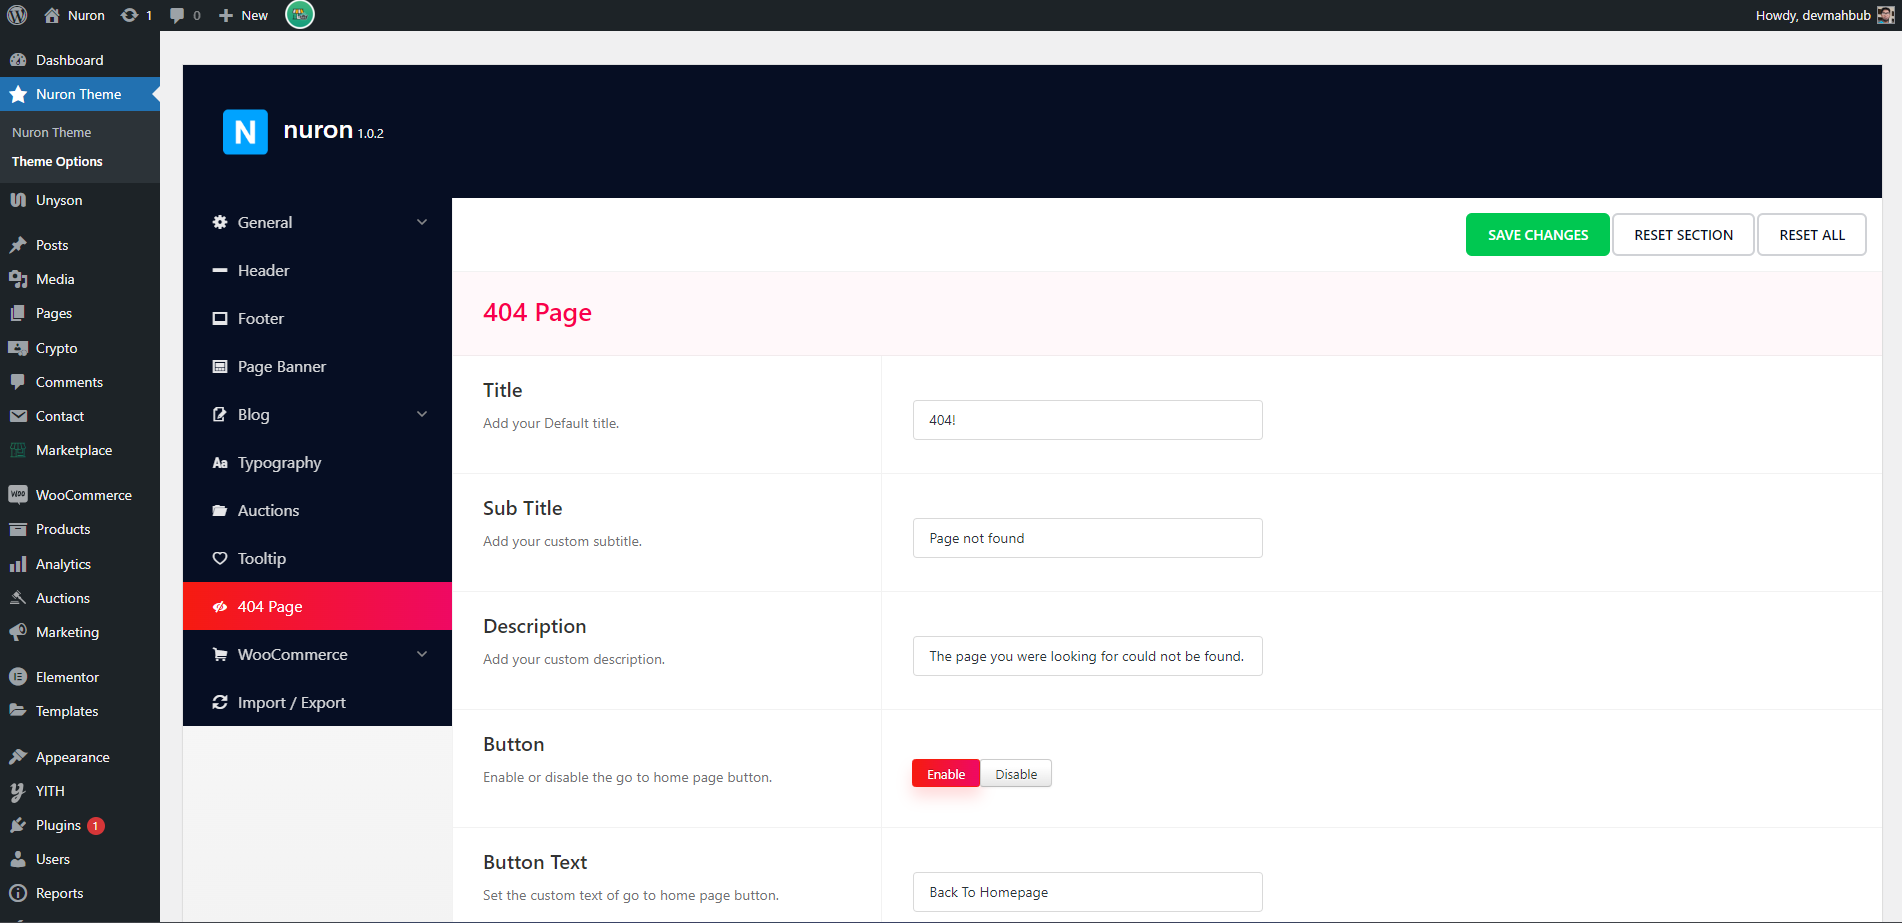
404 Page
To change 404 Page setting, navigate to Nuron Theme Theme Options 404 Page
Change 404 Page Setting
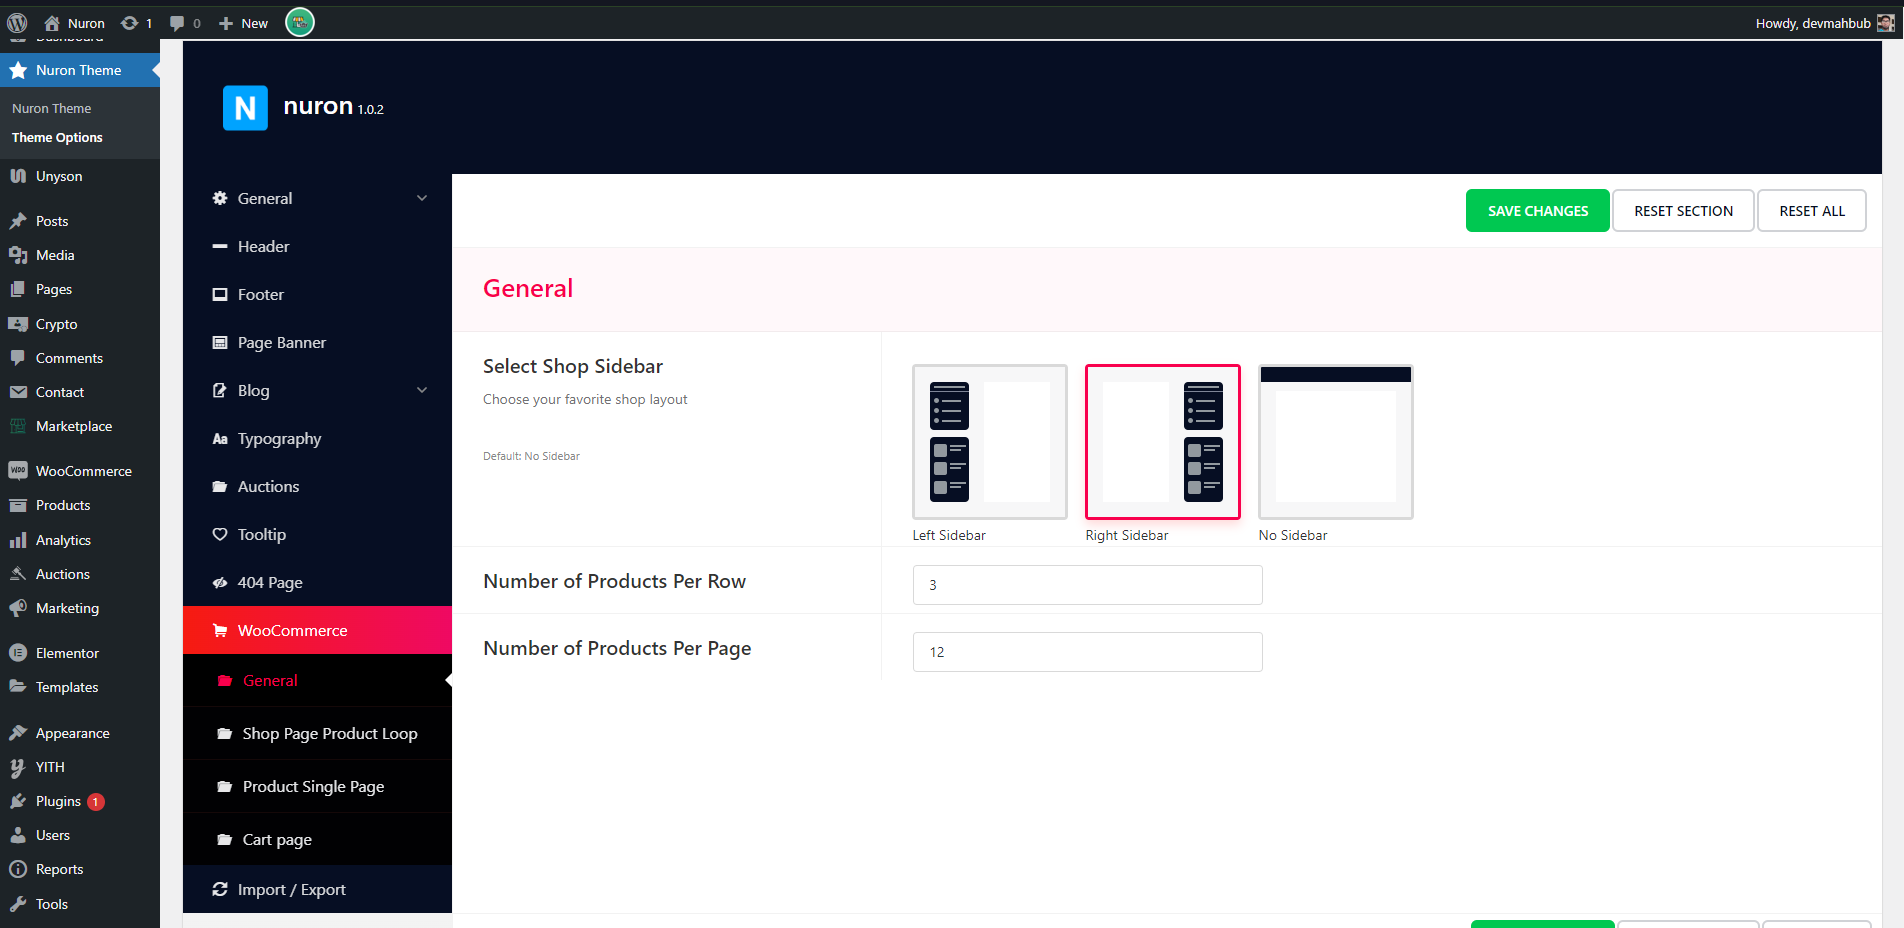
WooCommerce
To WooCommerce setting, navigate to Nuron Theme Theme Options WooCommerce
WooCommerce setting
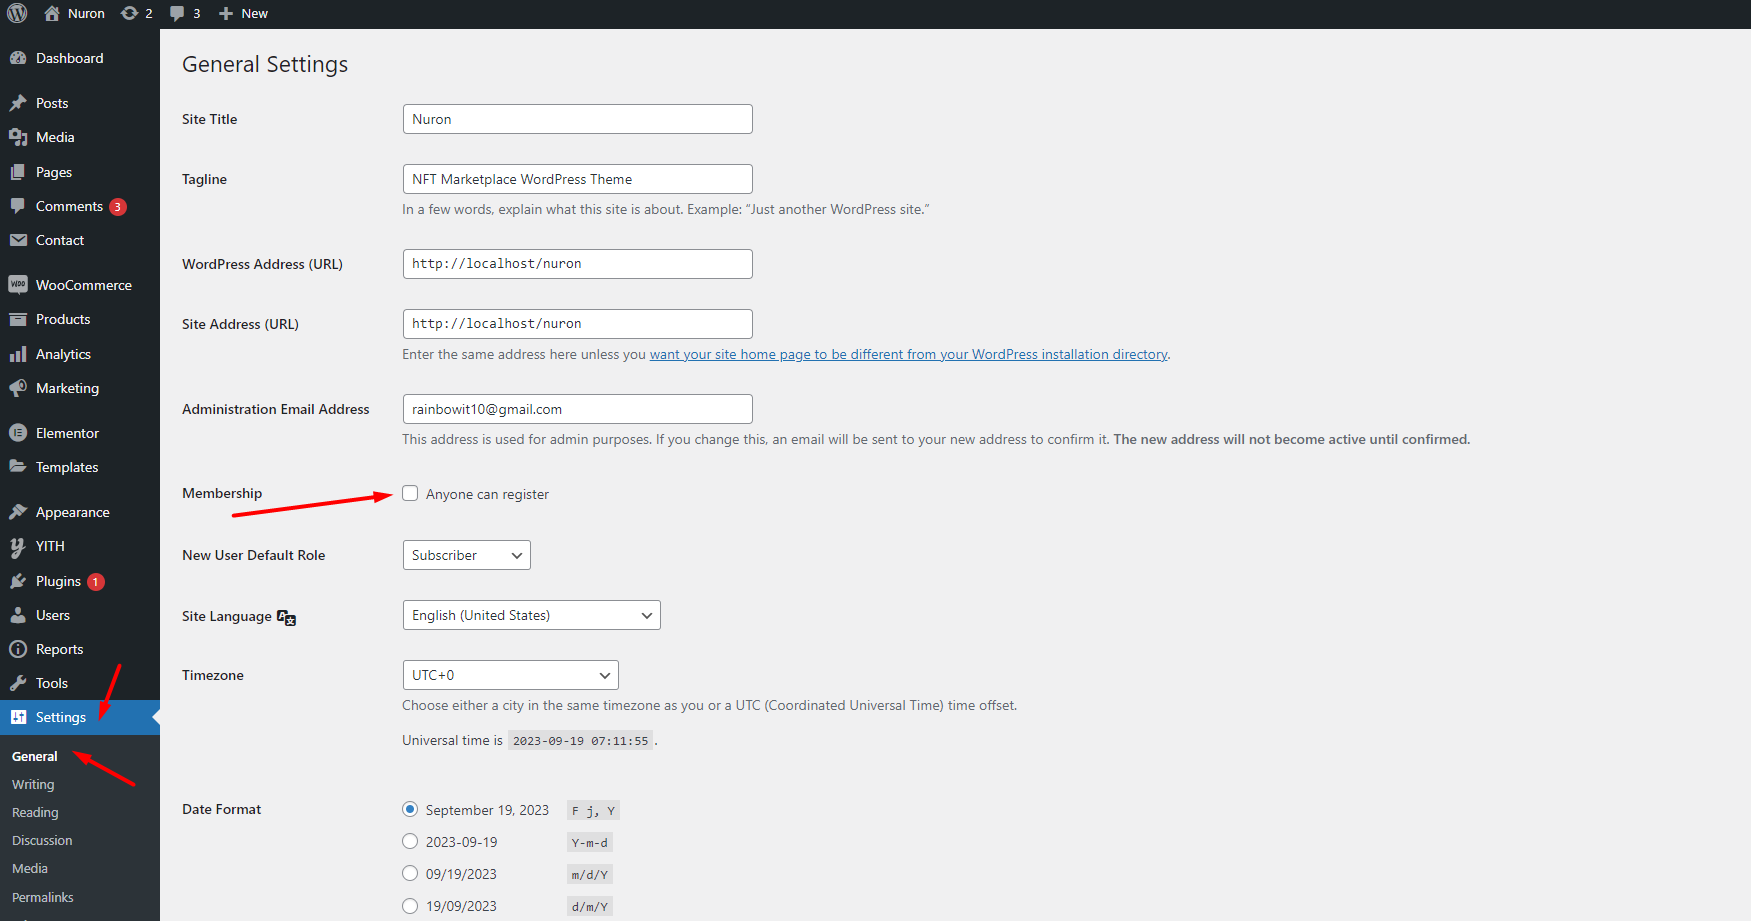
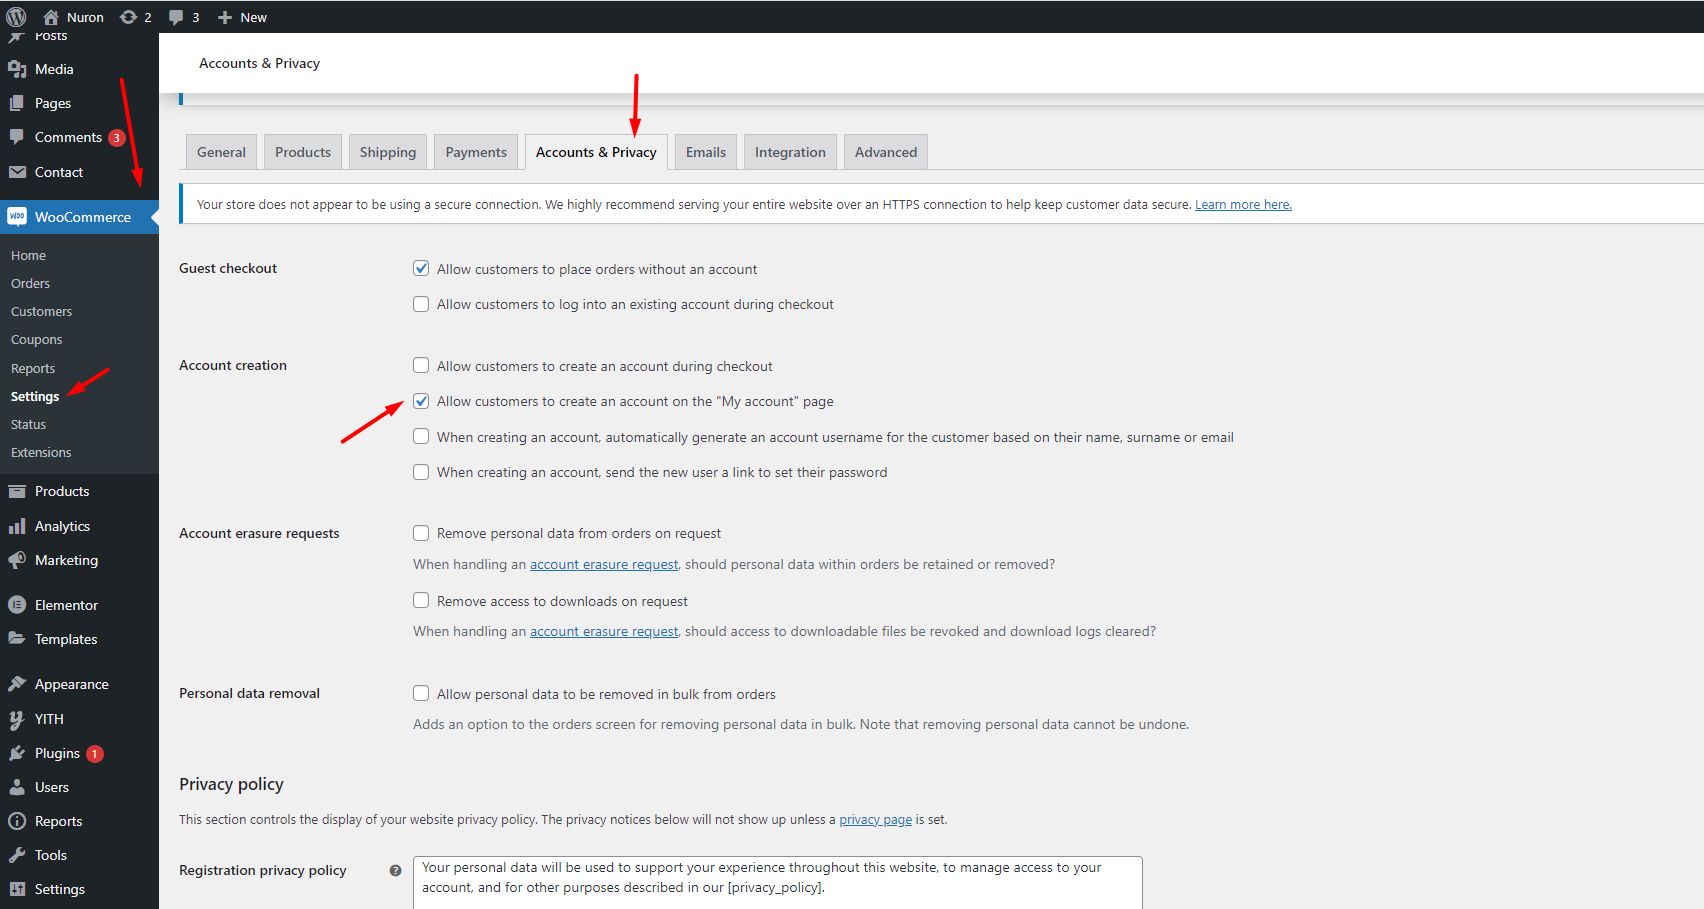
Allow Account Registration
To allow for account registration
Please make sure that in Dashboard Settings General Anyone can register is turned on
And also in Woocommerce Settings Accounts and Privacy Allow customers to create an account on the "My account" page
Anyone can registerAllow customers to create an account
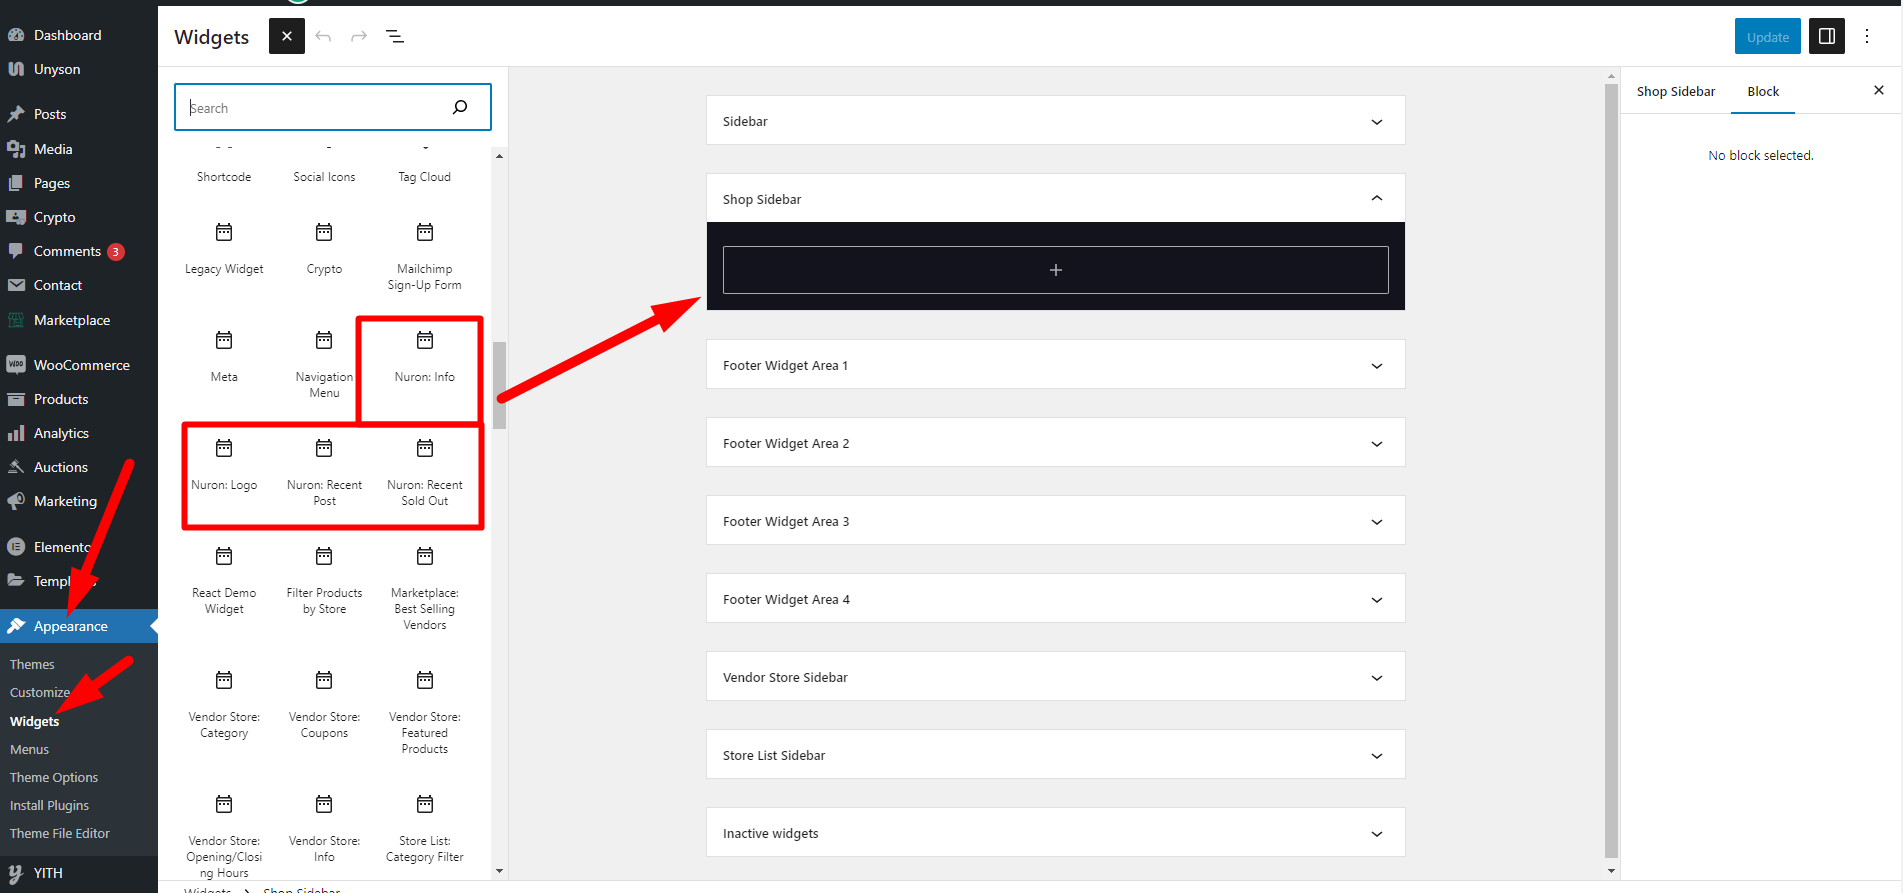
Default Widget
A widget adds content and features to a widget area (also called a sidebar). Widget areas provide a way for users to customize their site. A widget area can appear on multiple pages or on only one page. Your theme might have just one widget area or many of them.
Default Widget/Addons
Add Auction Product
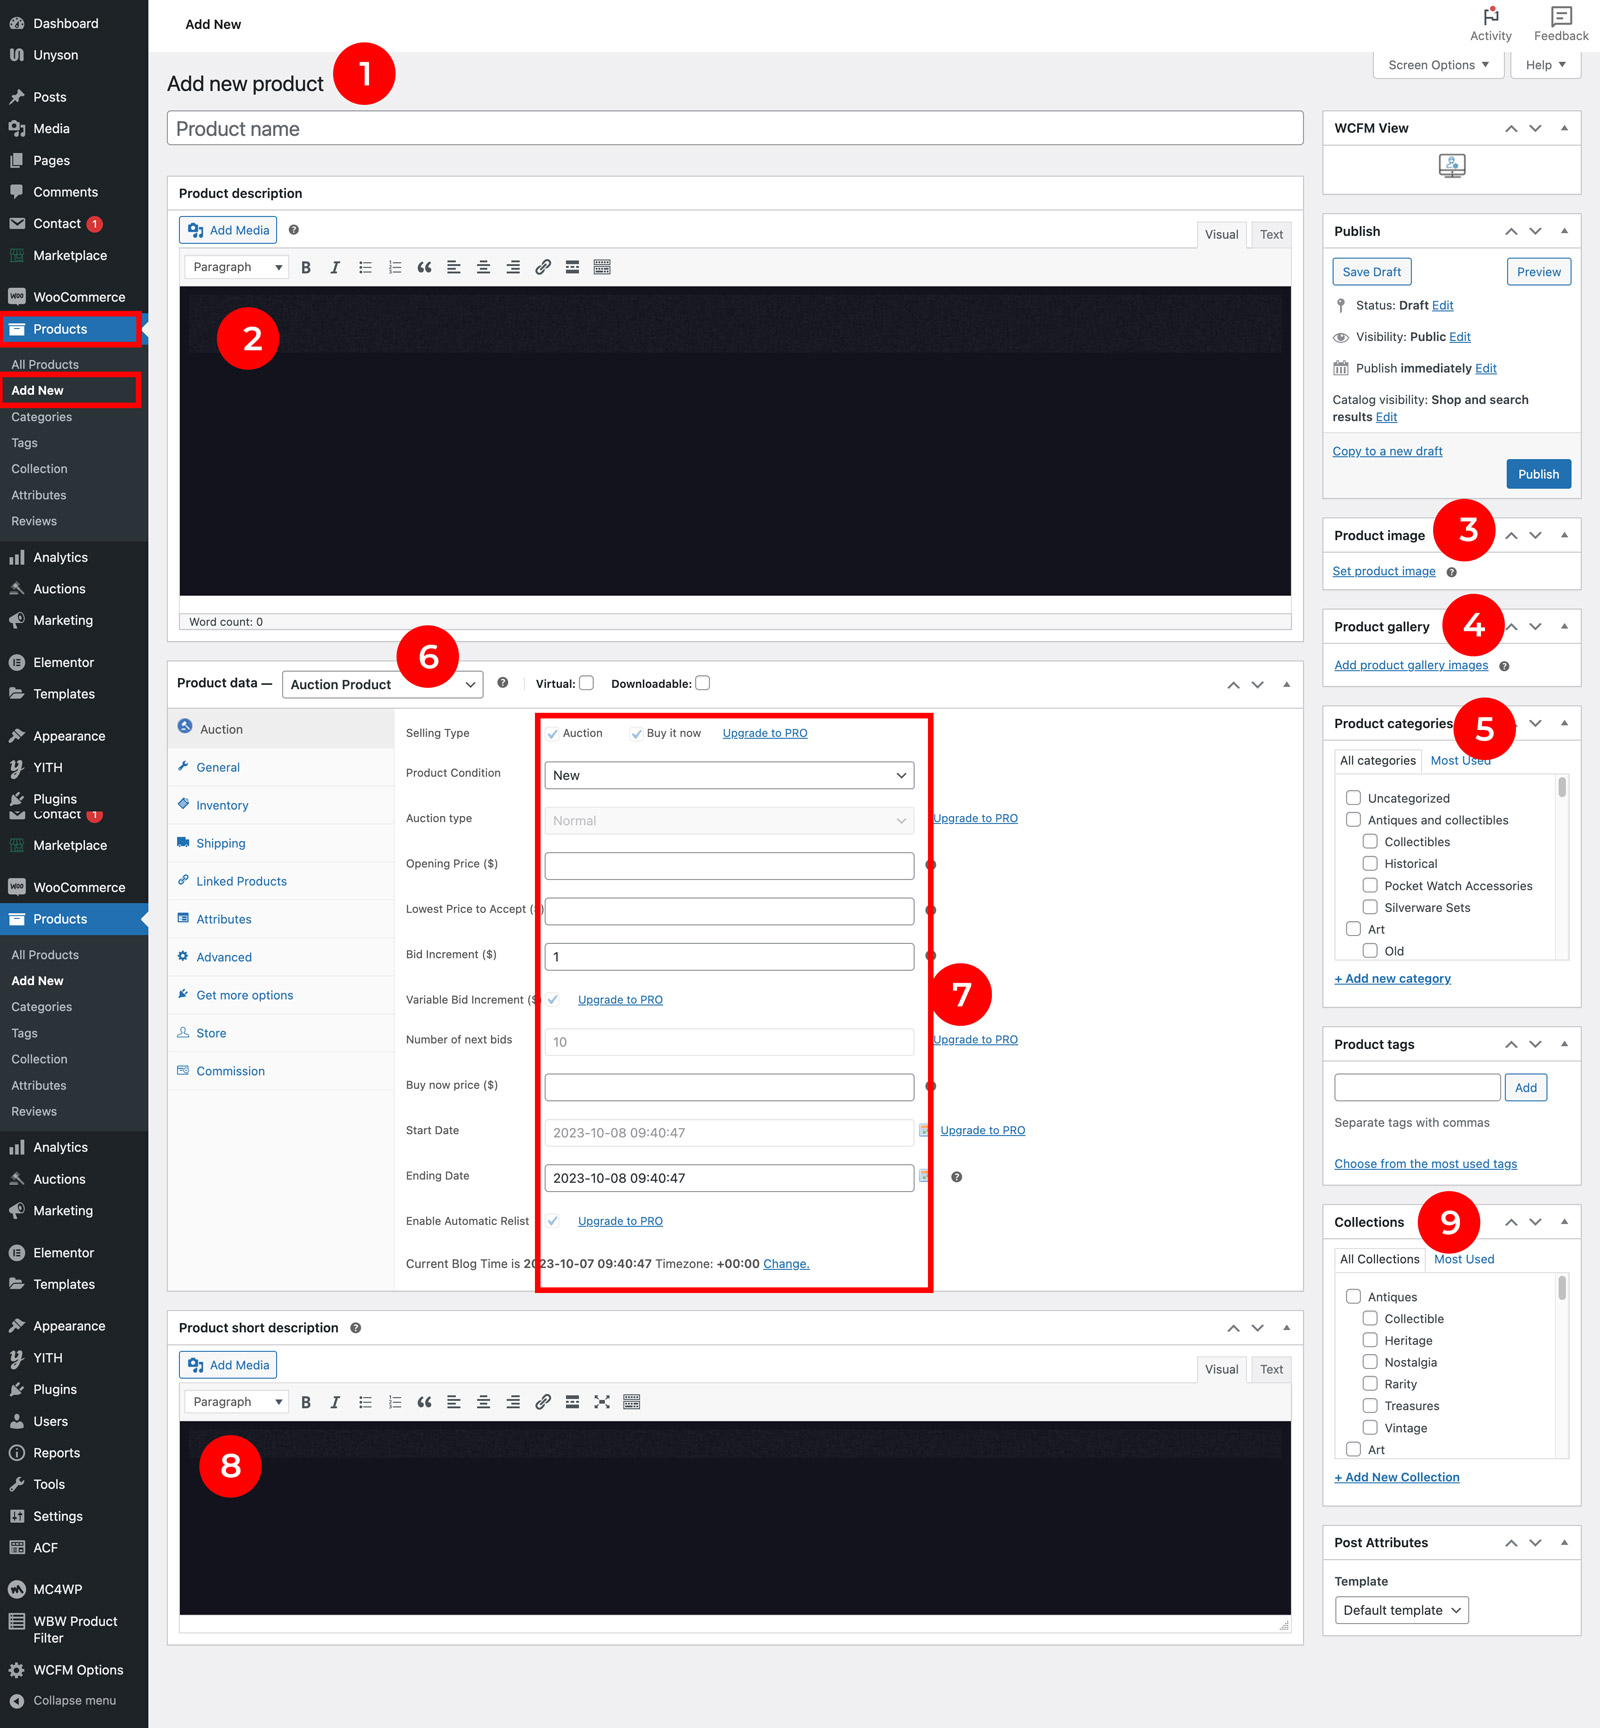
Please follow the instructions below:
From the dashboard go to Products Add new and Name of the product
Product Discription
Select Product Image
Select More Product Image for Gallary
Select Product categories
Select Auction Product
Auction Details
Product Short Discription
Select Product collections
Click Publish Button
Add an auction Product
Create NFT
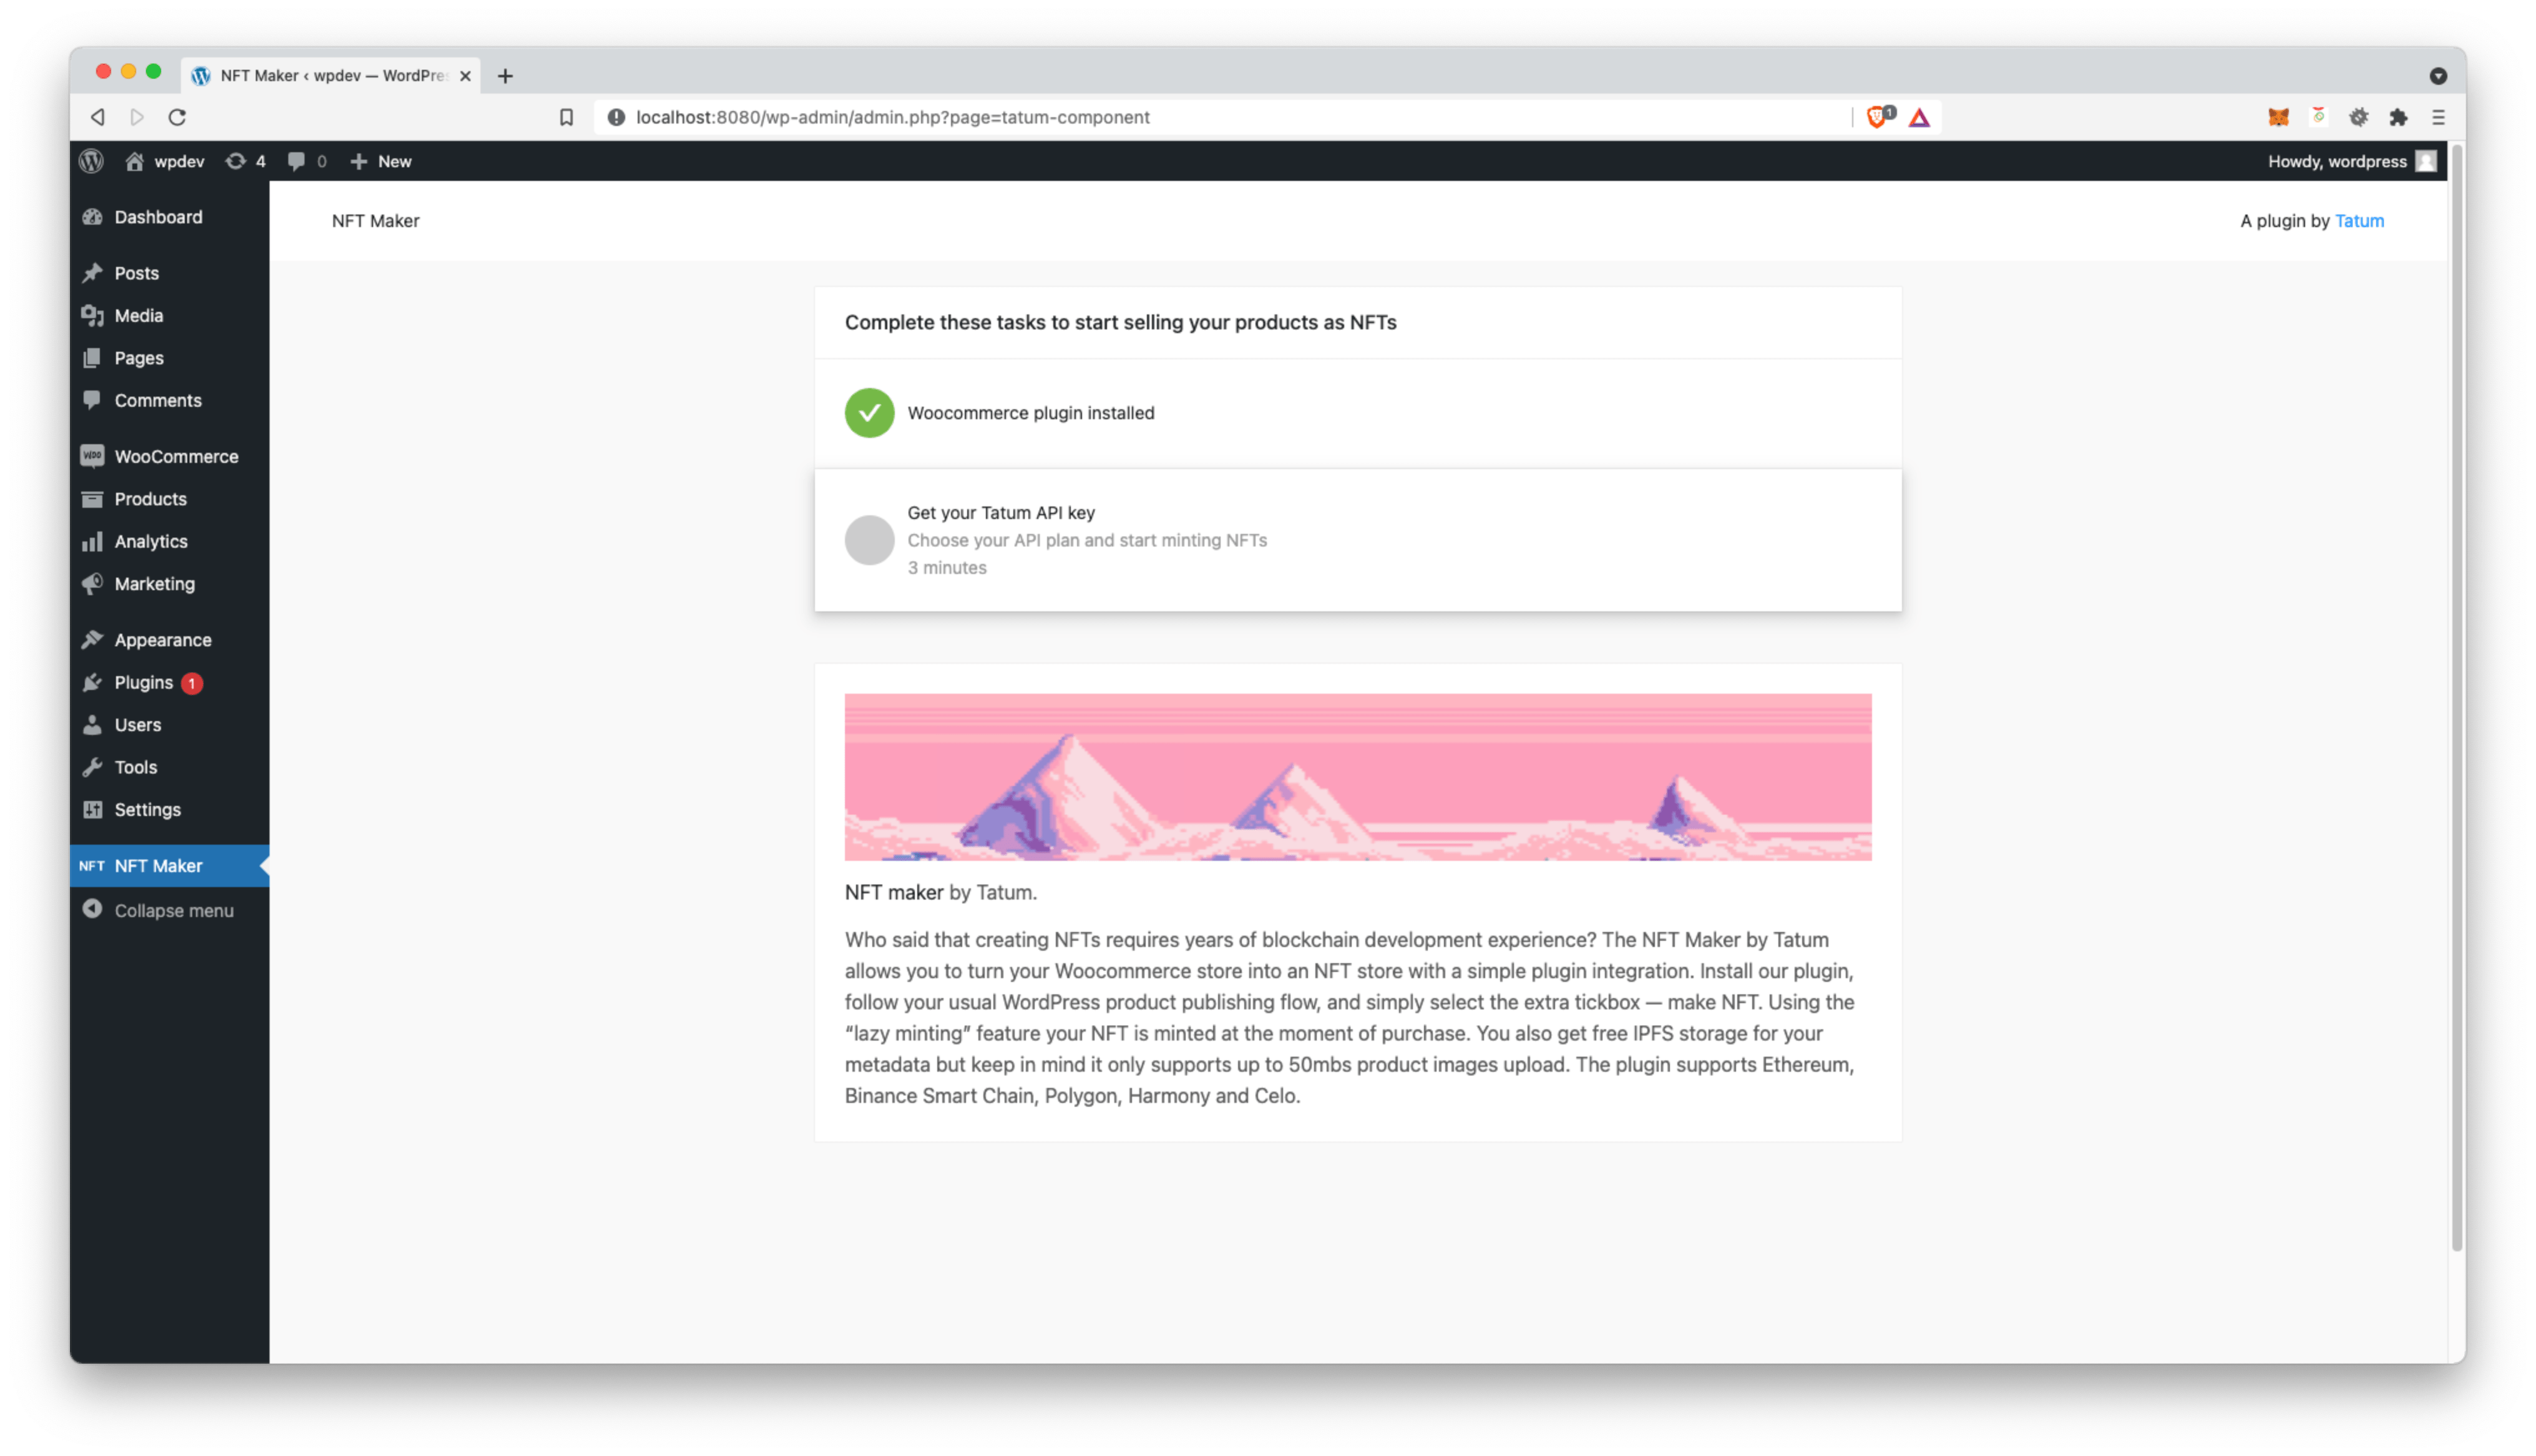
Please follow the instructions below:
Download and install the Woocommerce plugin if you haven’t already.
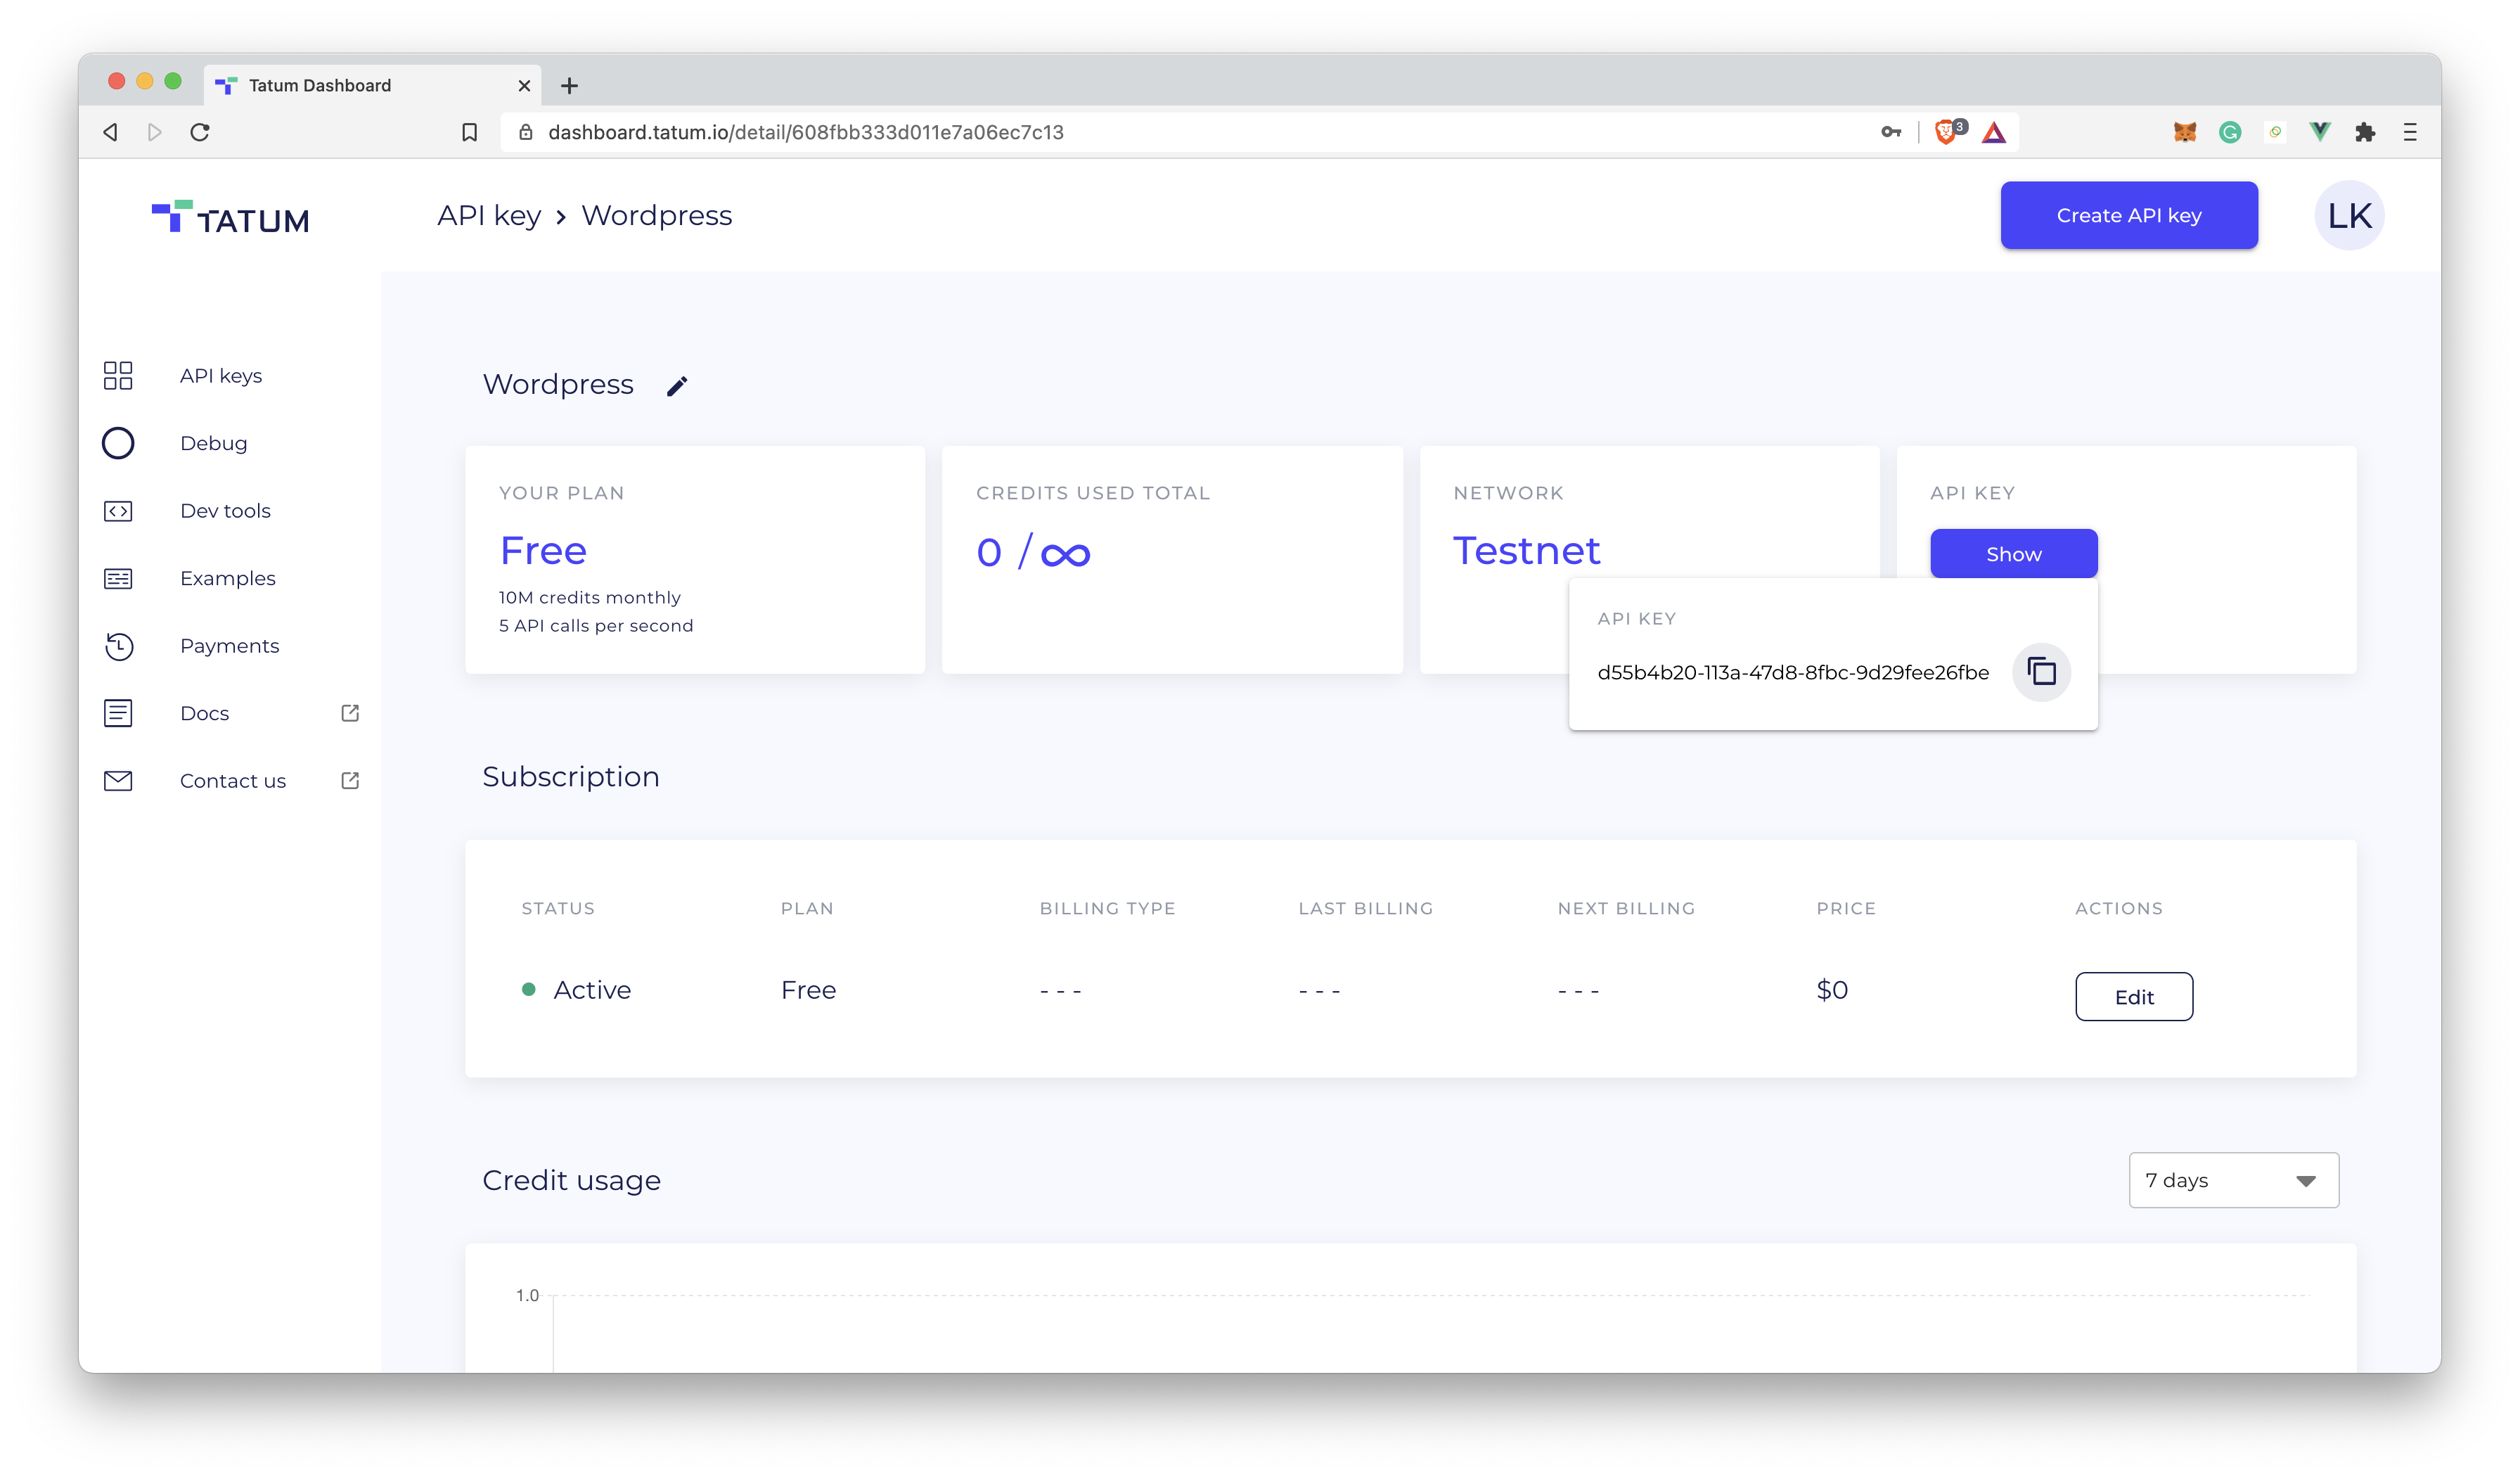
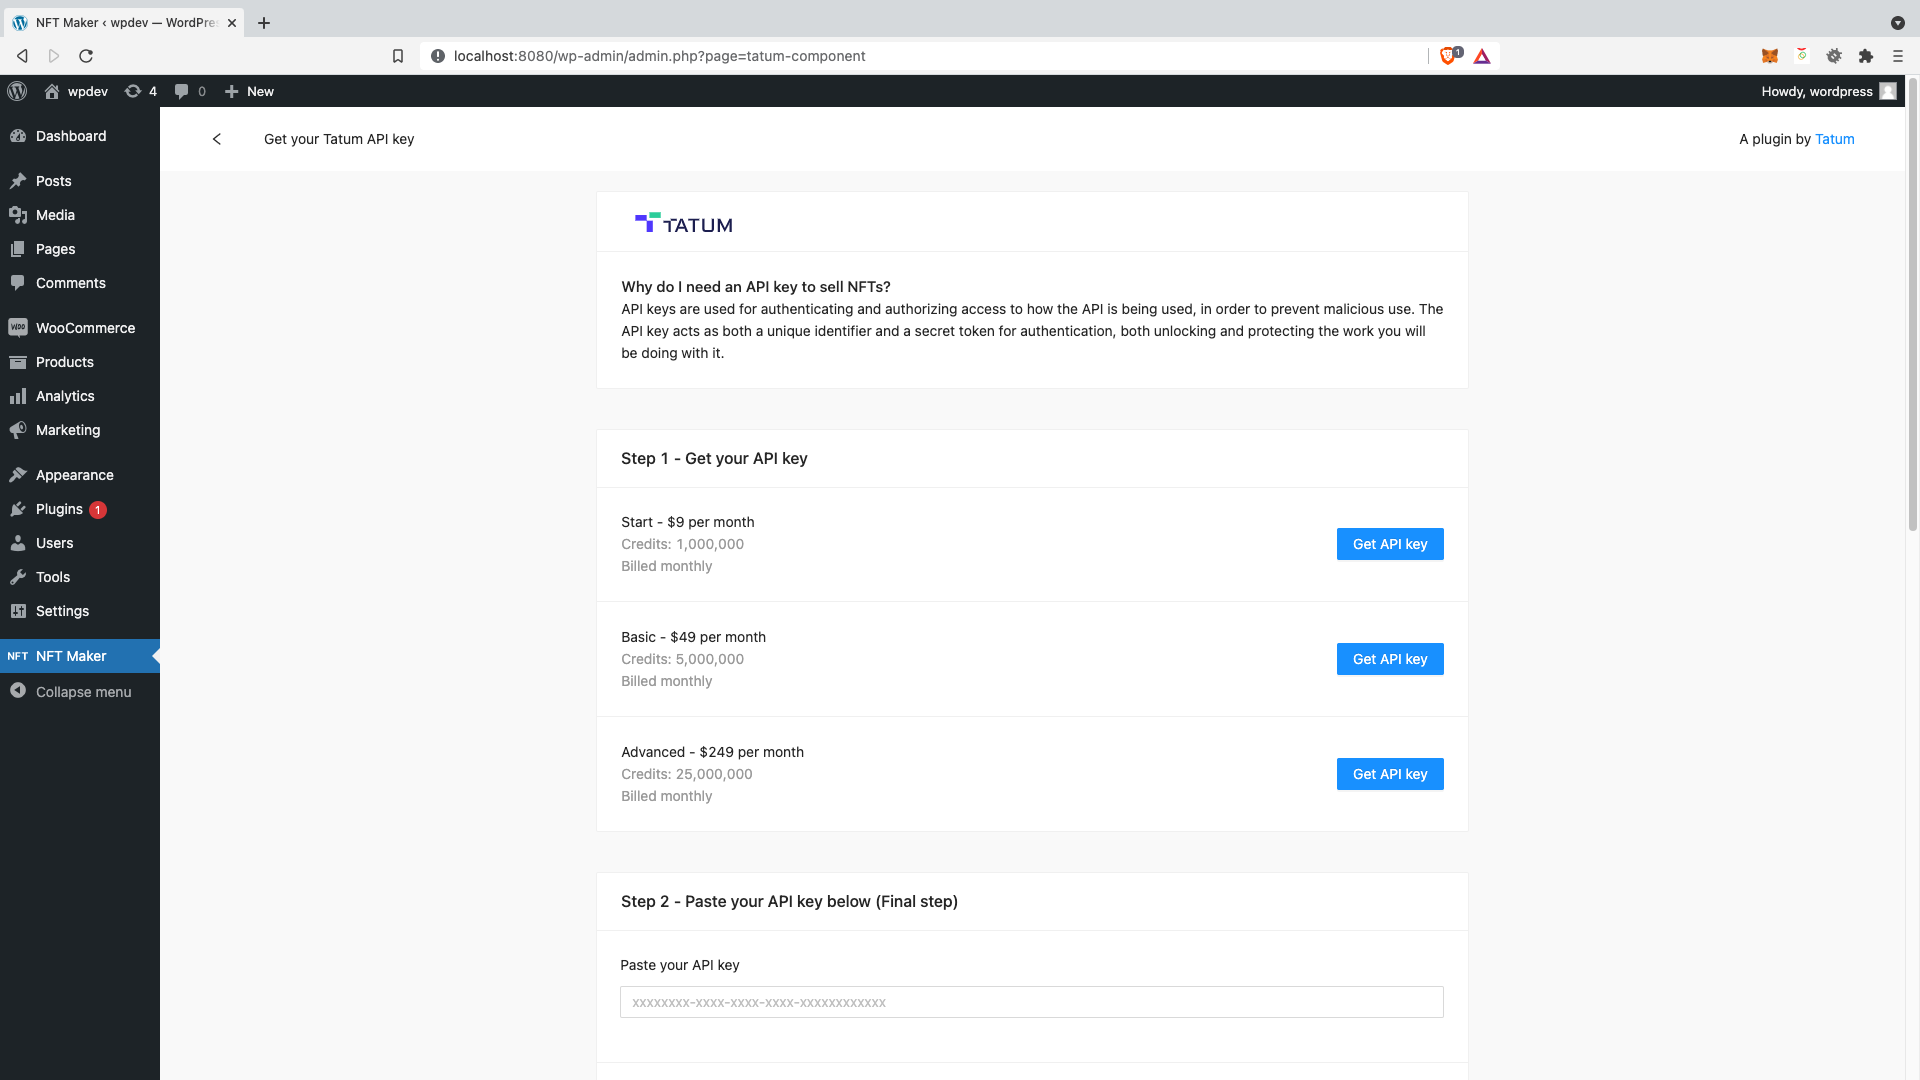
Click “Get your Tatum API key.”
Login to the Tatum dashboard and purchase a paid plan. The Tatum is an external service which provides access for the blockchain infrastructure.
When you have completed your purchase, you will be directed back to the Tatum dashboard. Next to your newly created API key, click “Show” and copy your API key.
Now, back in the NFT Maker dashboard, paste your API key in the field labeled “Paste your API key below.”
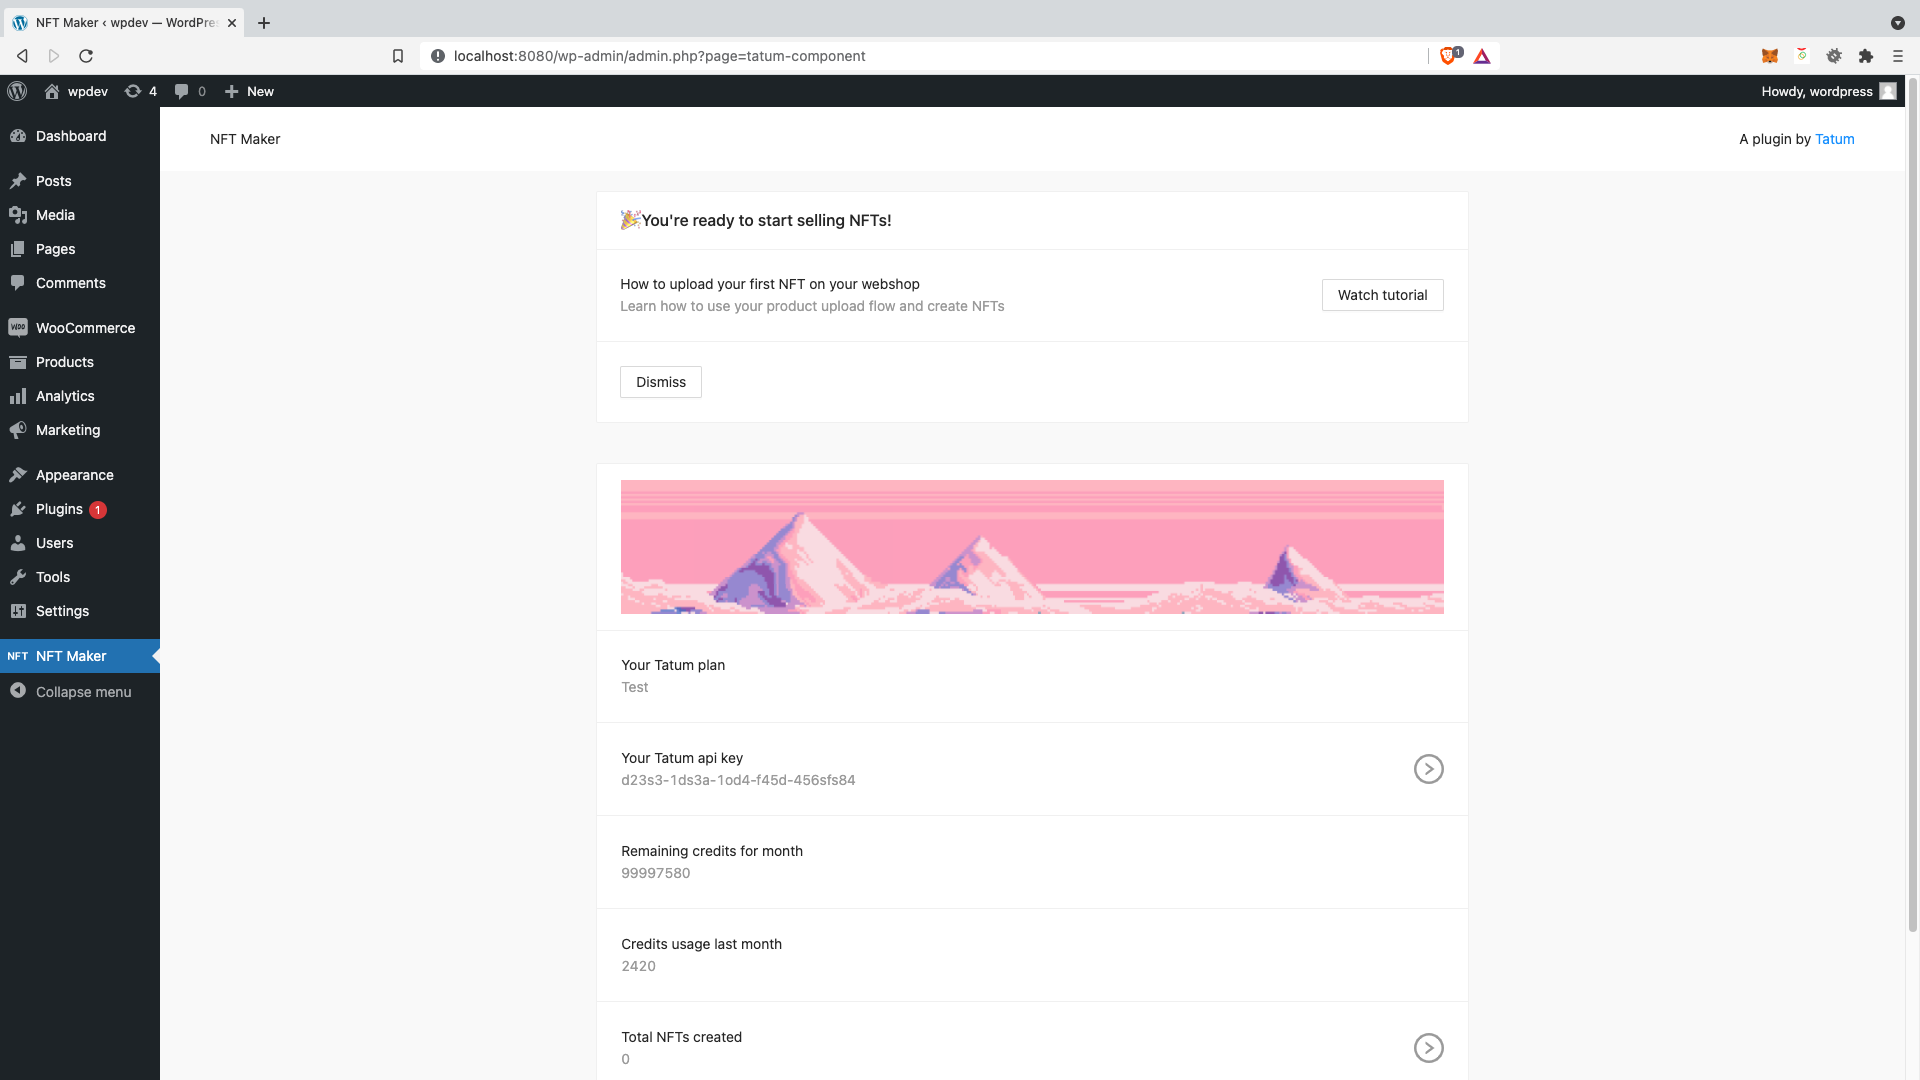
Okay, you’re all ready to mint NFT tokens! In the overview, you can see info about your API key.
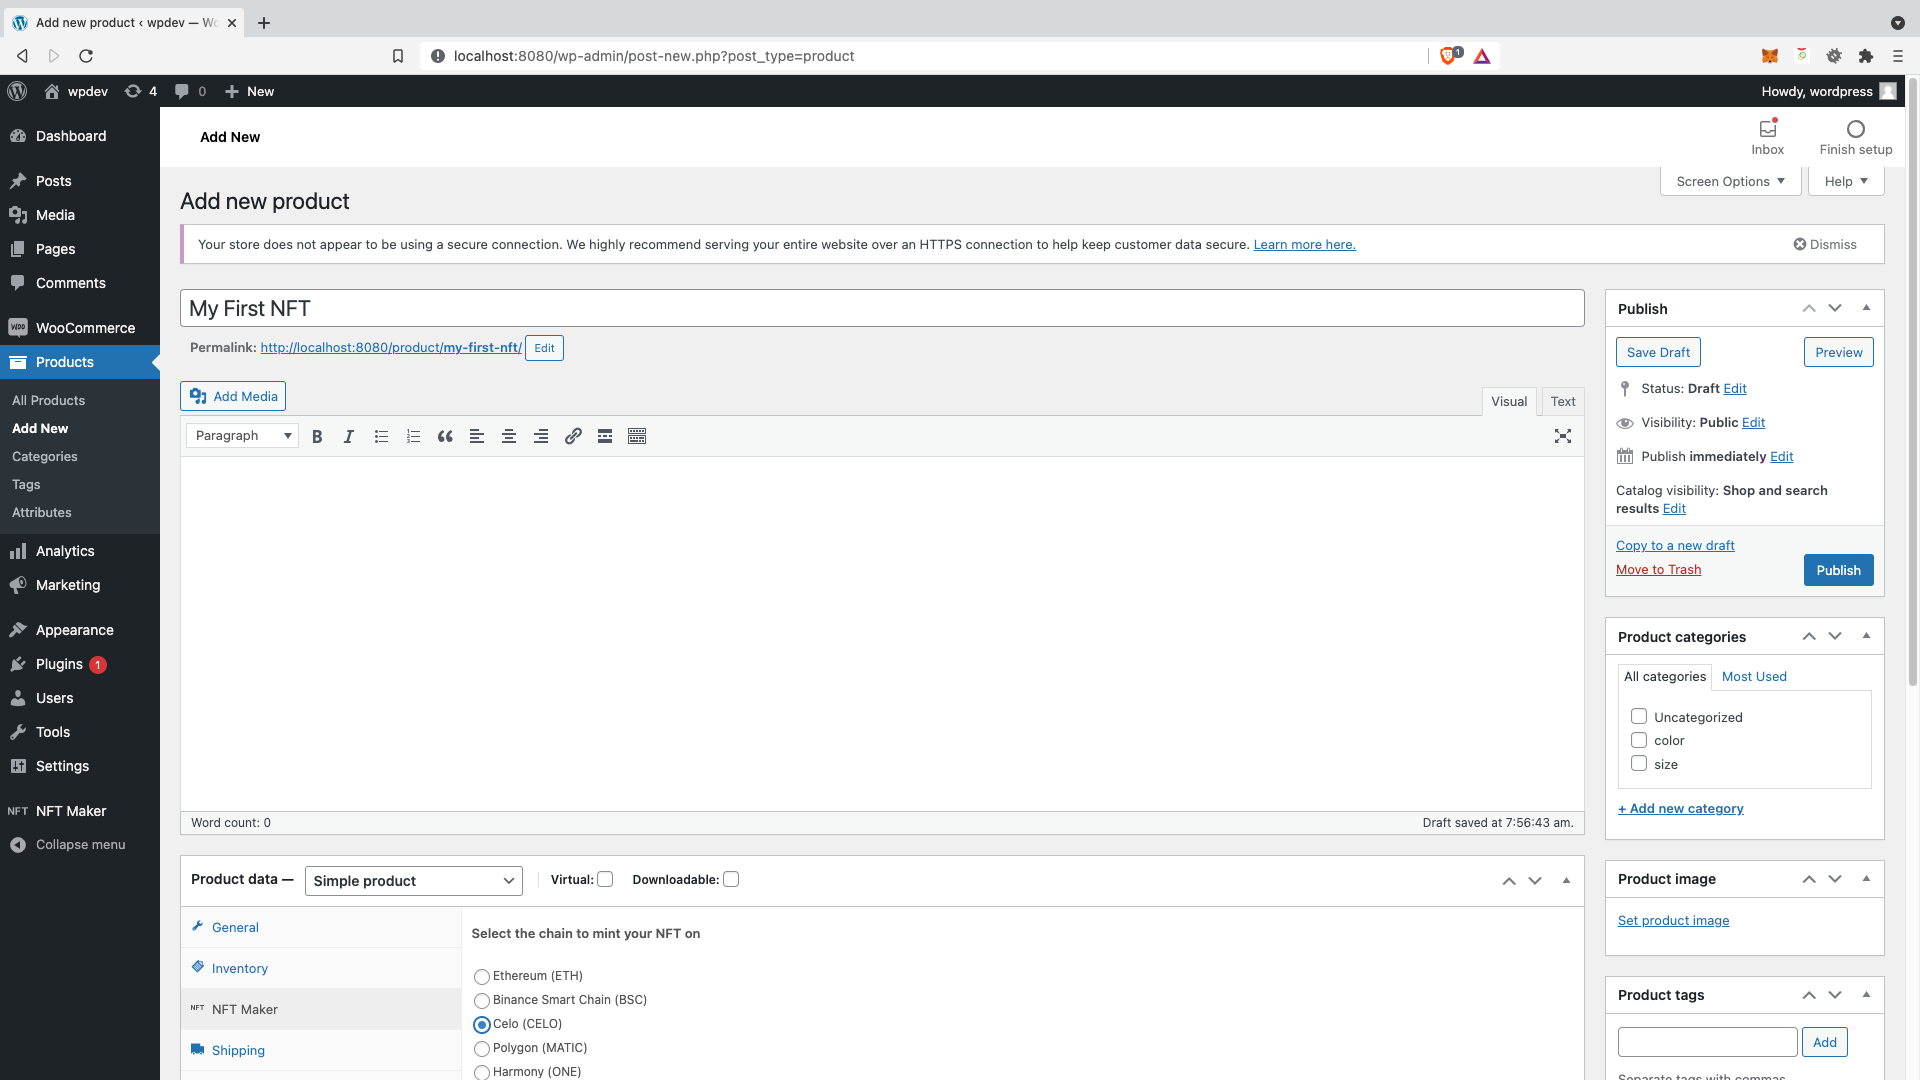
Open the “Product” tab in the left-hand column of your WordPress dashboard.
Click “Add product.”
Name your NFT.
Set its price in the “General” tab of the “Product data” box.
In the “NFT Maker” tab of the same box, select the blockchain on which to mint the NFT upon purchase.
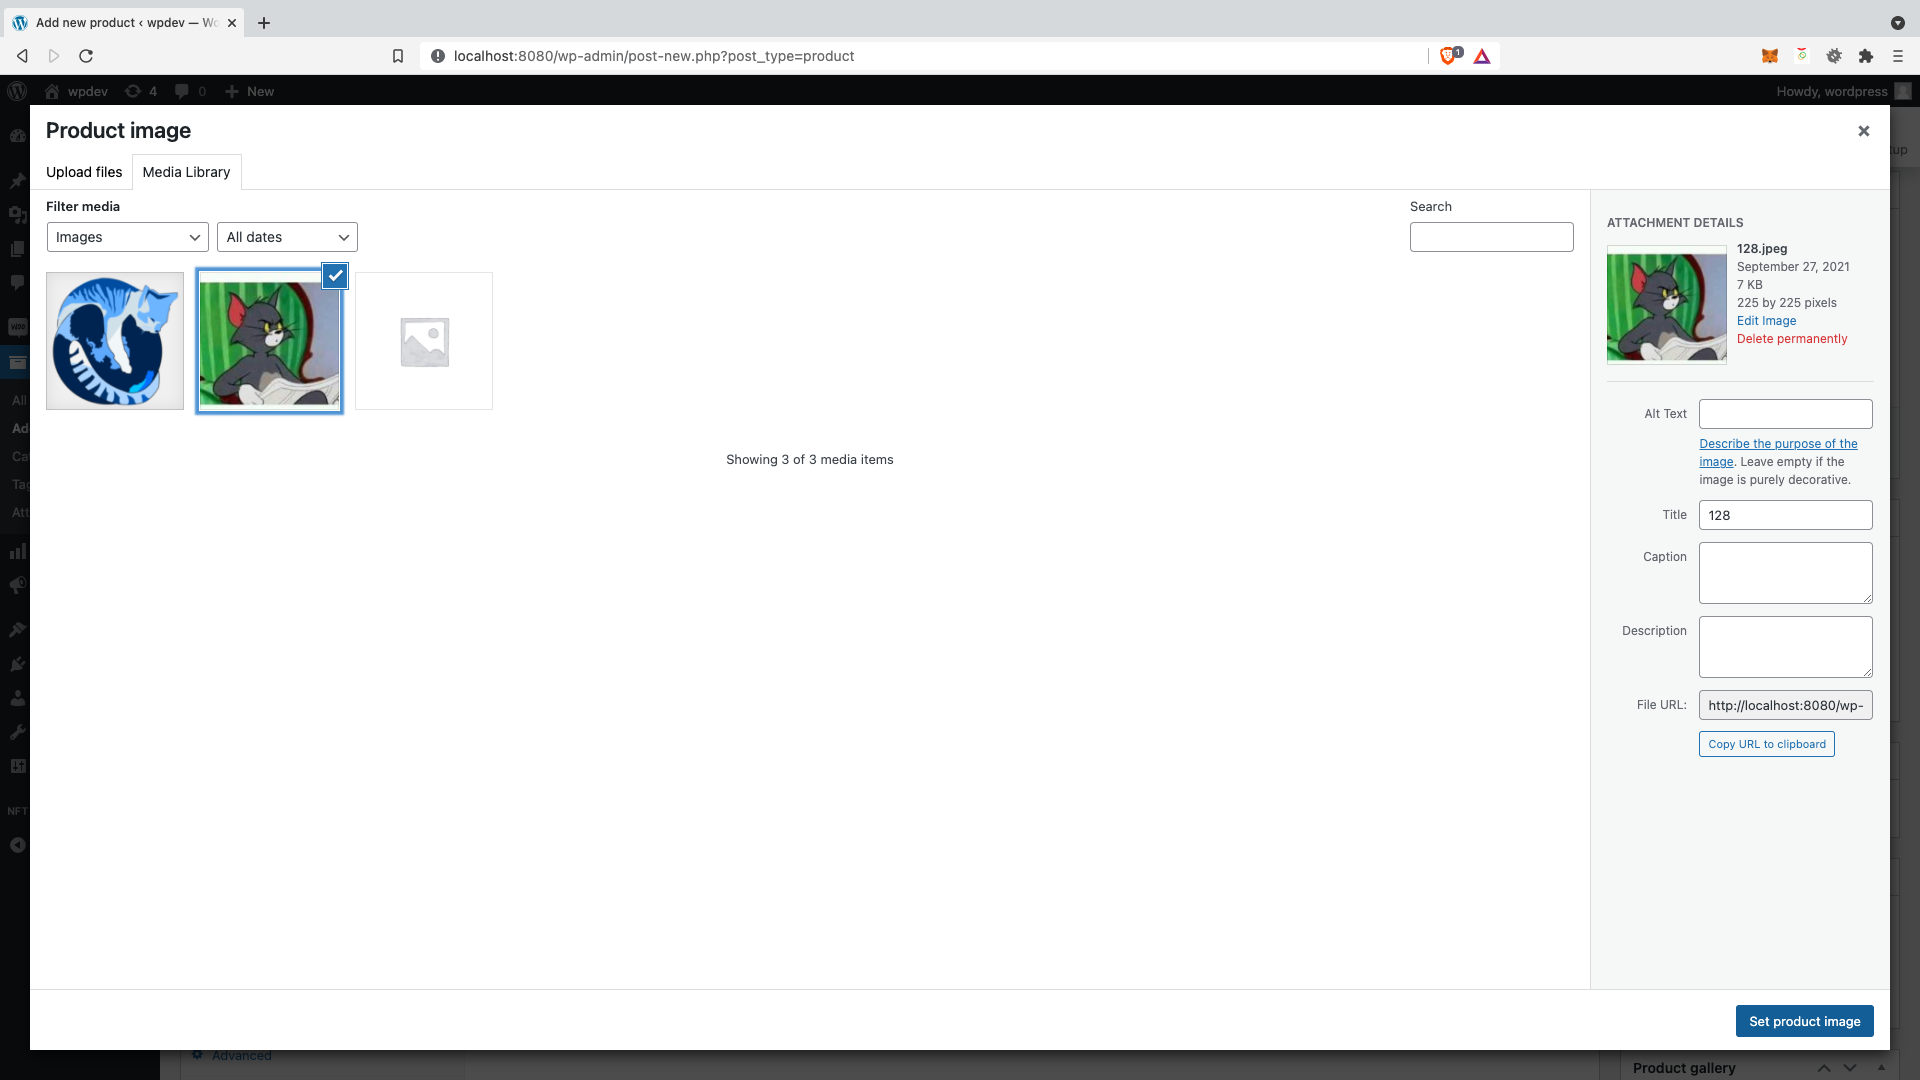
Upload an image by clicking “Set product image” in the “Product Image” field in the right-hand column of the screen.
Click “Publish” to create your product. Now it is available for purchase in your e-shop. You can also view it in your list of lazy-minted NFTs. You will not consume any credits from your paid plan for gas fees until someone purchases your NFT and it is minted on the blockchain you have selected.
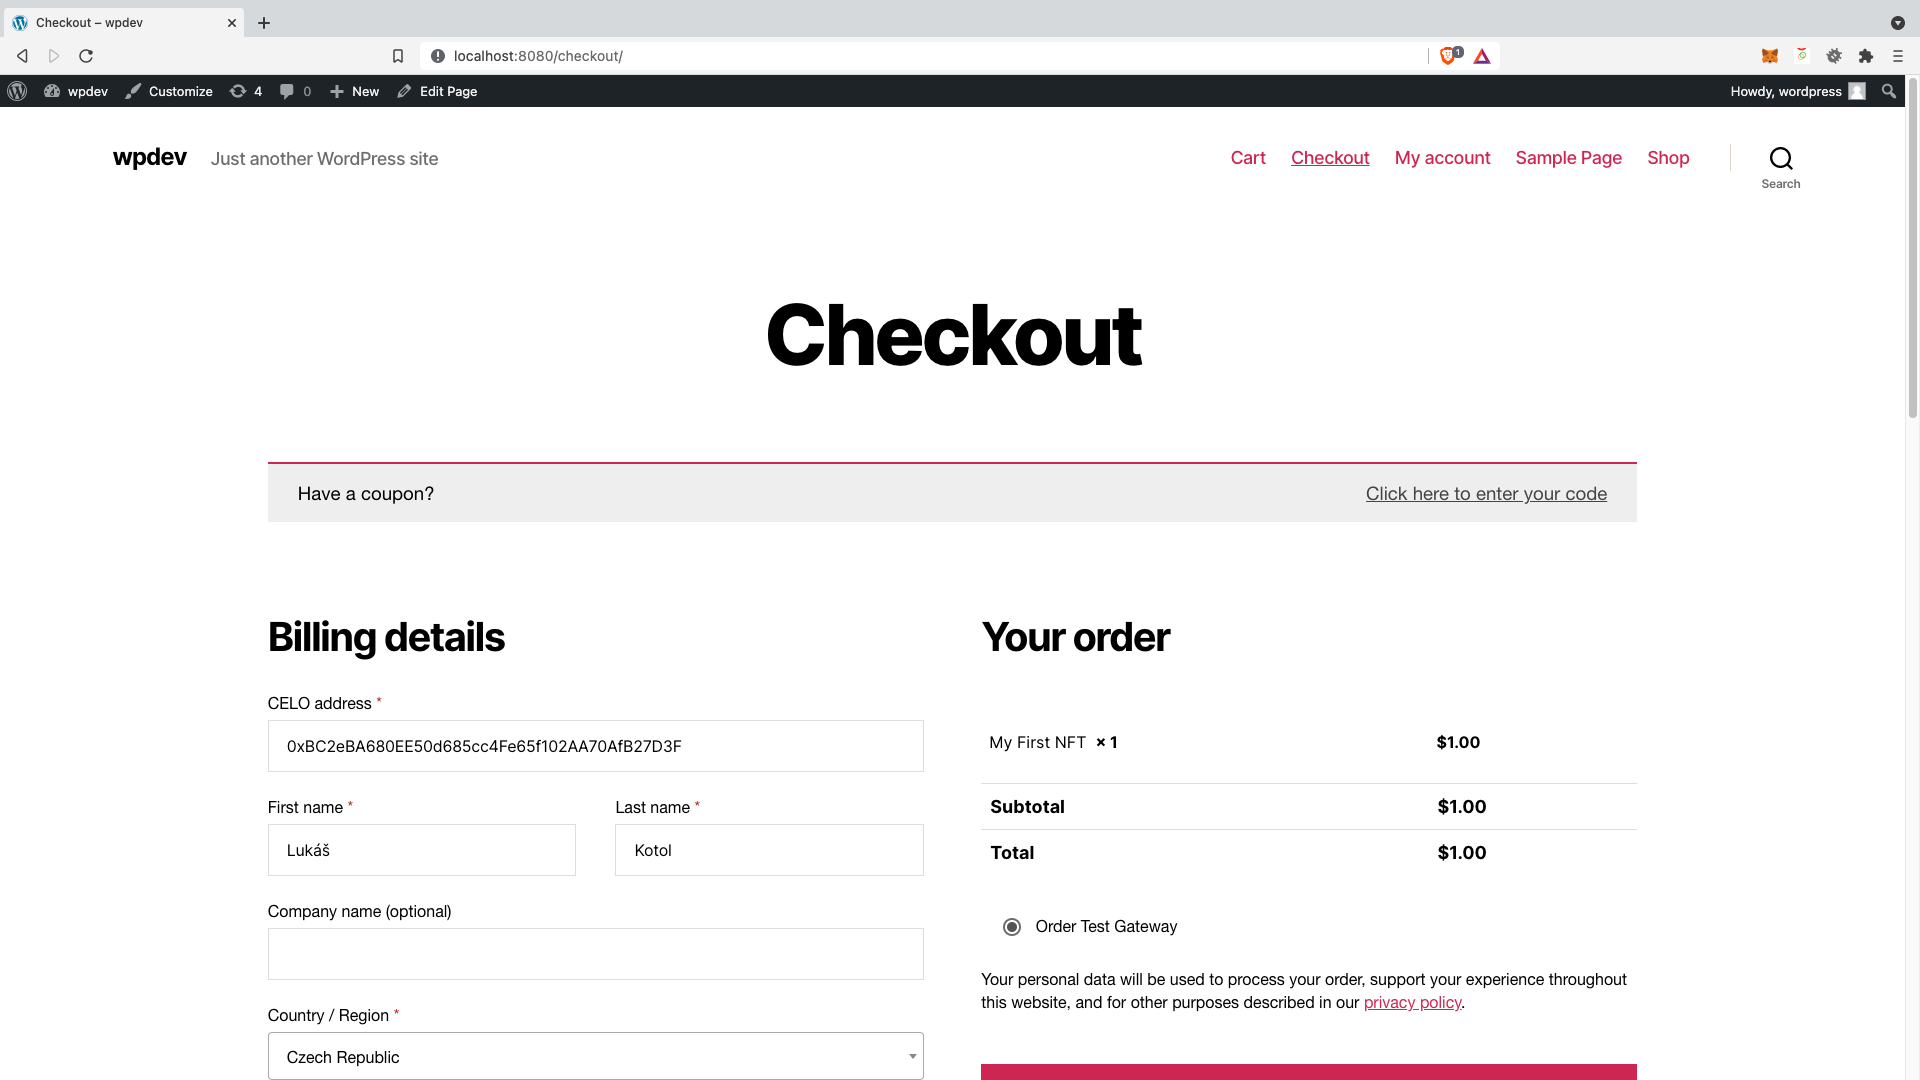
When a buyer adds the NFT to their cart and proceeds to checkout, they will have to enter a blockchain address on the blockchain to which the NFT will be minted.
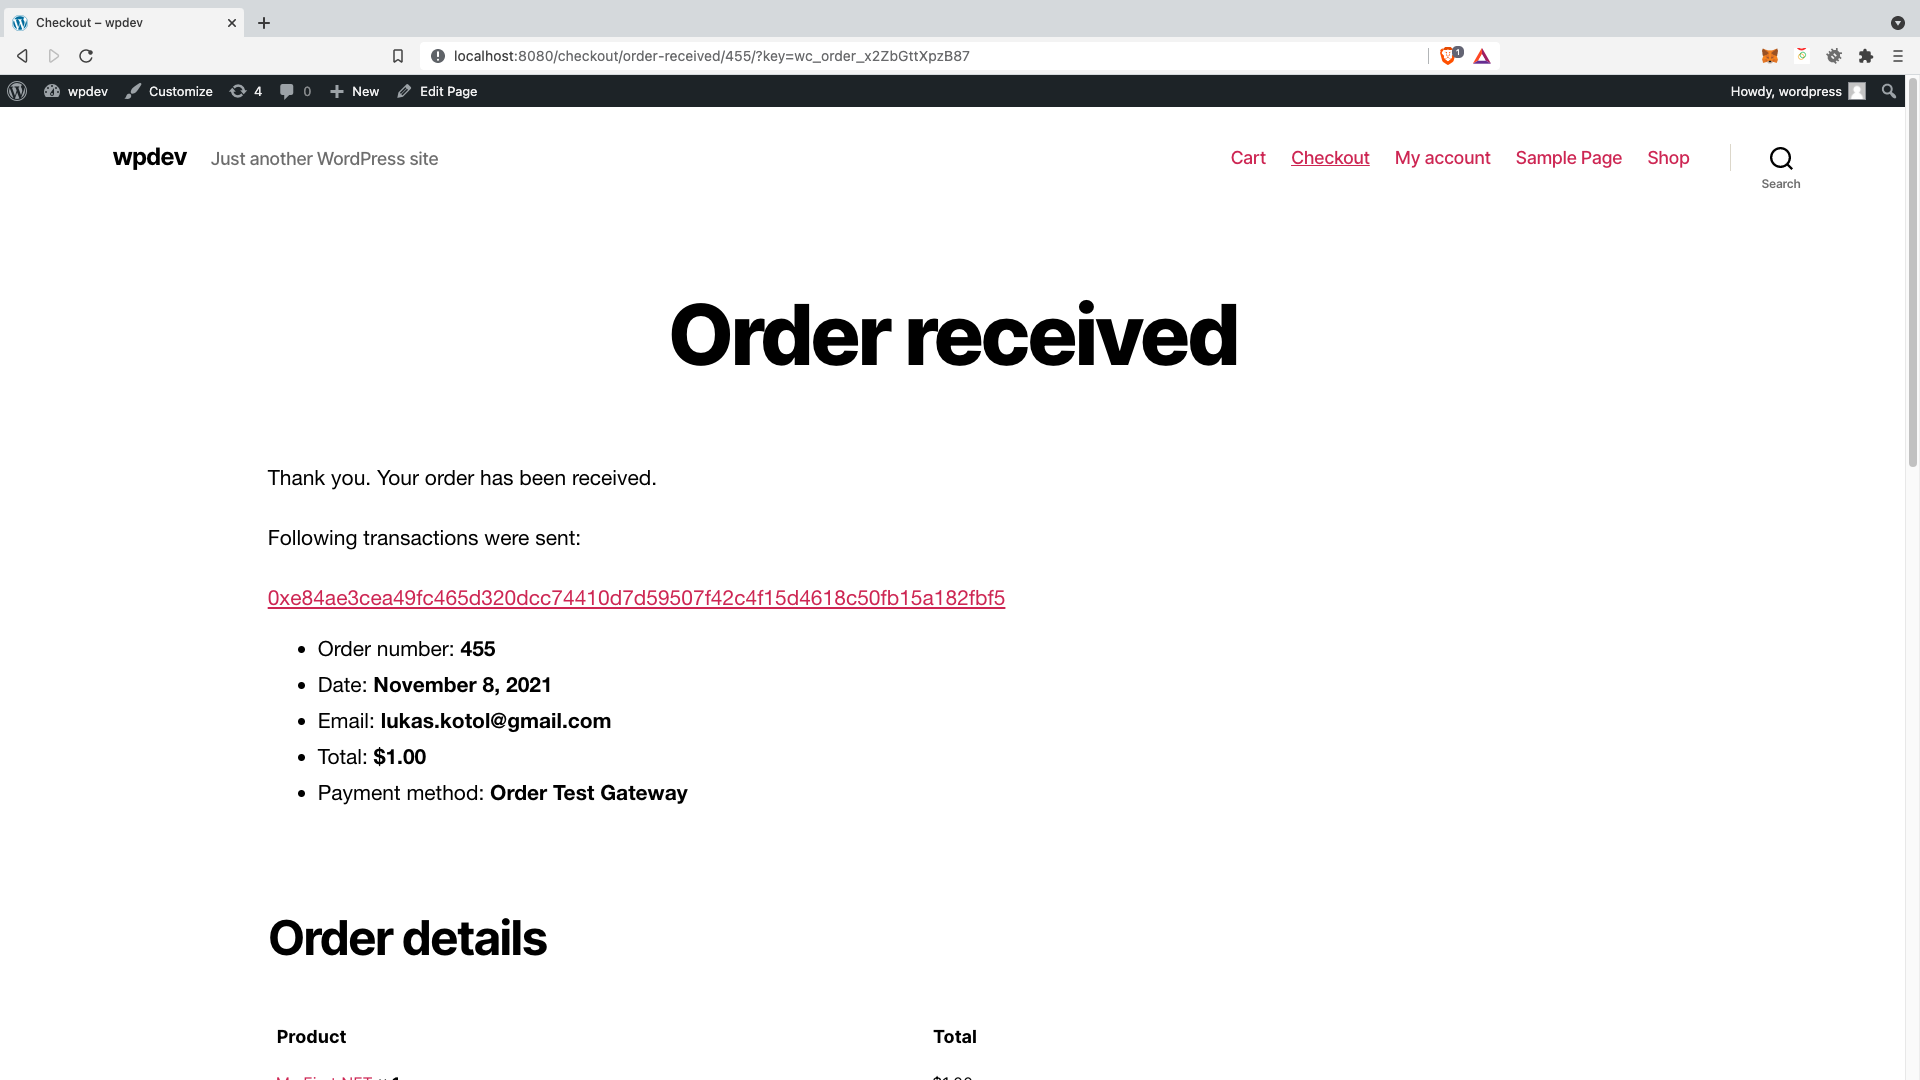
After a successful purchase of the NFT, the customer will be shown a link to the blockchain transaction.
The blockchain transaction link redirects the customer to the blockchain explorer of the respective blockchain where they can view NFT mint transaction details.
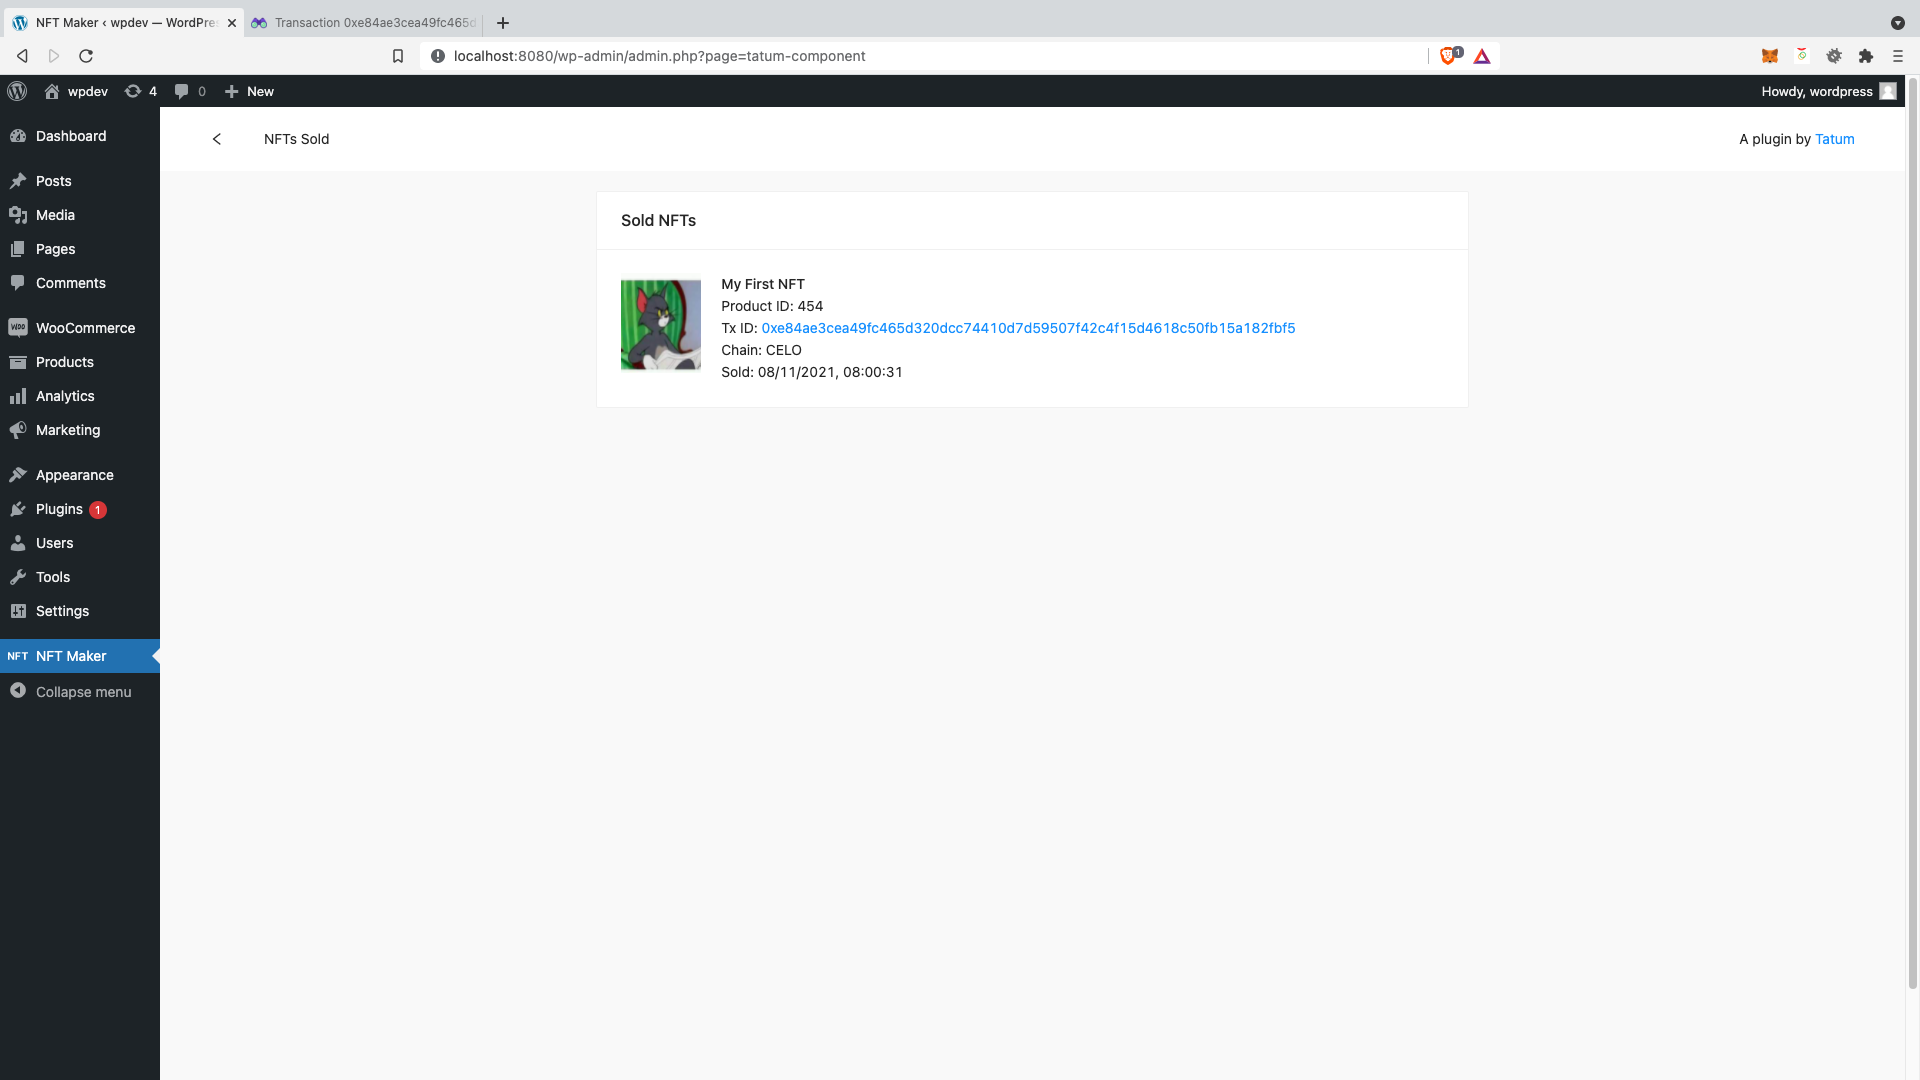
Admins of the WordPress shop can also view all lazy-minted and sold NFTs.
Create an account in the Tatum Dashboard and obtain paid API key. The Tatum is an external service which provides access for the blockchain infrastructure.Install Woocommerce plugin if you don't have already installed it yet.Submit your API key.You are ready to mint NFT tokens! In the overview, you can see info about your API key.Create Woocommerce product. Don't forget to select chain on which NFT will be minted.Don't forget to set an NFT image. Only images up to 50 MB are available for storing. If you don't set an image your NFT will not be minted!After you create product can see it in the list of lazy minted NFTs.If your customer adds product to the cart and proceed to checkout, he/she will need to submit blockchain address to which will be NFT minted.After successful purchase of the NFT customer will see the blockchain transaction.Blockchain transaction links can redirect customer to the blockchain explorer to see NFT mint transaction details.Admin can also see all sold and minted NFT.
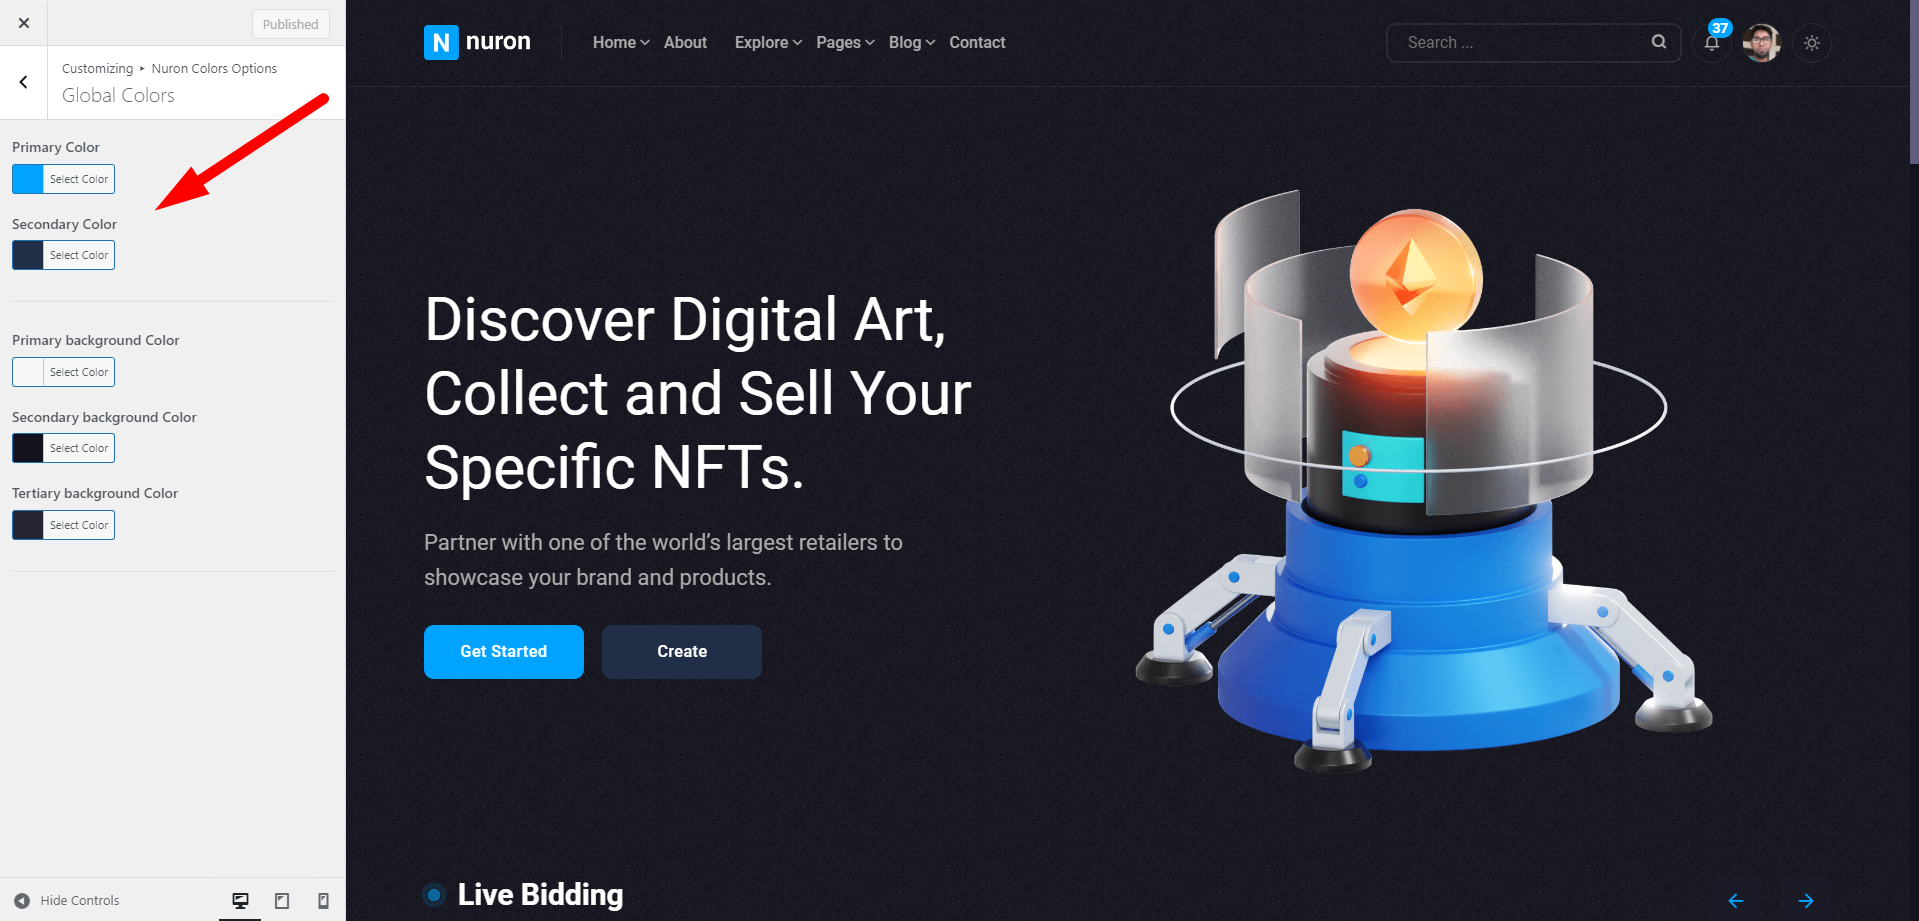
Global Color Options
To change Global Color Options setting, navigate to Appearance Customize Nuron Color Options Global Colors
Change Global Color Options Setting
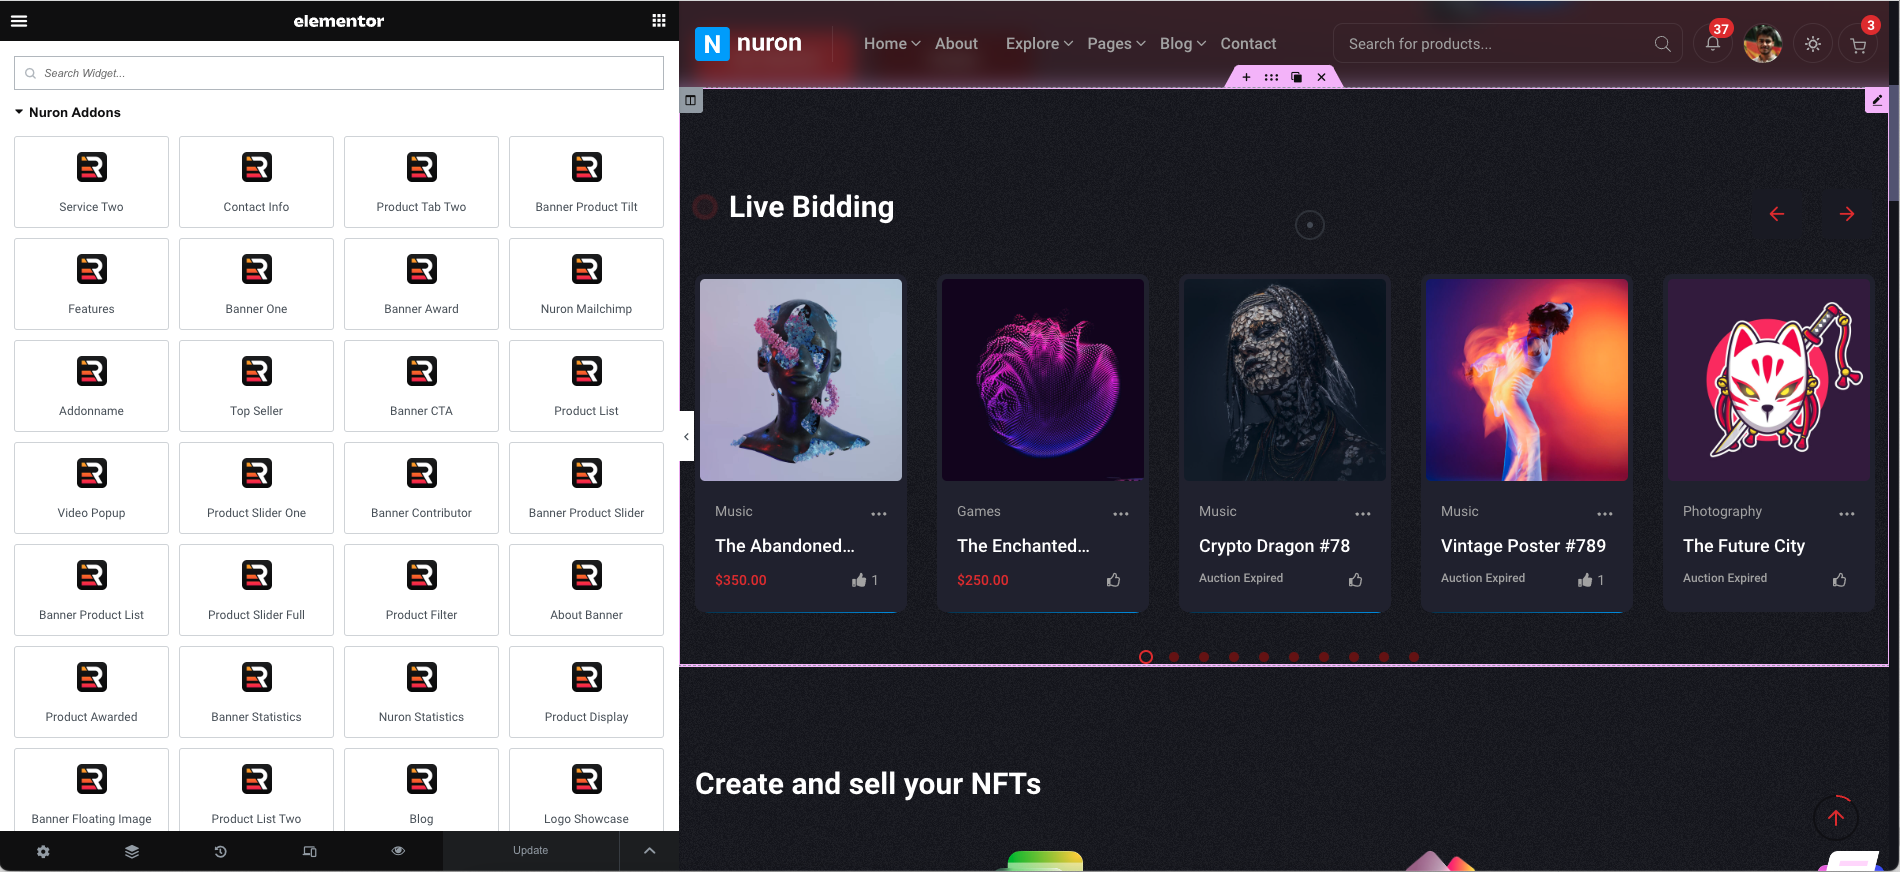
Elementor Elements/Widget
Elementor Page Builder has a lot of built-in widgets by default. But for your convenience we've created 40+ custom Elementor Widgets that you can use in your website and extend website functionality. You can find them under Nuron Addons
section on Elementor edit mode.
Elementor Custom Widget/Addons
Change Log
Rainbow-Themes team never stops Improving, bug fixes, and improvements. See What's New. We recommend you to read the changelog for every update.


Social Networks
To change Social Networks Options navigate to Nuron Theme Theme Options Social Networks
Pul your social profile link here.